 Life Sales and Inventory Management System
Complete User Guide for Web Application and Mobile App
📚 Table of Contents
- 0. Quick Start / TL;DR
- 1. Welcome to the System
- 2. System Requirements
- 2.1 Dependencies & External Tools
-
3. Using the Web Application (For the Boss)
- 3.0 Installing the Web Application
- 3.1 How to Log In
- 3.2 Exploring the Dashboard
- 3.3 Setting Up Your Business Details
- 3.4 Updating Your Profile
- 3.5 Page Builder
- 3.6 Adding Vehicles
- 3.7 Setting Up Routes
- 3.8 Adding Salesmen
- 3.9 Adding Stores
- 3.10 Adding Products
- 3.11 Giving Stock to Vehicles
- 3.12 Making a Stock Bill
- 3.13 Checking Orders
- 3.14 Tracking Money Owed (Dues)
- 3.15 Looking at Reports
- 3.16 Setting Up SMTP
- 3.17 Setting Local TIMEZONE
- 4. Using the Mobile App (For Salesmen)
- 5. Video Tutorial Section
- 6. Troubleshooting & FAQ
Quick Start / TL;DR
- Upload the Web Application folder to your hosting panel (in public_html or public folder).
- Create a MySQL database and note the credentials.
- Visit
/installon your domain and follow the installation steps. - Log in to the admin panel (
/admin/login) and update your profile & password. - Set up your business details, add products, and configure your mobile app.
Welcome to the System

The Life Sales and Inventory Management System is a tool to help your business keep track of sales, products, and customers. It has two main parts:
- Web Application: A website for the boss (administrator) to manage products, stock, and sales reports.
- Mobile App: An app for salesmen to use on their phones when they’re out selling, picking stores, and printing bills.
This guide explains everything you need to know to use both parts. We’ve made it super simple so even beginners can follow along.
Password: password
System Requirements

Before installing the system, ensure your server or local environment meets these requirements:
- PHP Version: PHP version 8.2.0 or higher
- Laravel Version: Laravel 10
- MySQL Version: 8.3.0
- Apache Version: 2.4.59
- Required PHP Extensions:
- php 8.2.7
- PDO
- pdo_mysql
- mbstring
- tokenizer
- xml
- ctype
- json
- symlink
Dependencies & External Tools Used
This system leverages several key technologies and tools to deliver a robust performance:
- Backend Framework: Laravel 10
- Programming Language: PHP (8.2.0+)
- Database: MySQL 8.3.0
- Web Server: Apache 2.4.59
- Mobile Framework: Flutter for building the Android app
- Flutter Version: Flutter 3.2.7.4
- Dart Version: Dart 3.6.2
- SMTP: For automated email notifications (ensure your hosting supports outbound SMTP connections)
- Additional Tools: hPanel/cPanel for hosting management, Bluetooth for printer connectivity
Using the Web Application (For the Boss)
The web application is used on your computer with a web browser (like Chrome or Firefox) to manage your business.
- After downloading the installable zip file from CodeCanyon, extract it on your local machine.
- Inside, you’ll see two folders:
- Web Application – The folder to upload to your hosting panel.
- Flutter App – The mobile app source code (used later).
- To host the Web Application:
- Open the Web Application folder.
- Extract all its contents and upload them into the public_html (or public) folder of your hosting panel.

0. Installing the Web Application

Before you can log in and use the system, install it on your server or computer by following these steps:
- Access Your Hosting Panel:
- Log in to your hosting provider’s hPanel.
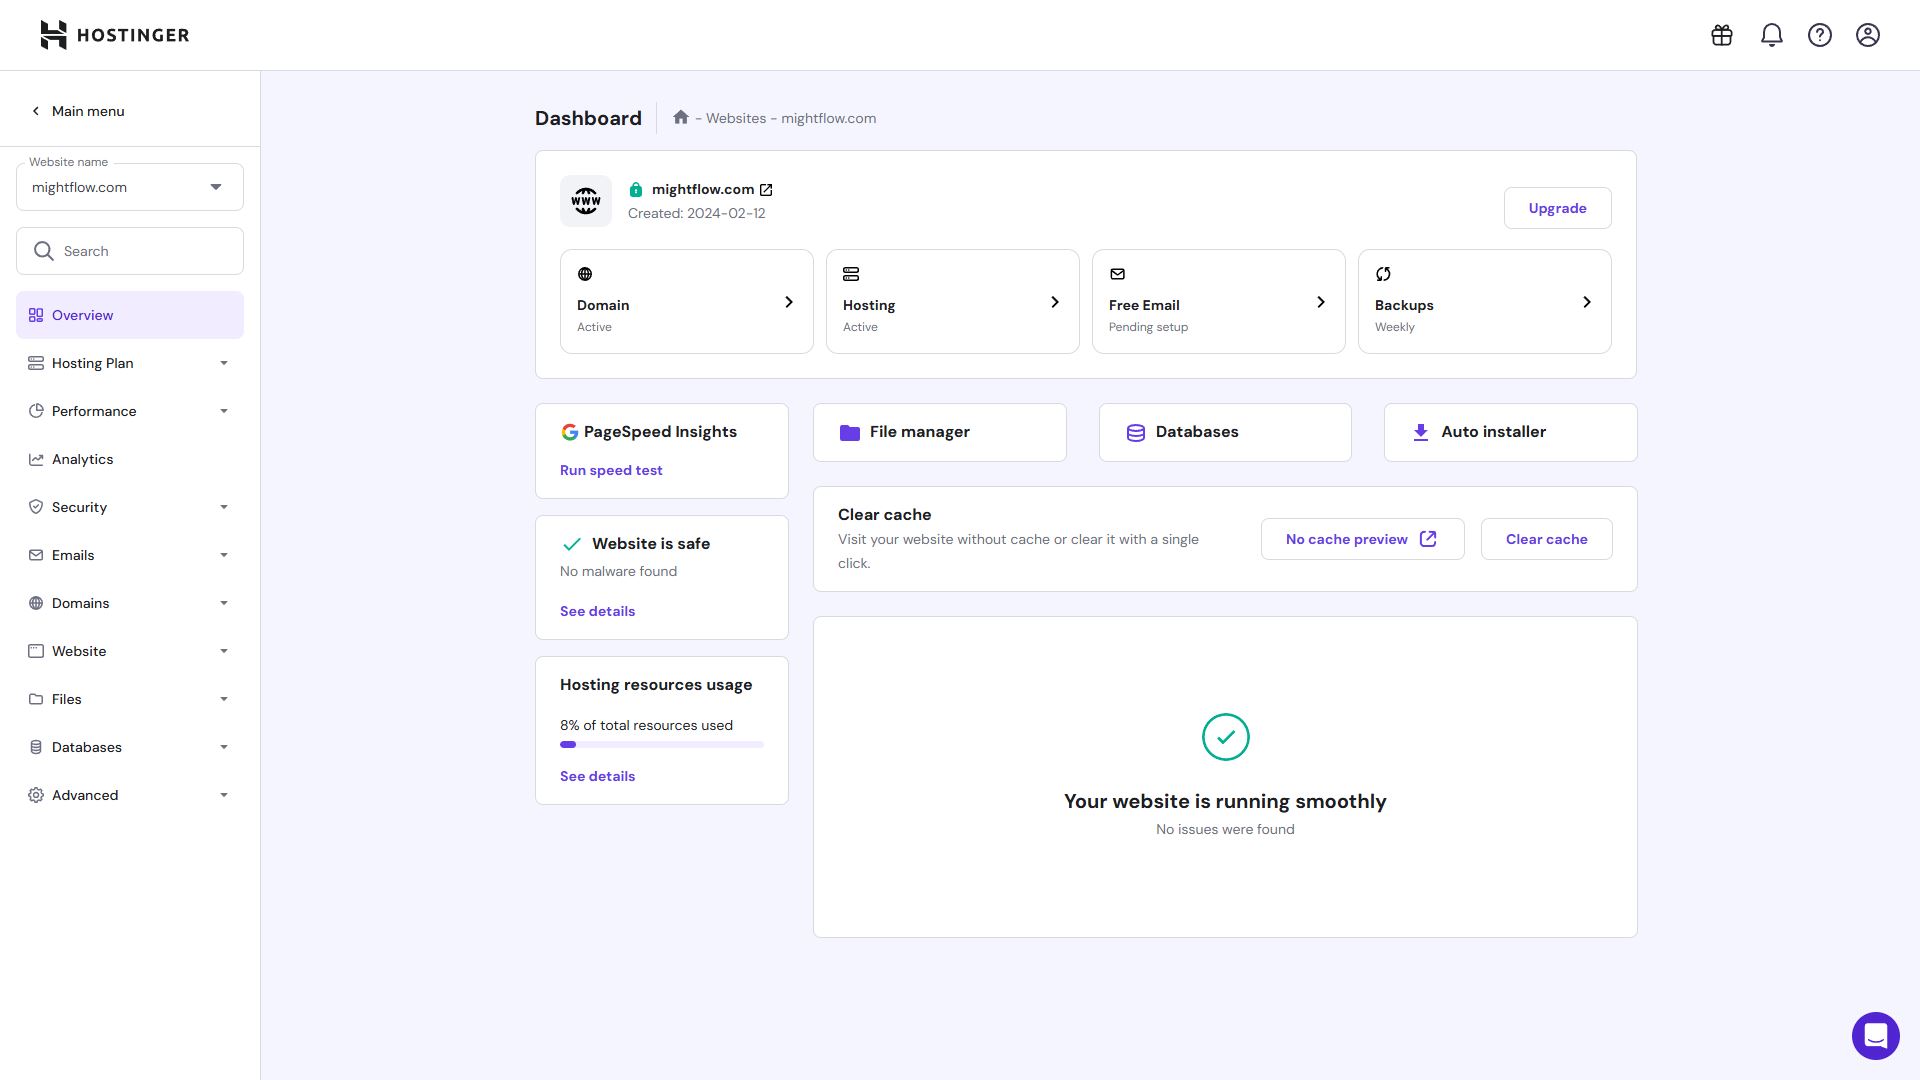
- Extract the Downloaded File:
- Extract the zip file to see the two folders.
- Upload the contents of the Web Application folder to your hosting panel.
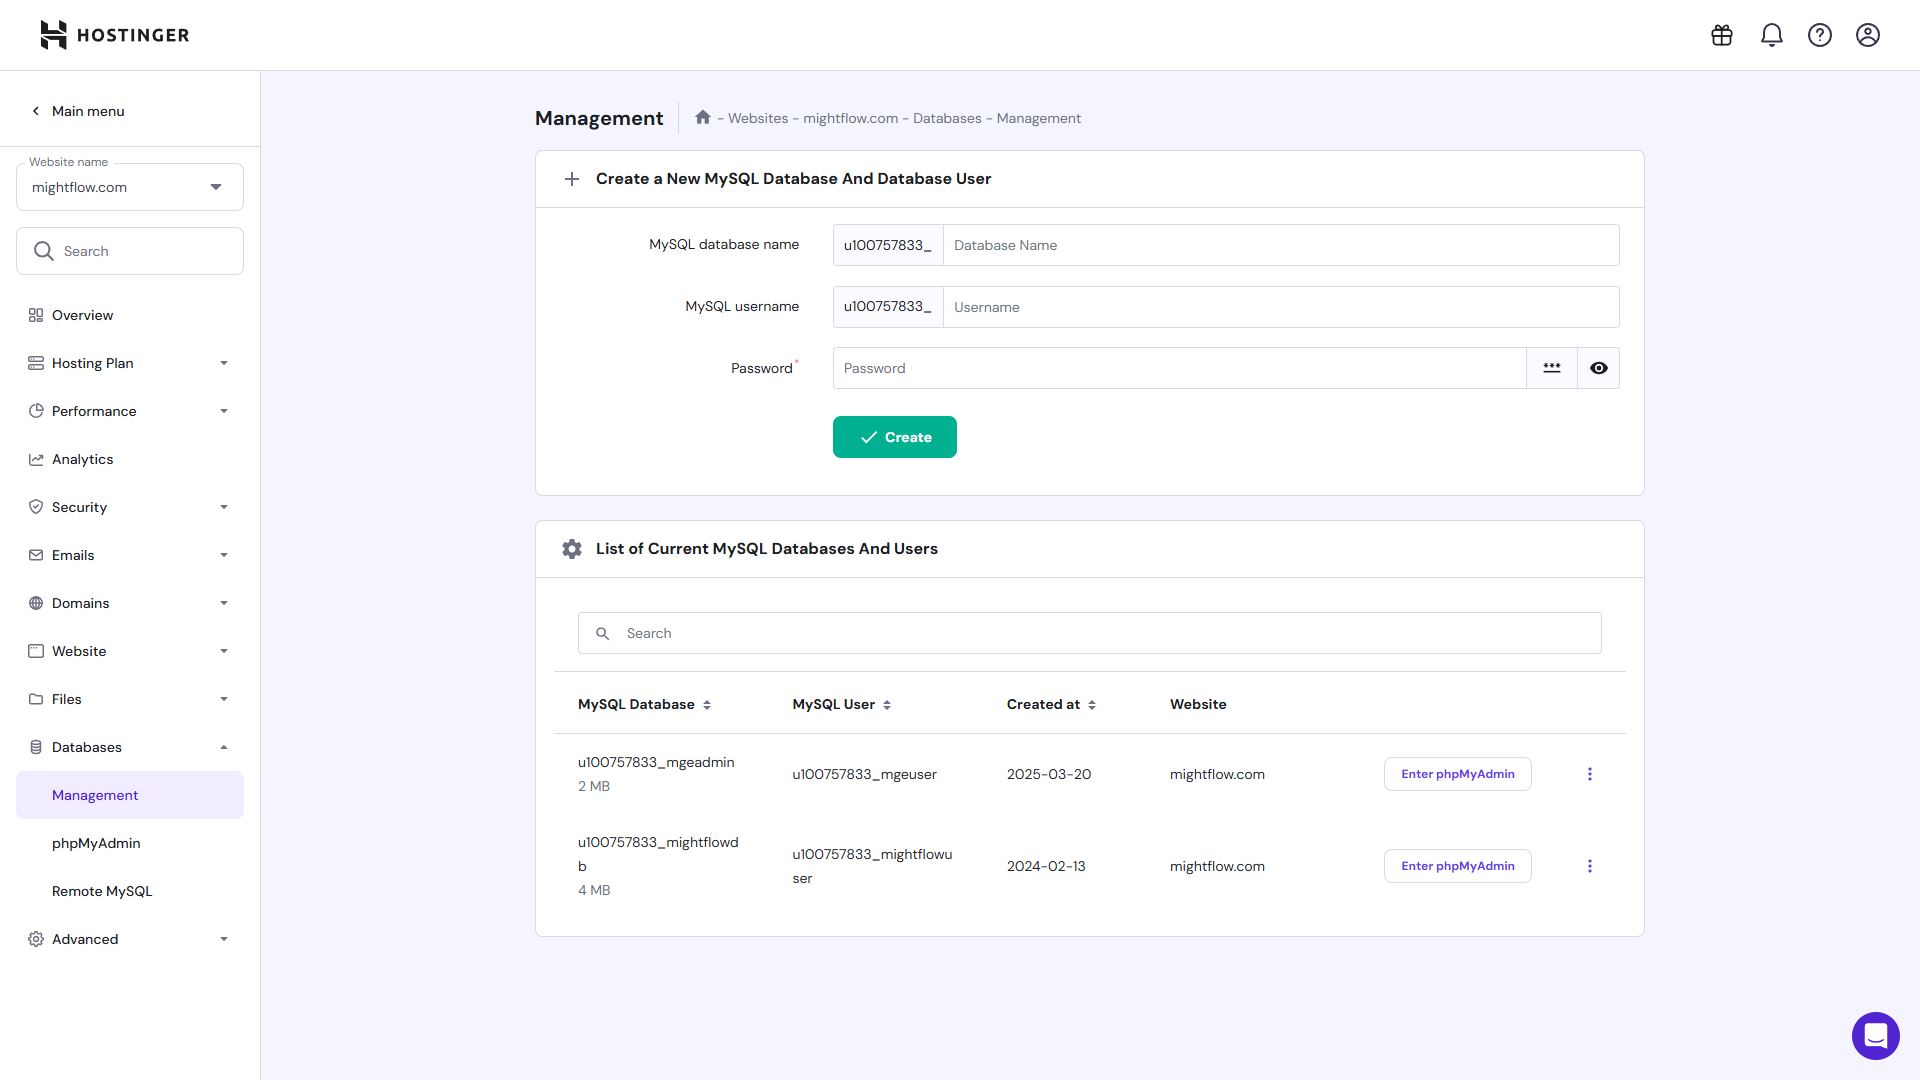
- Create a New Database:
- Create a new database in your hPanel and note the username, password, and database name.
- Begin the Installation:
- Open your browser and visit your domain followed by /install (e.g., http://yourbusiness.com/install).
- Click Next on the installation page.
- System Requirements Check:
- The installer will display the system requirements page.
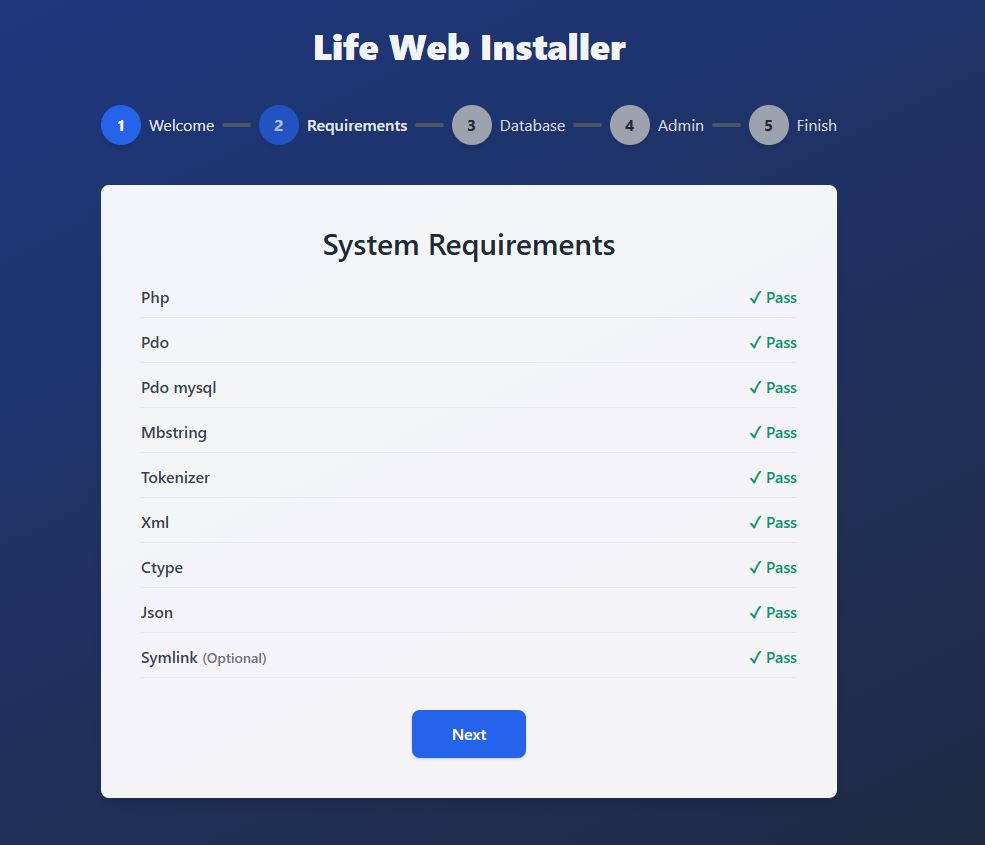
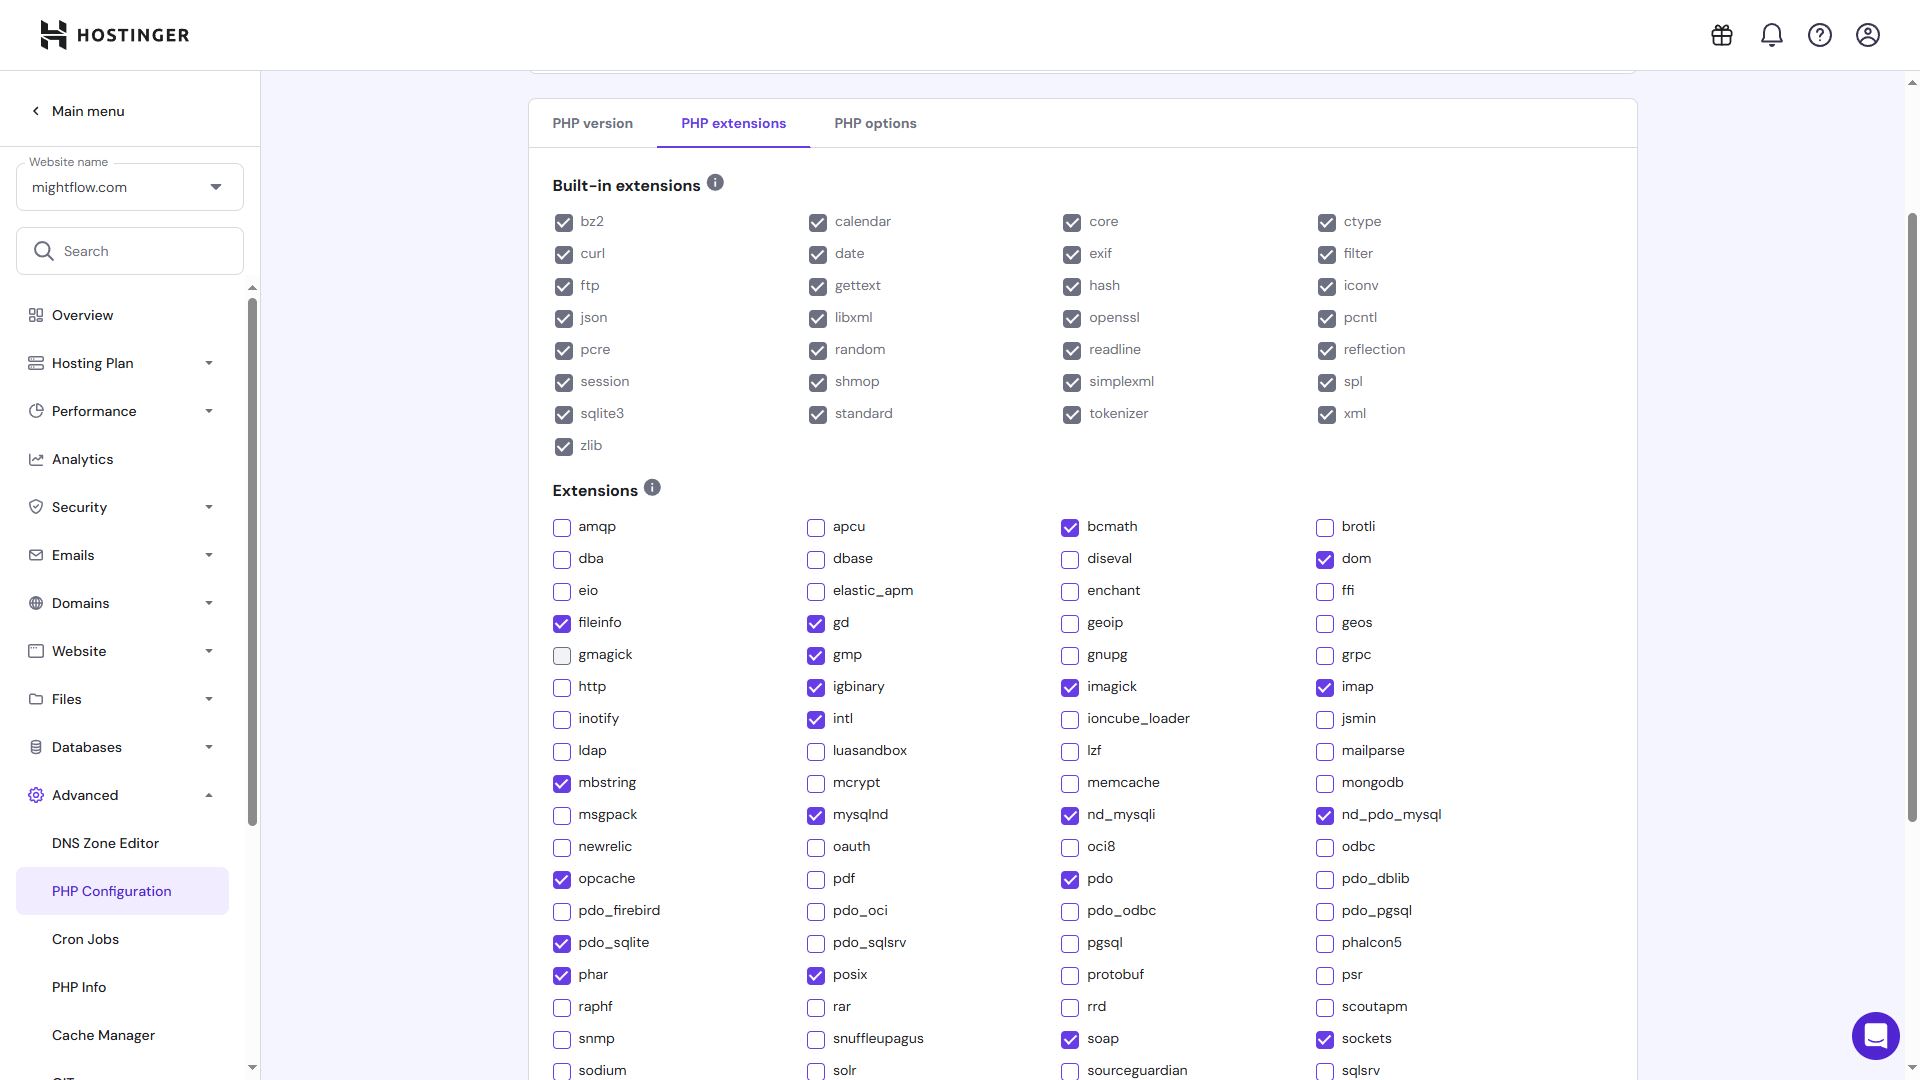
- Enable PHP Extensions:
- In your hPanel, go to PHP configuration under the Advanced section.
- Enable the required PHP Extensions and remove symlink from the Disable Functions list.
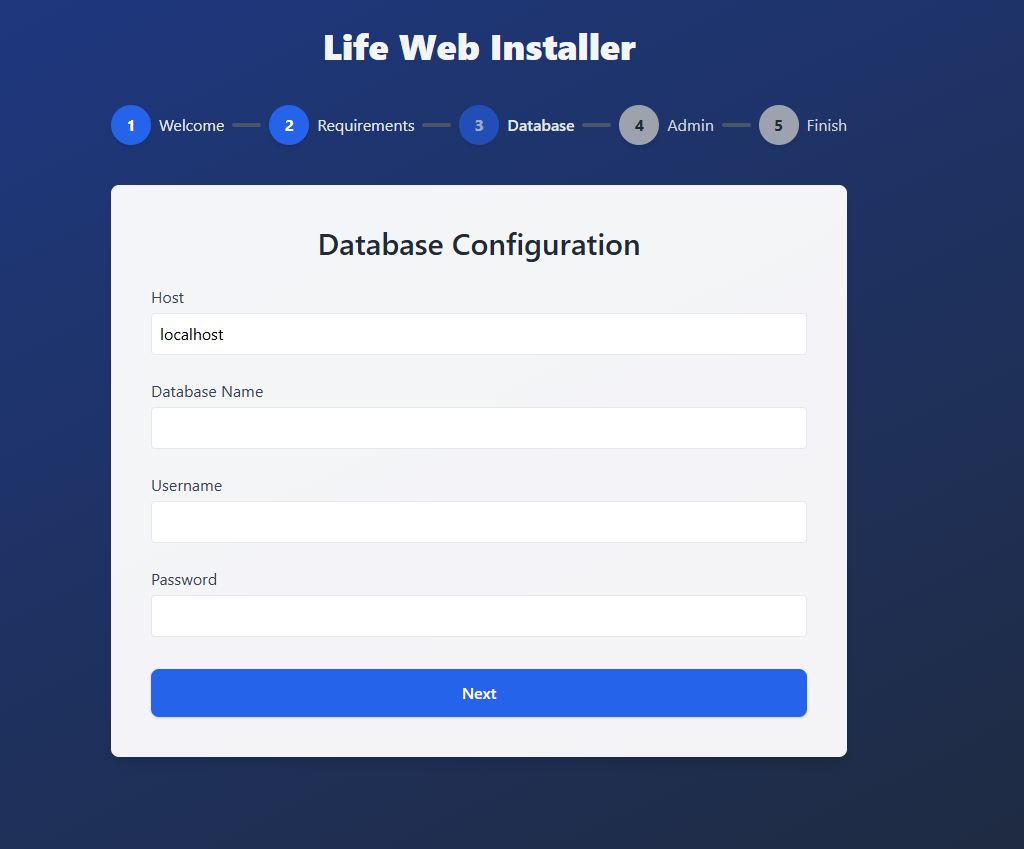
- Database Configuration:
- Enter your database details (username, password, database name) with host set to localhost.
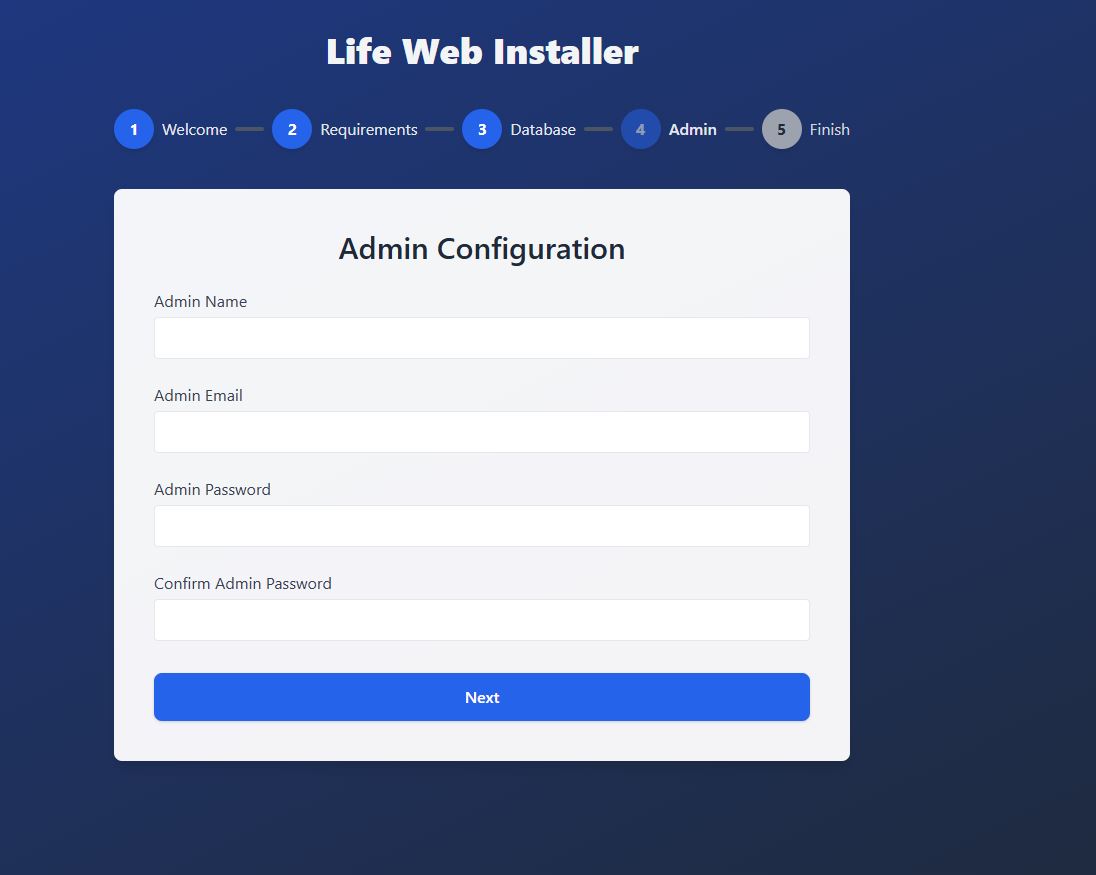
- Admin Configuration:
- Enter the admin details (name, email, password) on the next page.
- Complete Installation:
- Click Next to finish the installation. A success message will confirm completion.
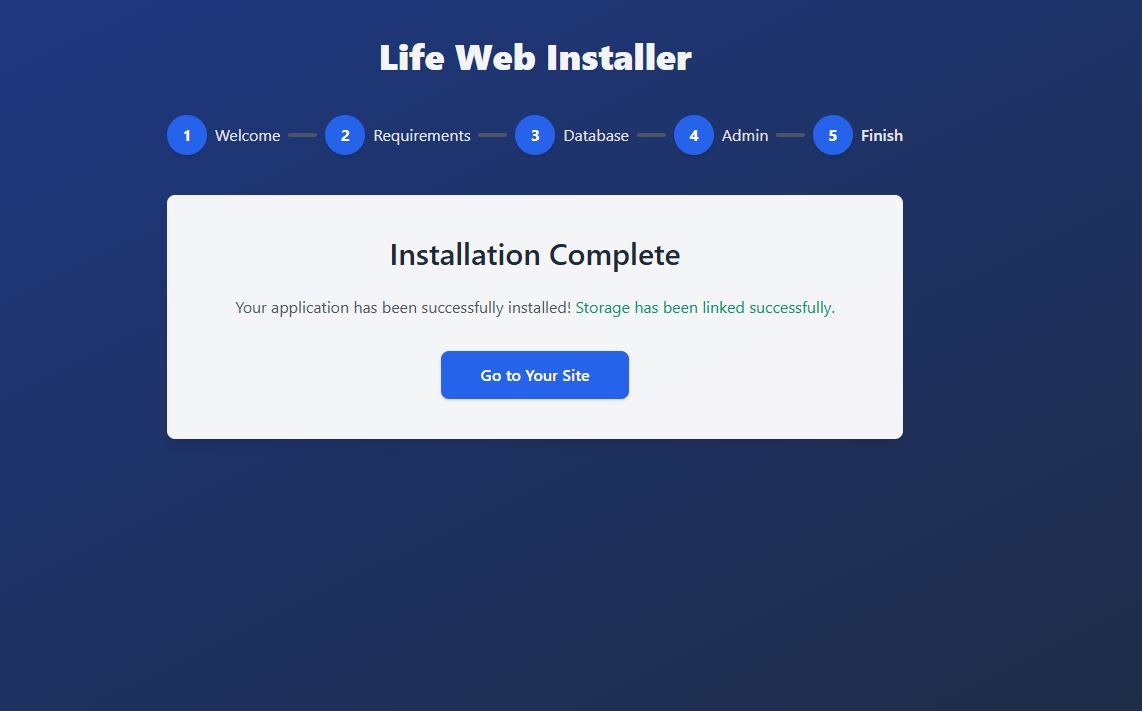
- Access Your Site and Admin Panel:
- Visit your site’s frontend and access the admin panel at /admin/login (e.g., http://yourbusiness.com/admin/login).
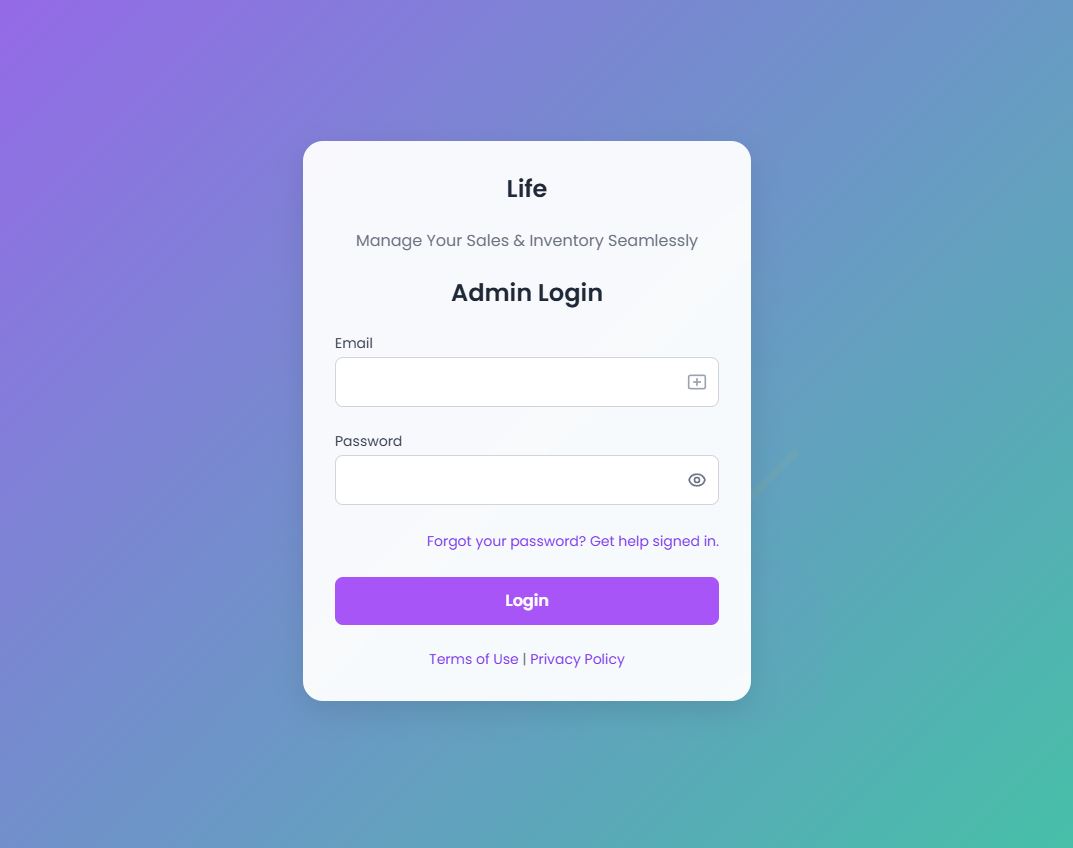
1. How to Log In
Follow these steps to log in to the admin panel:
- Open your browser and navigate to http://yourbusiness.com/admin/login.
- Enter the default credentials:
- Email: admin@example.com
- Password: 12345678
- Click Login and then update your password immediately.
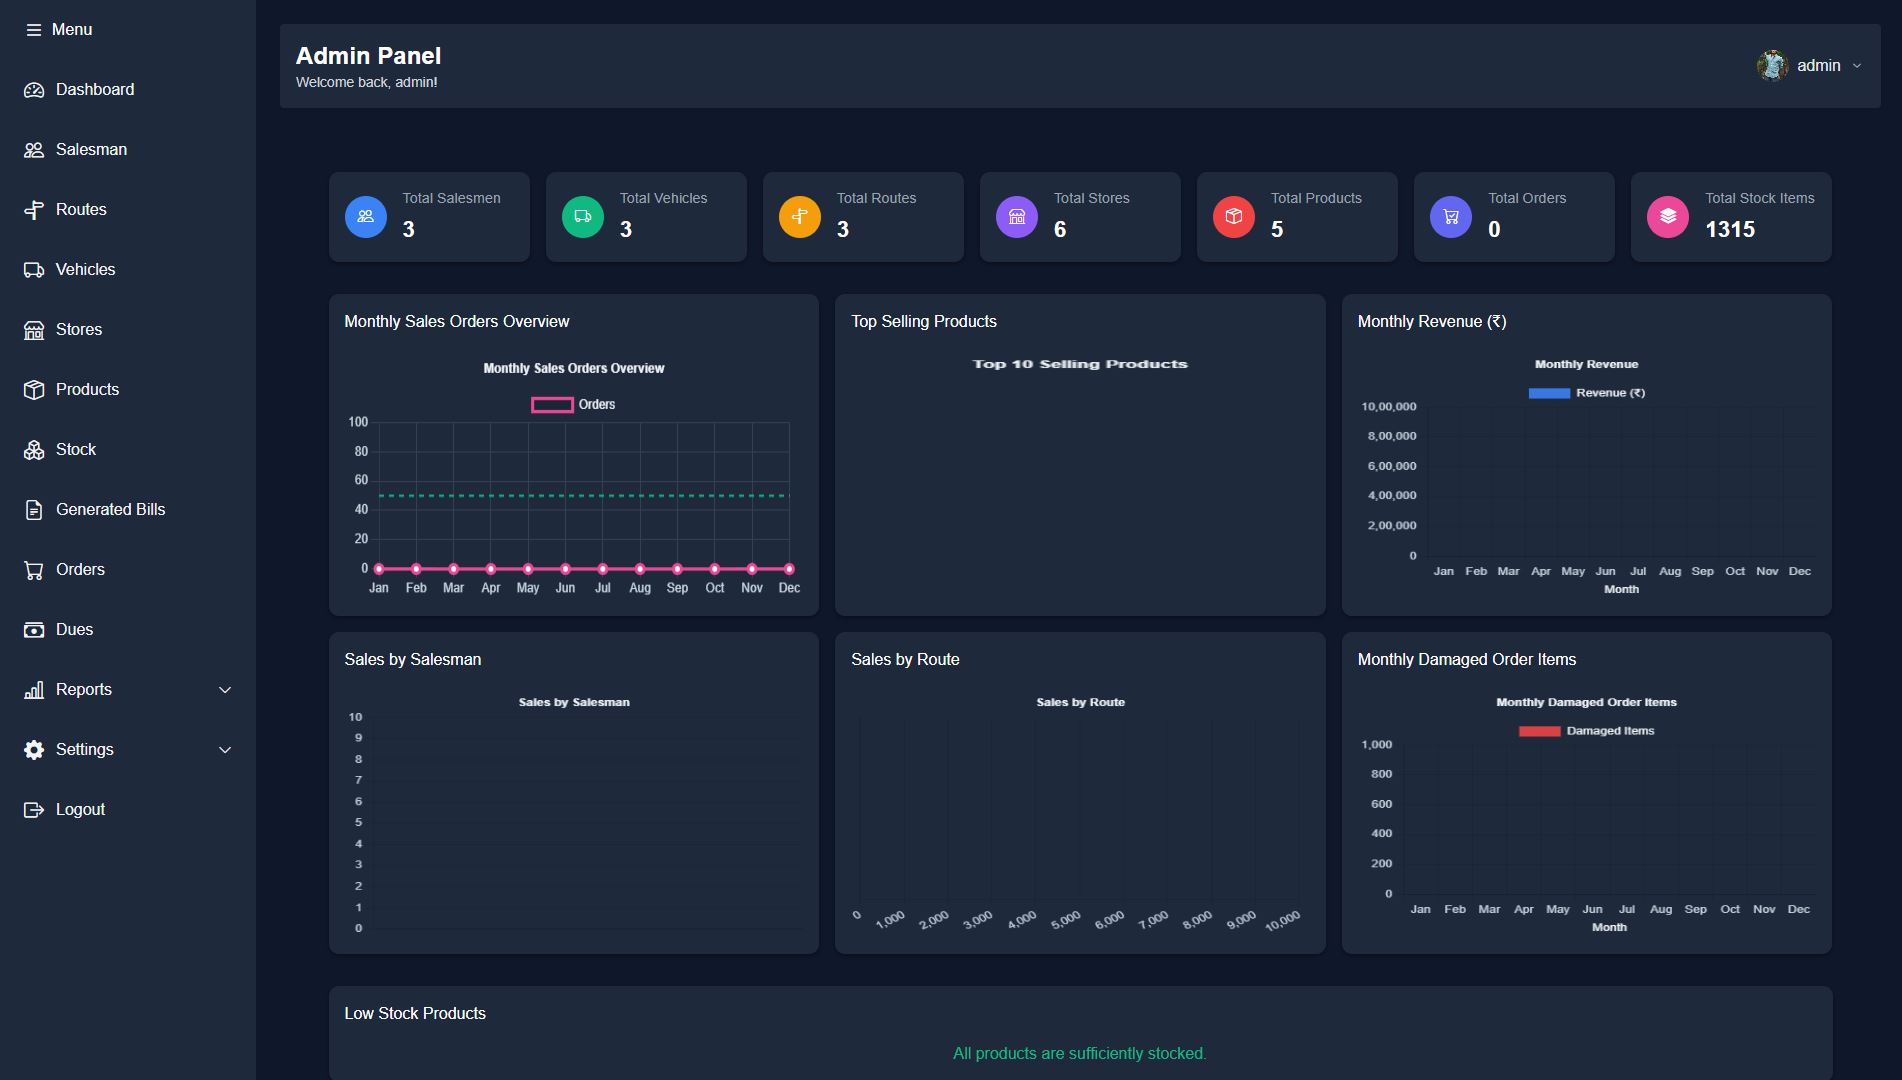
2. Exploring the Dashboard
The dashboard gives you a snapshot of your business. It displays:
- Total Salesmen, Vehicles, Routes, Stores, Products, Orders, and Stock Items
- Graphs and Charts showing sales trends and product performance
- A list of Low Stock Products
Detailed Graphs and Tables
- Totals Overview: Displays boxes with counts of salesmen, vehicles, routes, stores, products, orders, and stock items.
- Graphs and Charts:
- Sales Overview Graph: Line or bar chart showing total sales over time.
- Sales by Salesman Graph: Chart comparing sales figures per salesman.
- Top-Selling Products Graph: Bar or pie chart illustrating which products sell the most.
- Sales by Route Graph: Chart showing which routes generate the most sales.
- Revenue Over Time Graph: Line graph tracking revenue trends over time.
- Damaged Order Items Over Time: Graph indicating the number of broken items returned over time.
- Low Stock Products Table: A table listing products with low stock in vehicles.
- Click on any graph or table item for more detailed reports.
3. Setting Up Your Business Details

Configure your business information in General Settings:
- Click Settings from the sidebar and select General Settings.
- Fill in details such as Company Name, Email, Address, Phone, Country, Currency, and Tax System.
- Click Update Settings to save your changes.
4. Updating Your Profile
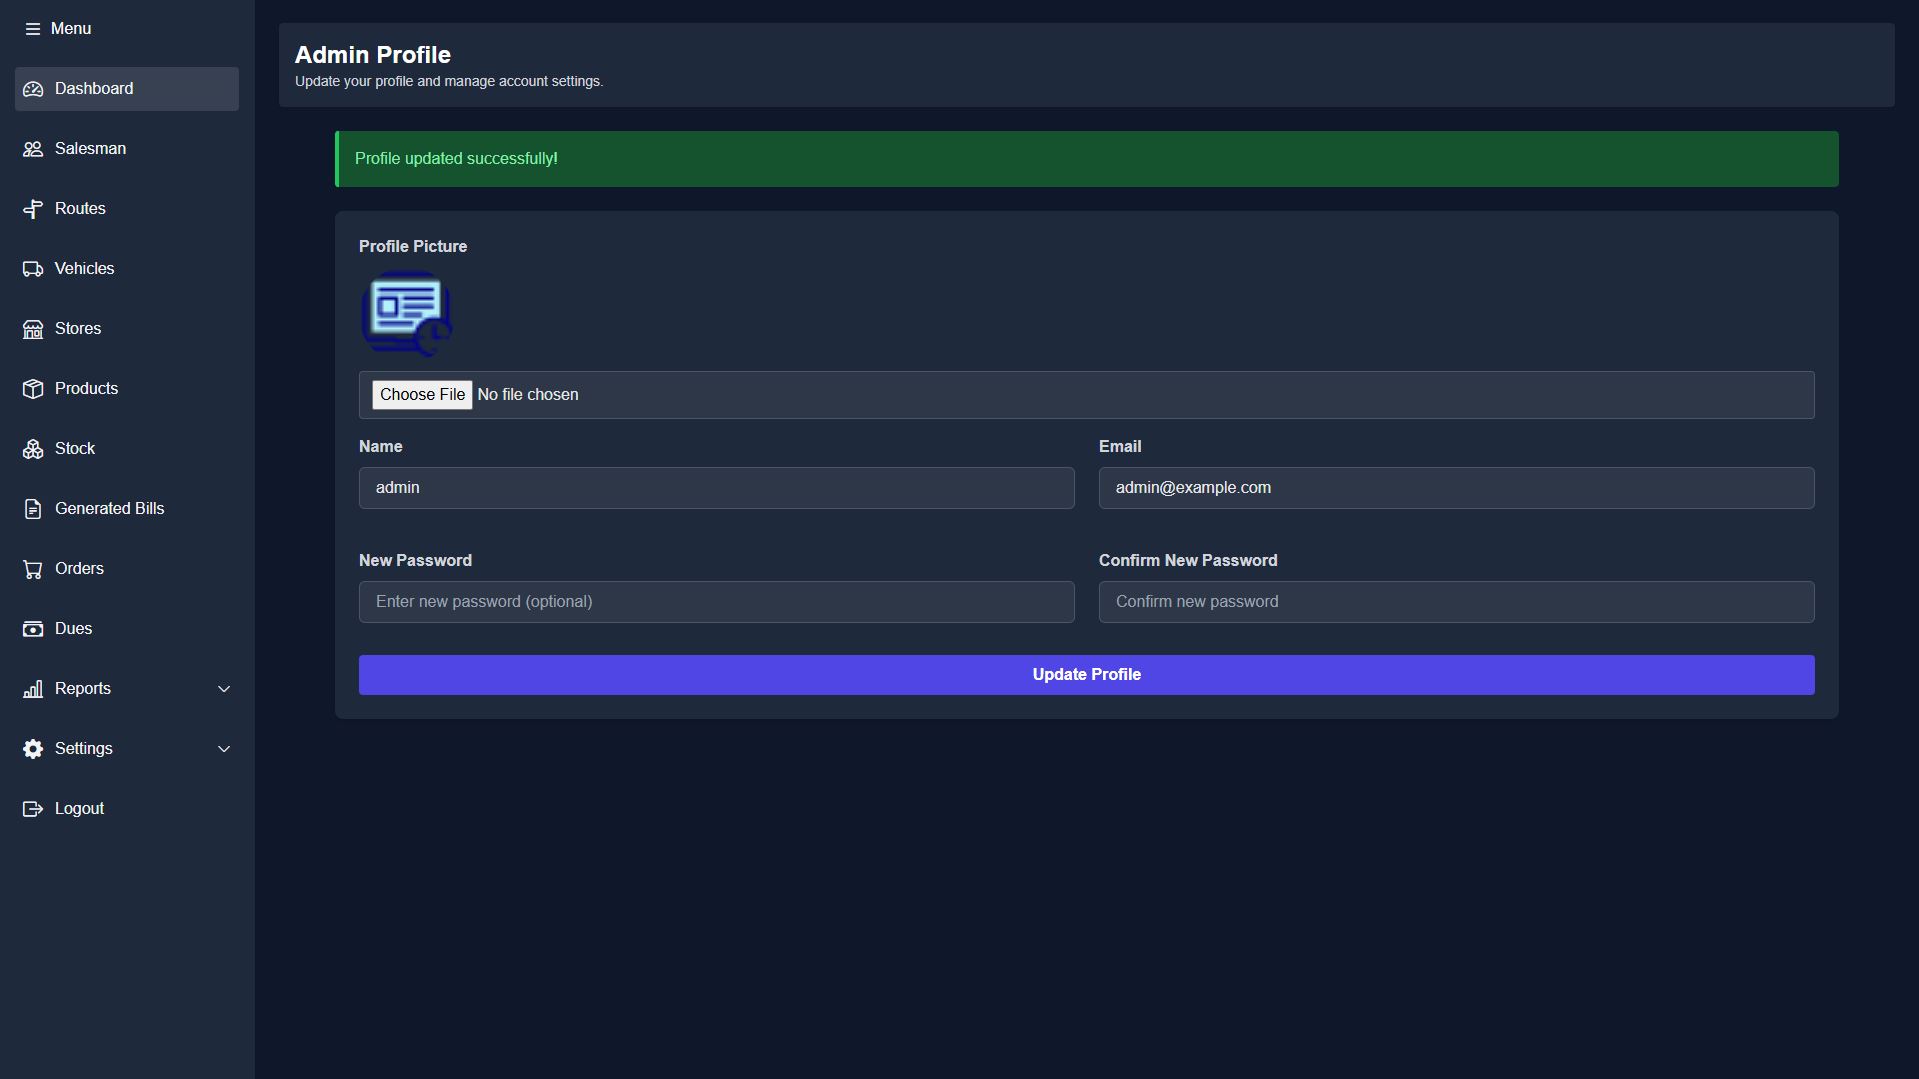
Secure your account by updating your personal details:
- Click Settings in the sidebar, then select Profile Settings.
- Update your Profile Picture, Name, Email, and set a new password.
- Click Update Profile to apply the changes.
Page Builder
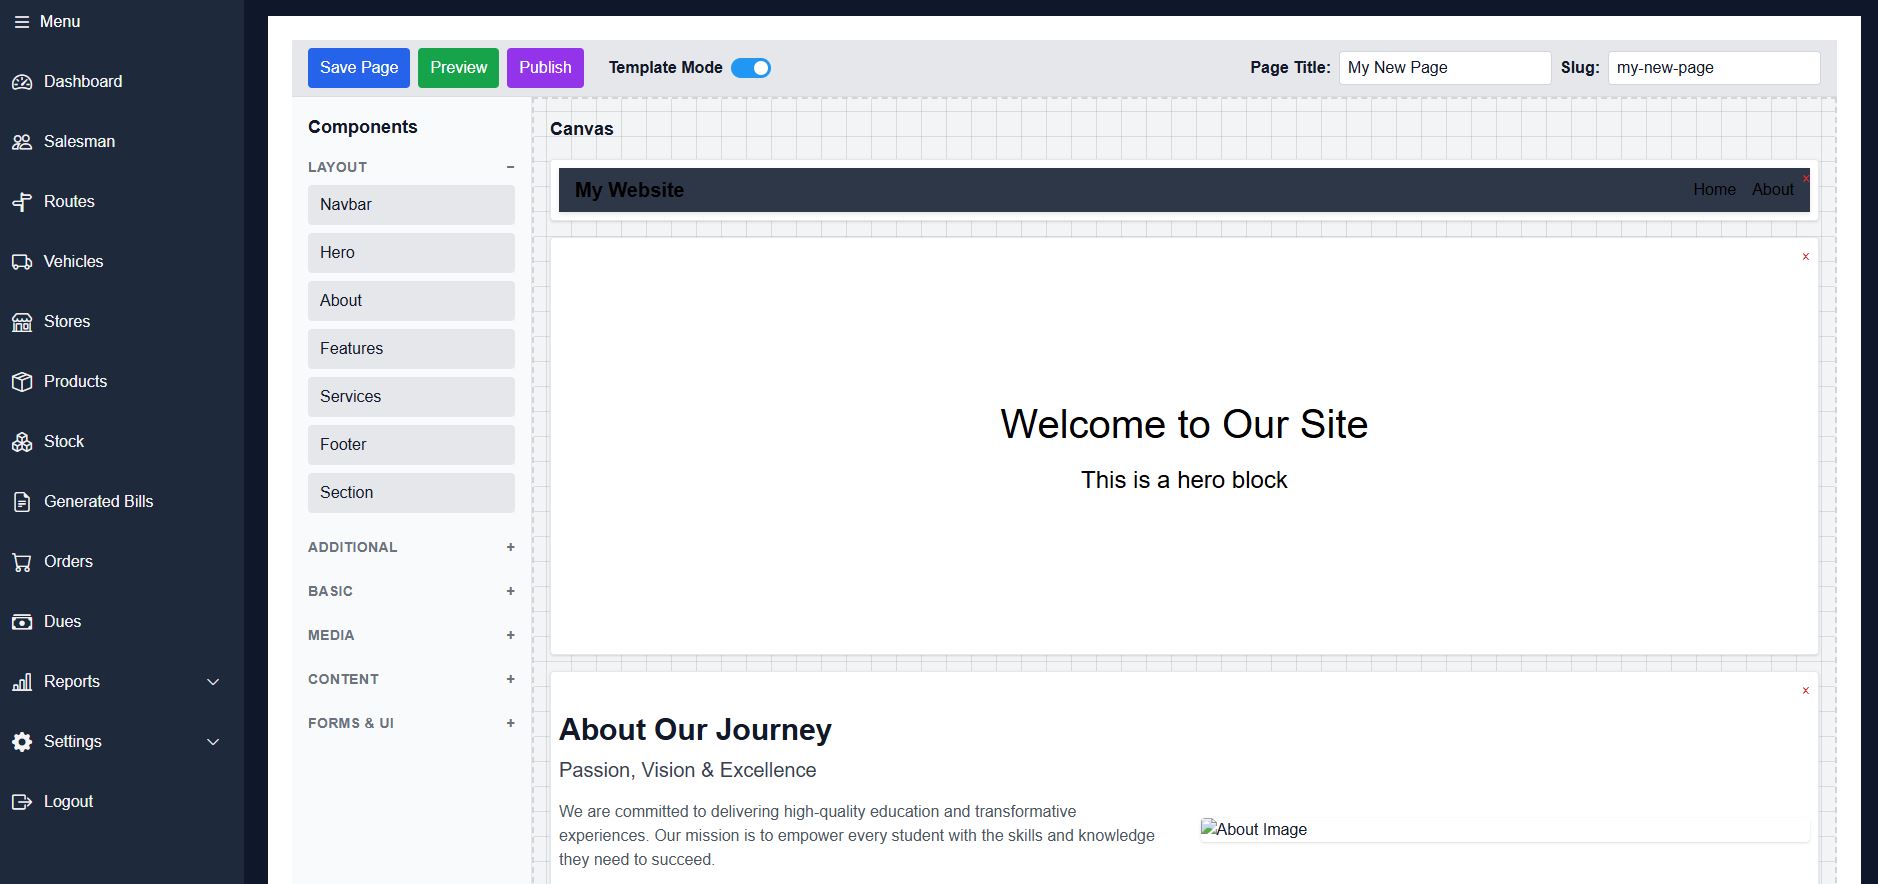
Welcome to the Page Builder – a fun, drag and drop interface that lets you design your website without any coding! Simply grab a component from the toolbox and drop it into your canvas to start building your unique website.
In the Page Builder, components are organized into several groups:
Layouts
- Navbar
- Hero
- About
- Features
- Services
- Footer
- Section
Additional
- Animated Hero
- Carousel
- Pricing Table
- Timeline
- Progress Bar
- Social Feed
- Newsletter Signup
Basic
- Text Block
- Image
- Button
- Card
Media
- Video
- Gallery
- Map
Content
- FAQ
- Team
- Blog Post
- Testimonial
Forms and UI
- Contact Form
- Dropdown Box
- Accordion Toggle
- Navlinks
To add a component, simply drag it from the left toolbox into the canvas. Clicking a component in the canvas brings up an editing panel on the right where you can customize settings like website title, logo, background colors, fonts, and navigation links.
In the toolbar at the top, you’ll find buttons for Save Page, Preview, and Publish – keeping you always in control of your design.
6. Adding Vehicles
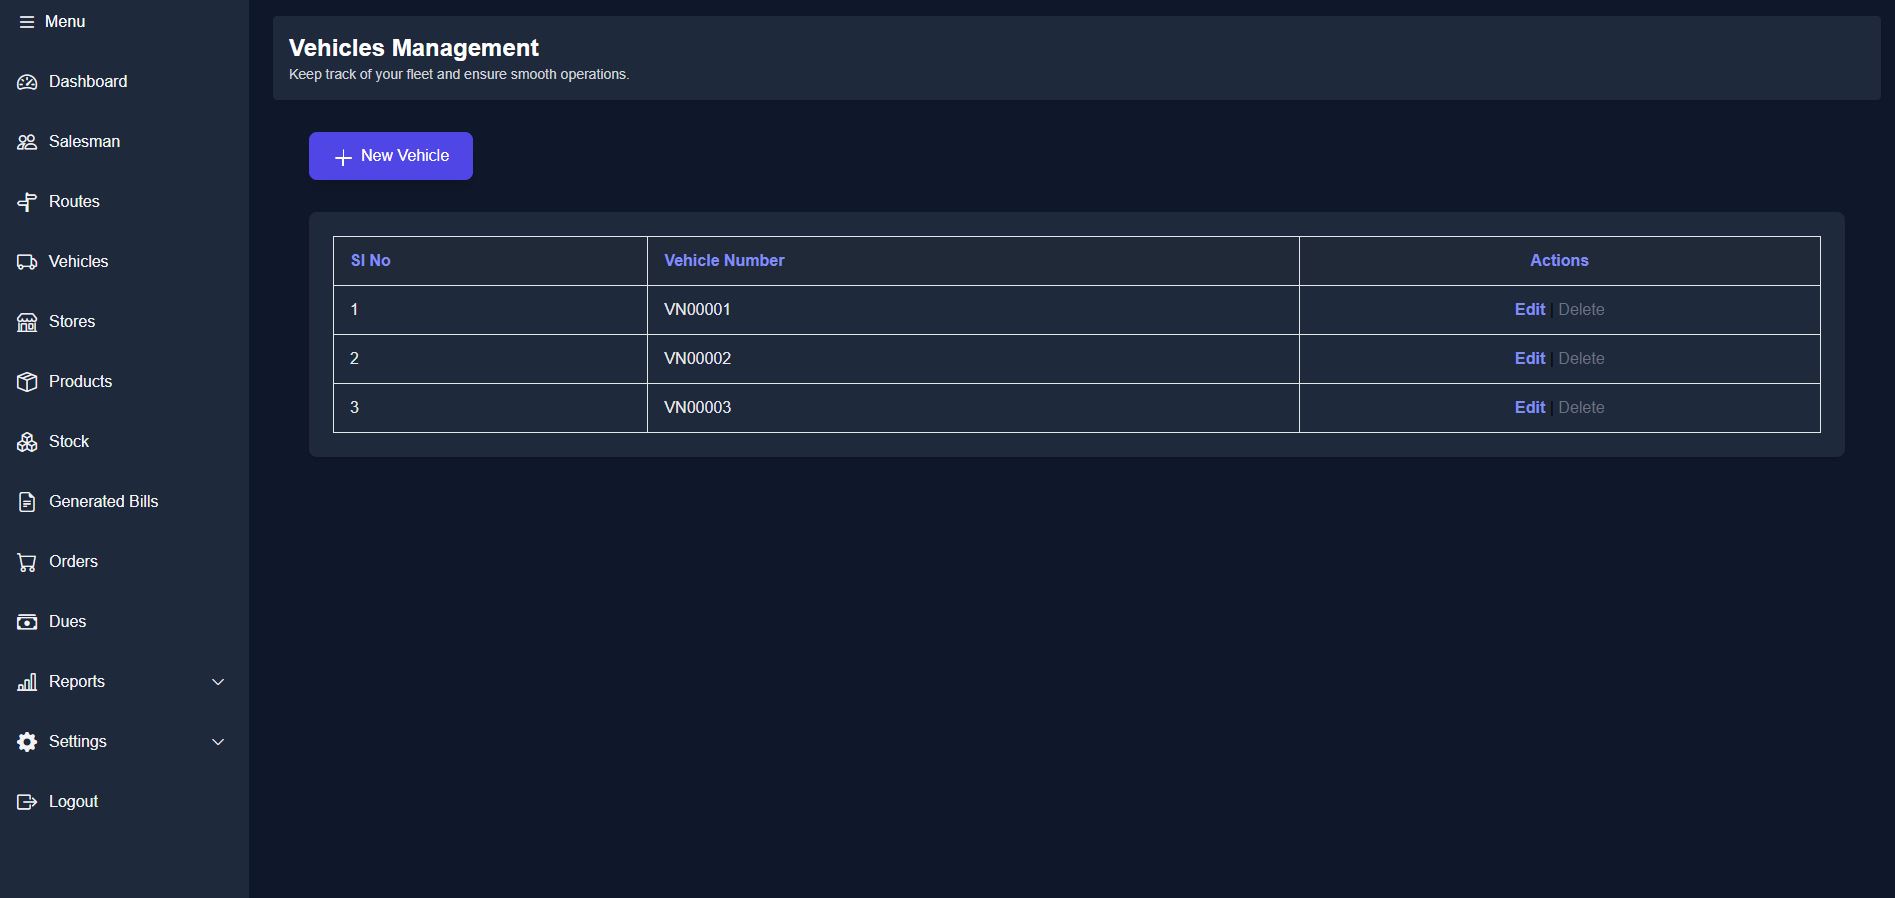
Vehicles represent the cars or vans used by your salesmen. To add a vehicle:
- Click Vehicles in the sidebar.
- Click the Add New Vehicle button.
- Enter the Vehicle Number (e.g., “XYZ-789”).
- Click Add Vehicle and confirm the message.
- To edit or delete a vehicle, use the options in the vehicle list.
7. Setting Up Routes
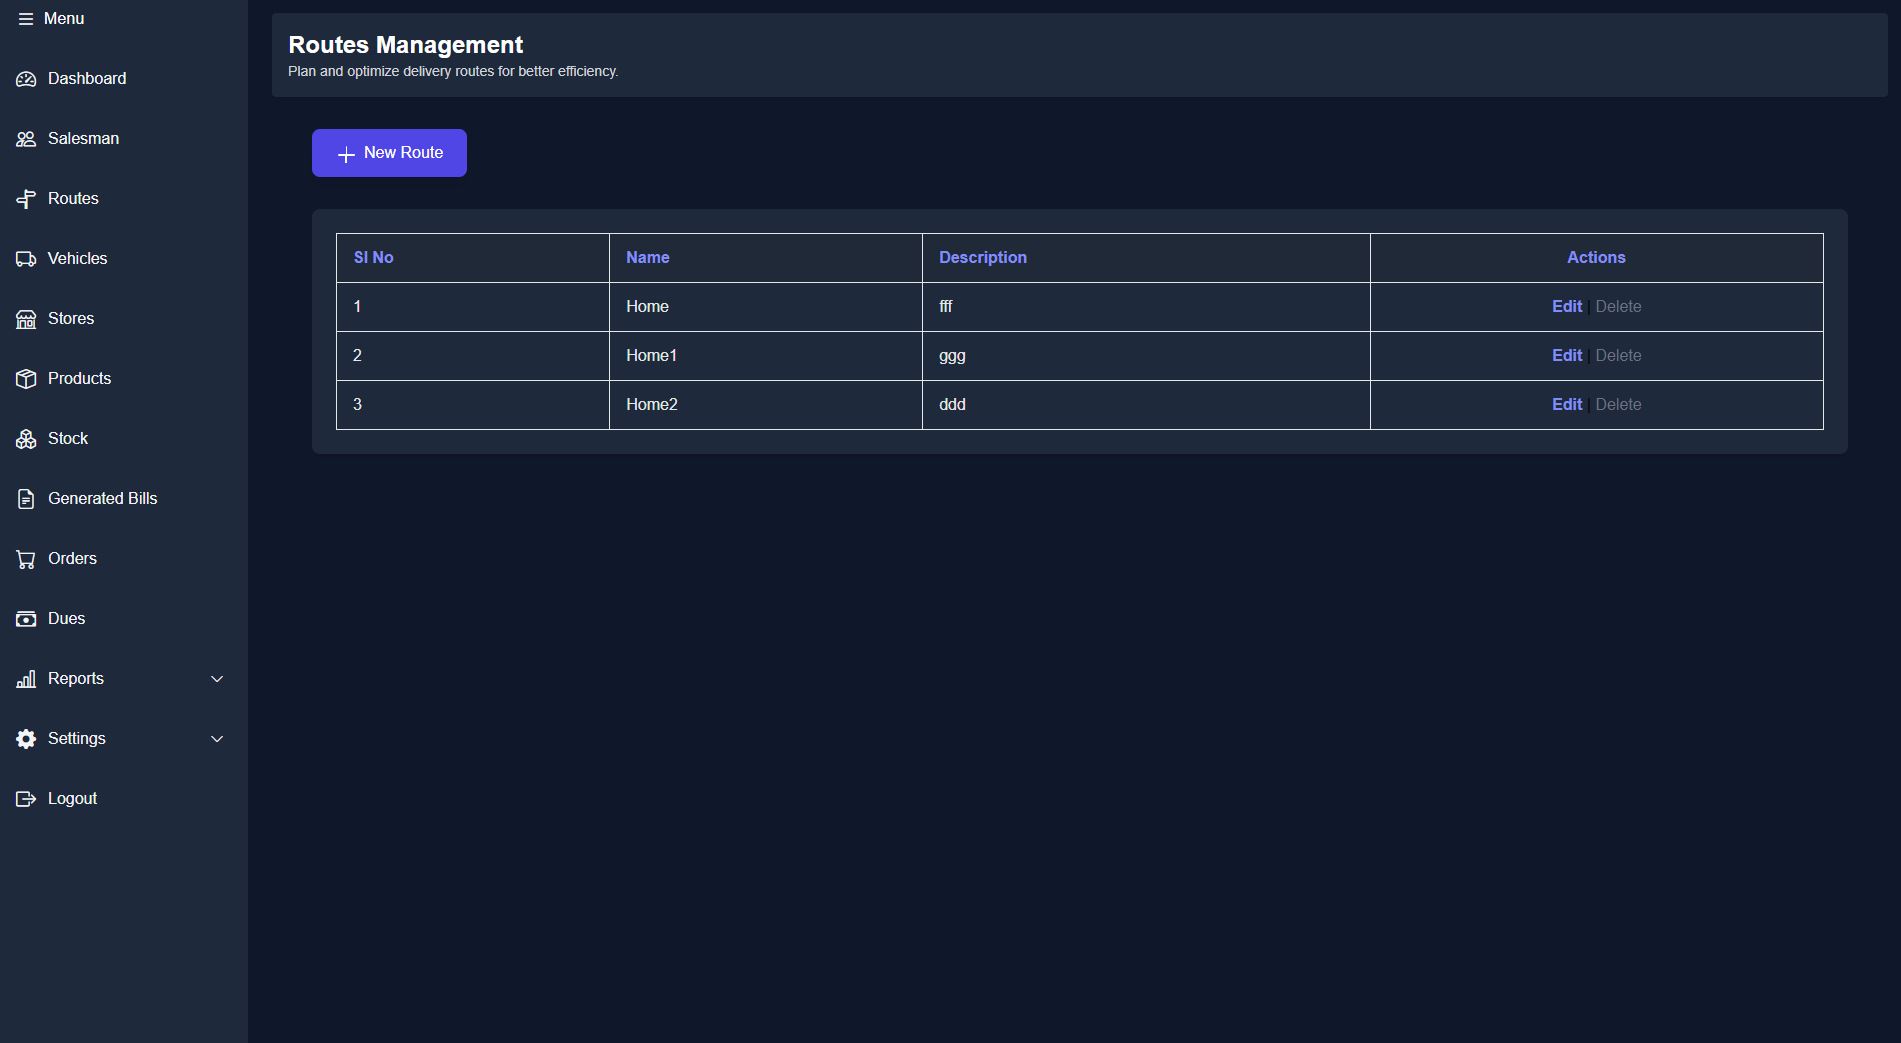
Routes determine the paths your salesmen take. To add a route:
- Click Routes from the sidebar.
- Click Add New Route.
- Enter a Route Name (e.g., “Downtown Route”) and an optional description.
- Click Add Route to confirm.
8. Adding Salesmen
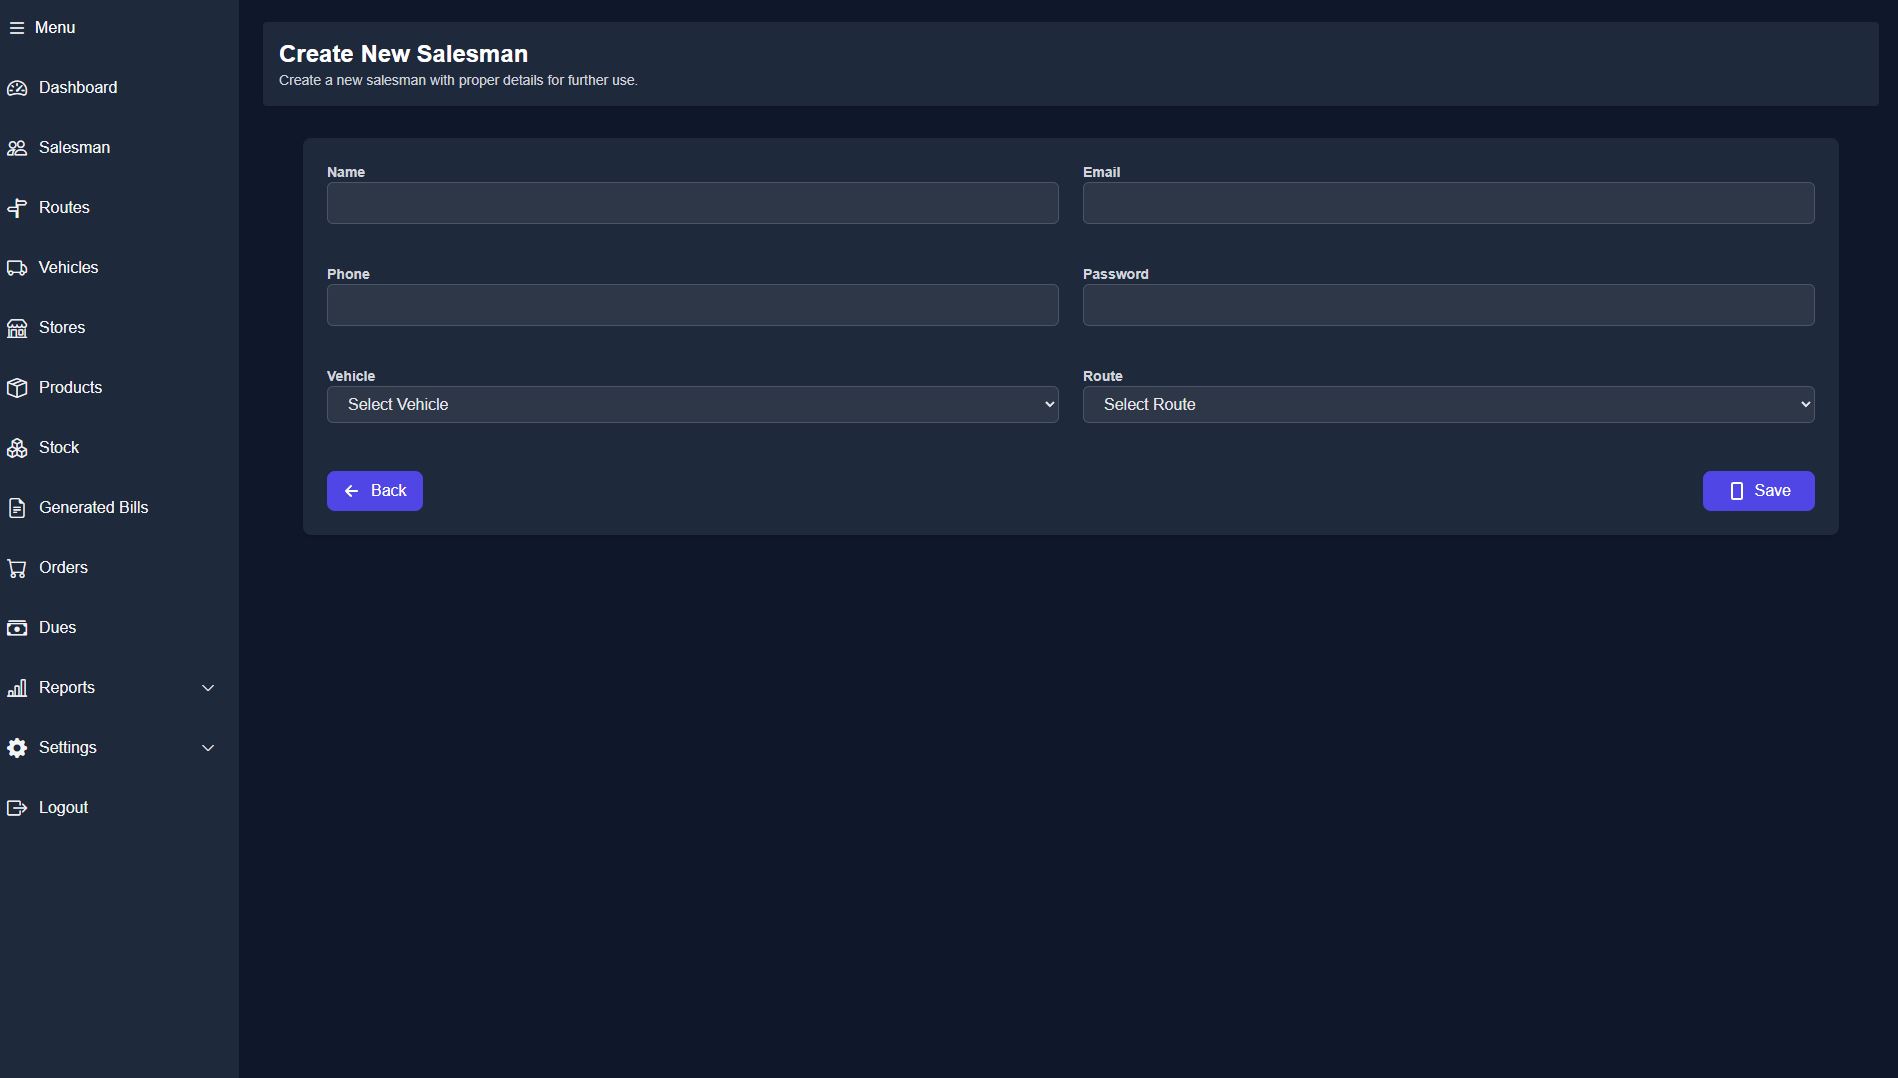
Add salesmen who will use the mobile app to sell your products:
- Click Salesman in the sidebar.
- Click Add New Salesman.
- Fill in their details (Name, Email, Phone, Password, Vehicle, and Route).
- Click Add Salesman to save their information.
- Share their login credentials so they can access the mobile app.
9. Adding Stores
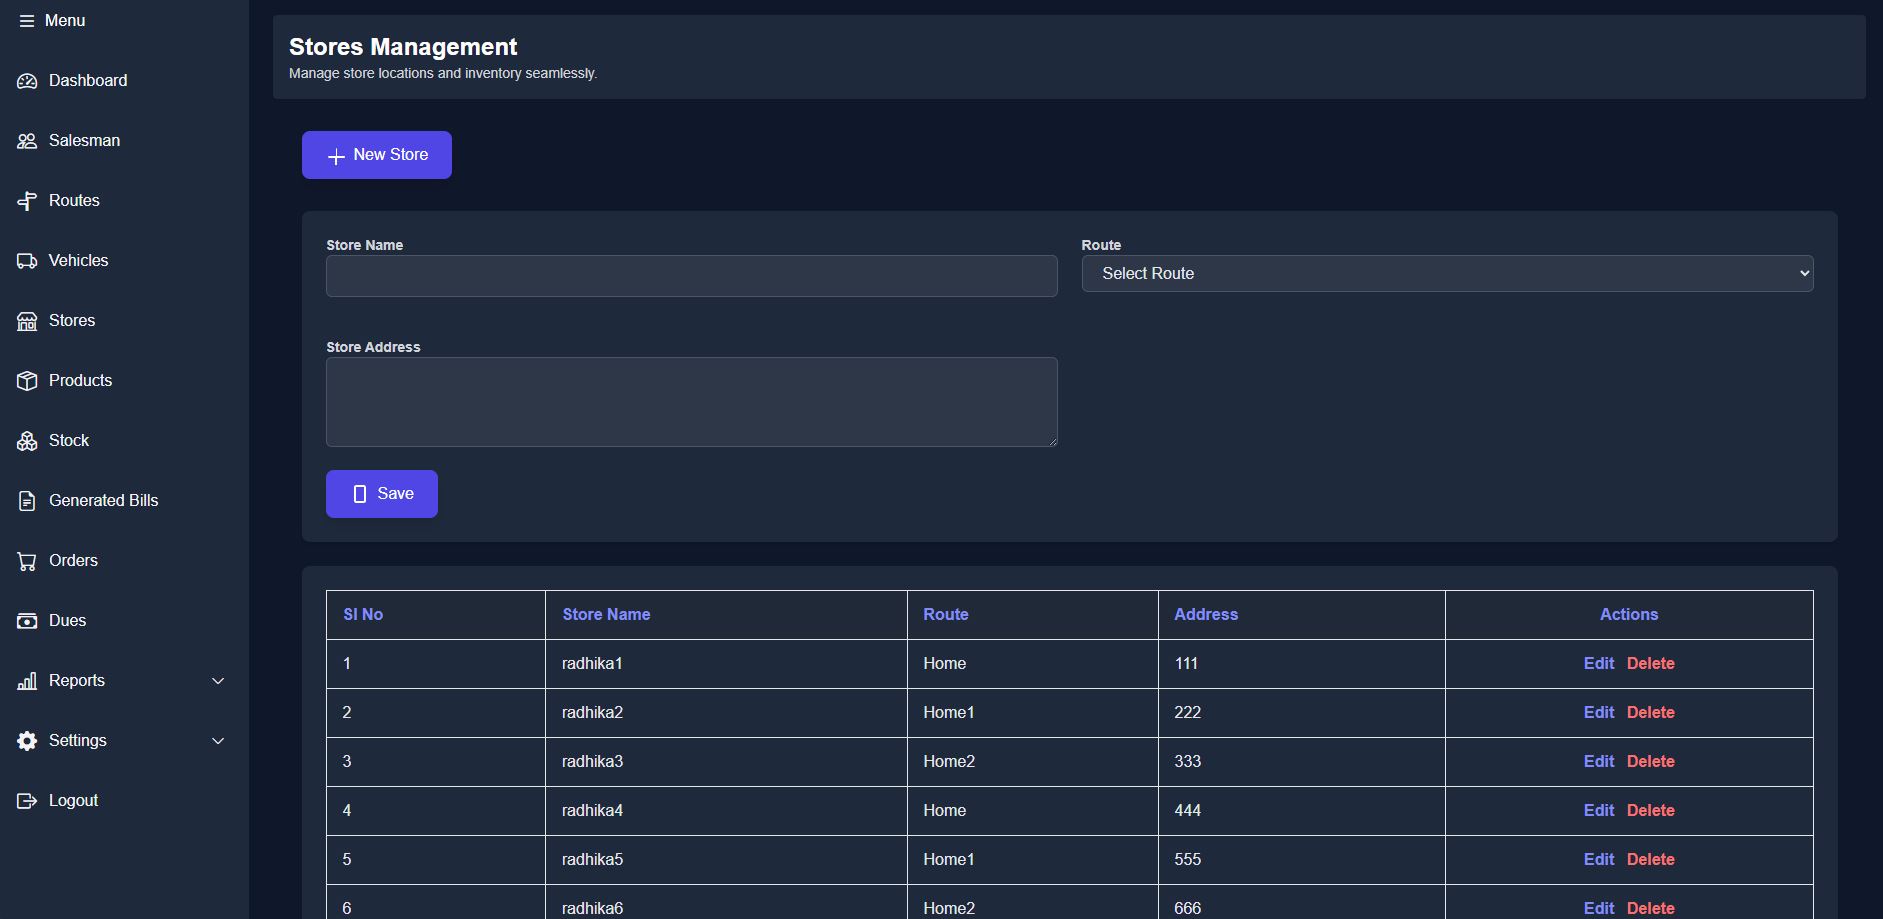
Stores represent the customers or shops visited by your salesmen. To add a store:
- Click Stores in the sidebar.
- Click Add New Store.
- Fill in the store’s Name, assign a Route, and enter its full Address.
- Click Add Store to confirm.
10. Adding Products
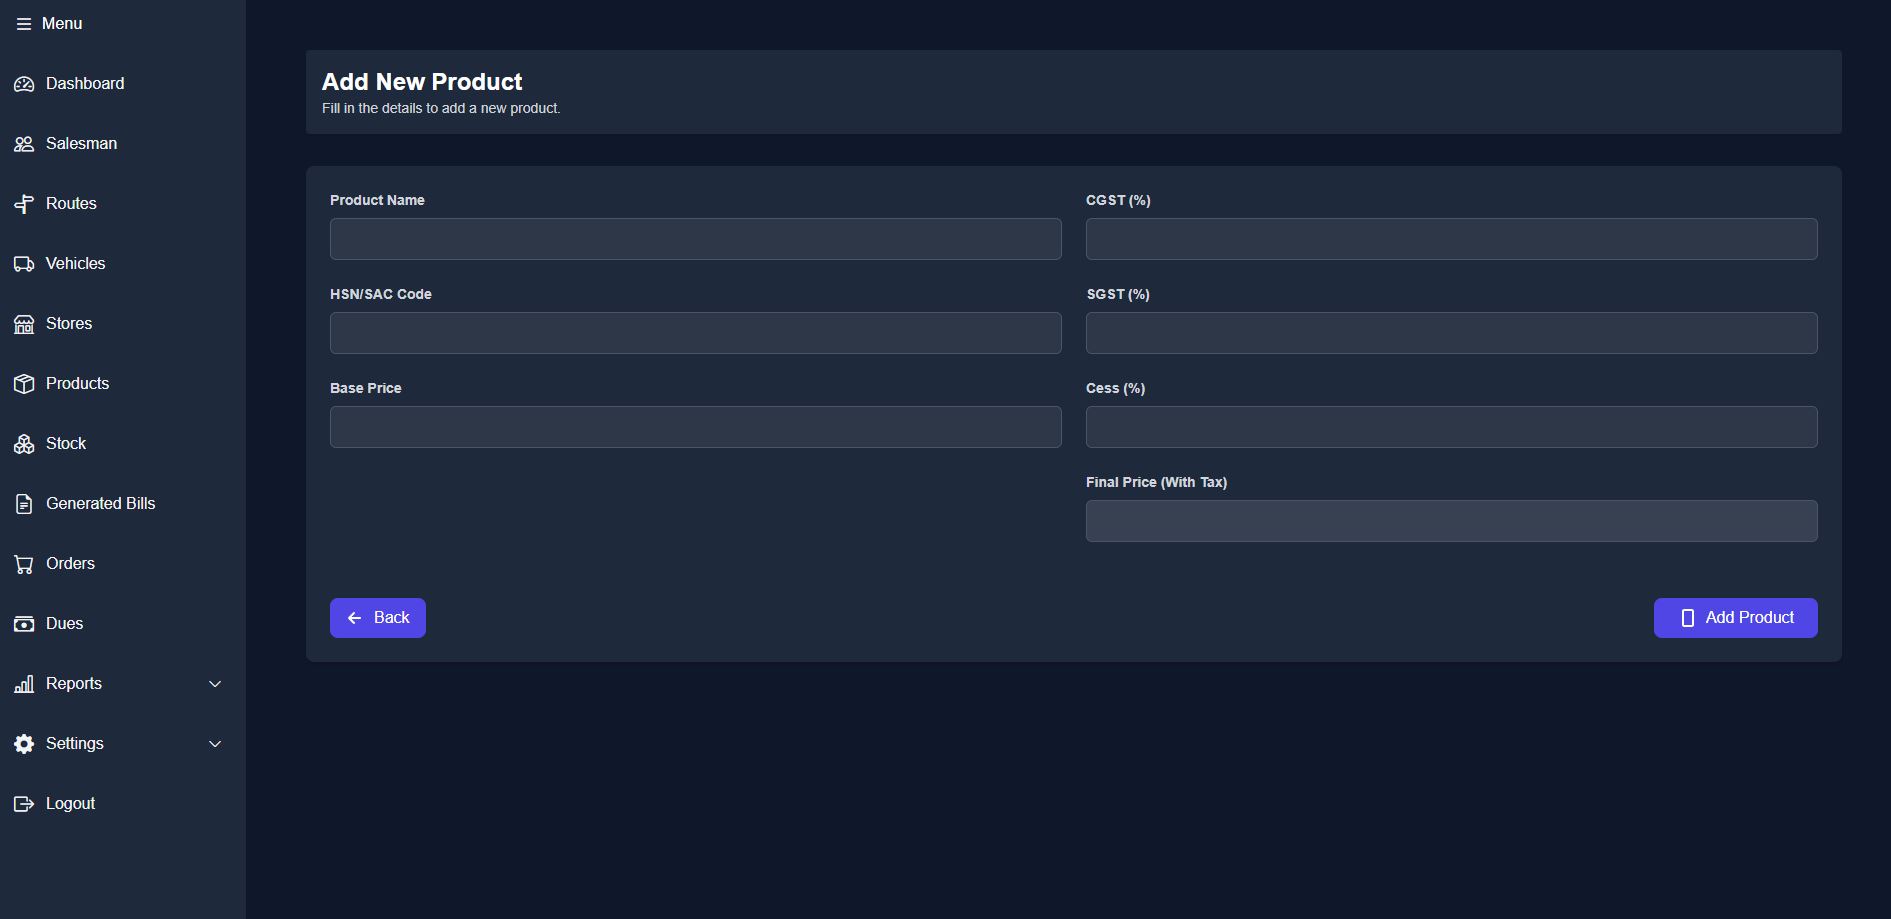
Products are what you sell. The product form will change based on your chosen tax system:
- Click Products in the sidebar.
- Click Add New Product.
- Fill in the details:
- If VAT: Product Name, Base Price, VAT%
- If GST: Product Name, HSN/SAC Code, Base Price, SGST%, CGST%, Cess%
- If Sales Tax: Product Name, Base Price, Sales Tax%
- The system will calculate the final price automatically.
- Click Add Product to save it.
11. Giving Stock to Vehicles
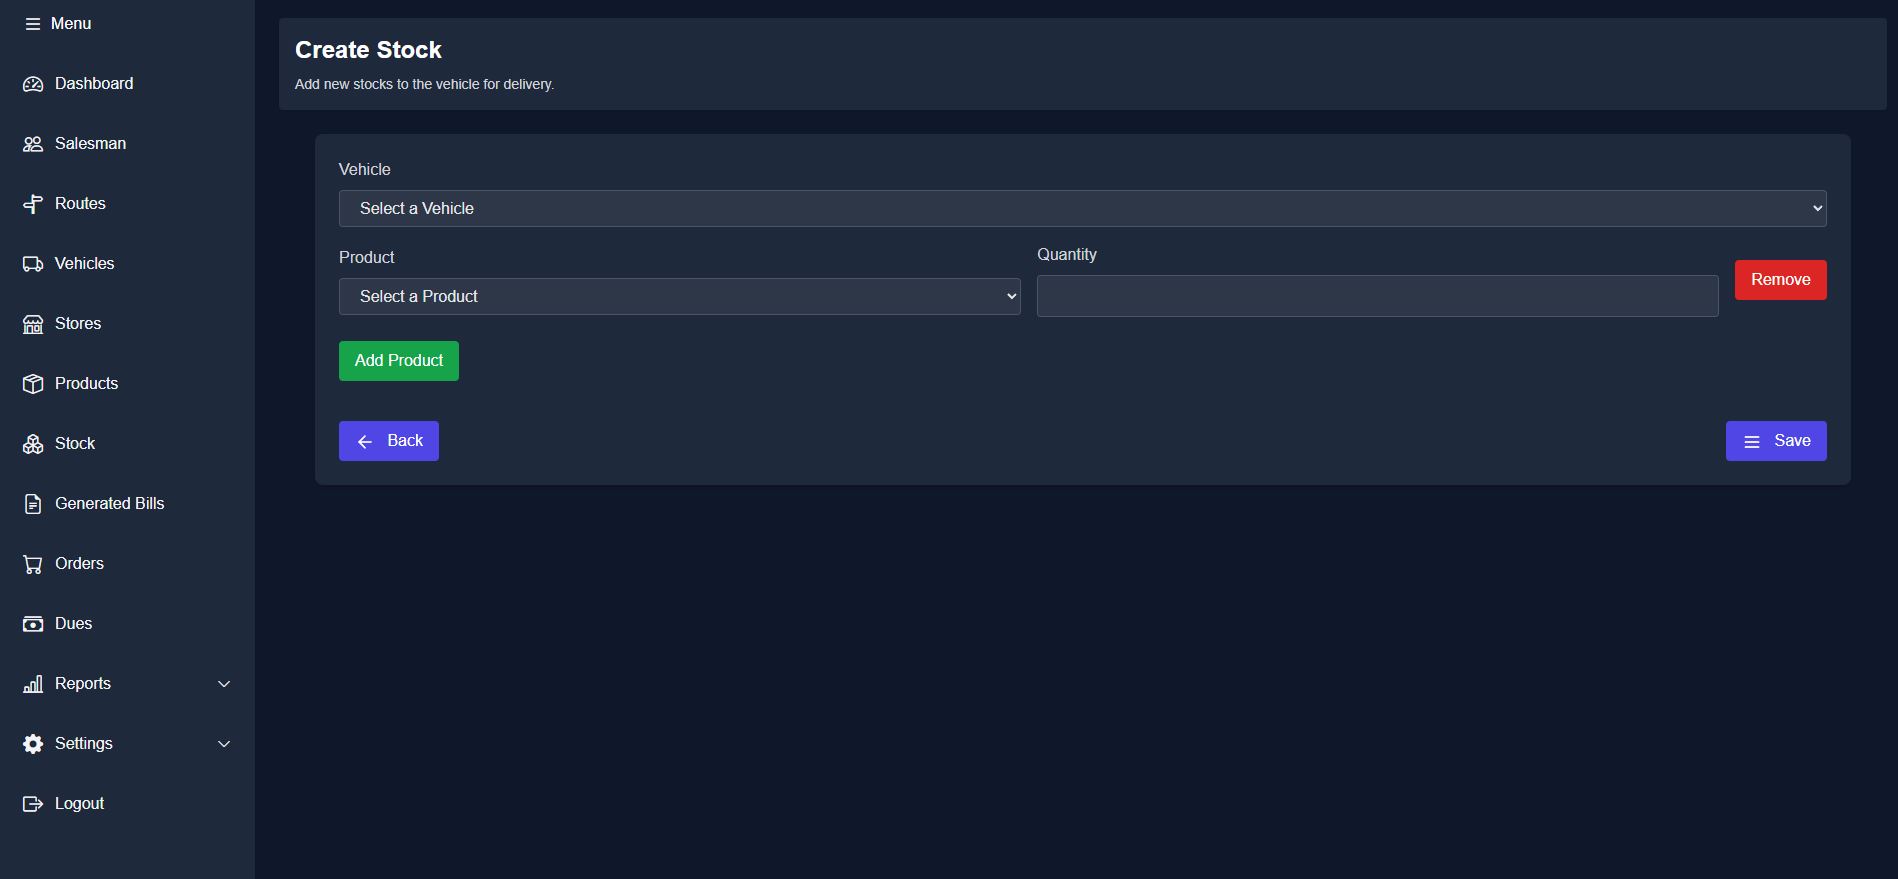
Assign stock to vehicles so salesmen have products to sell:
- Click Stock in the sidebar.
- Click Add New Stock.
- Select a Vehicle and then a Product, and specify the quantity.
- If needed, click Add Product to assign additional products to the same vehicle.
- Click Save to confirm.
12. Making a Stock Bill
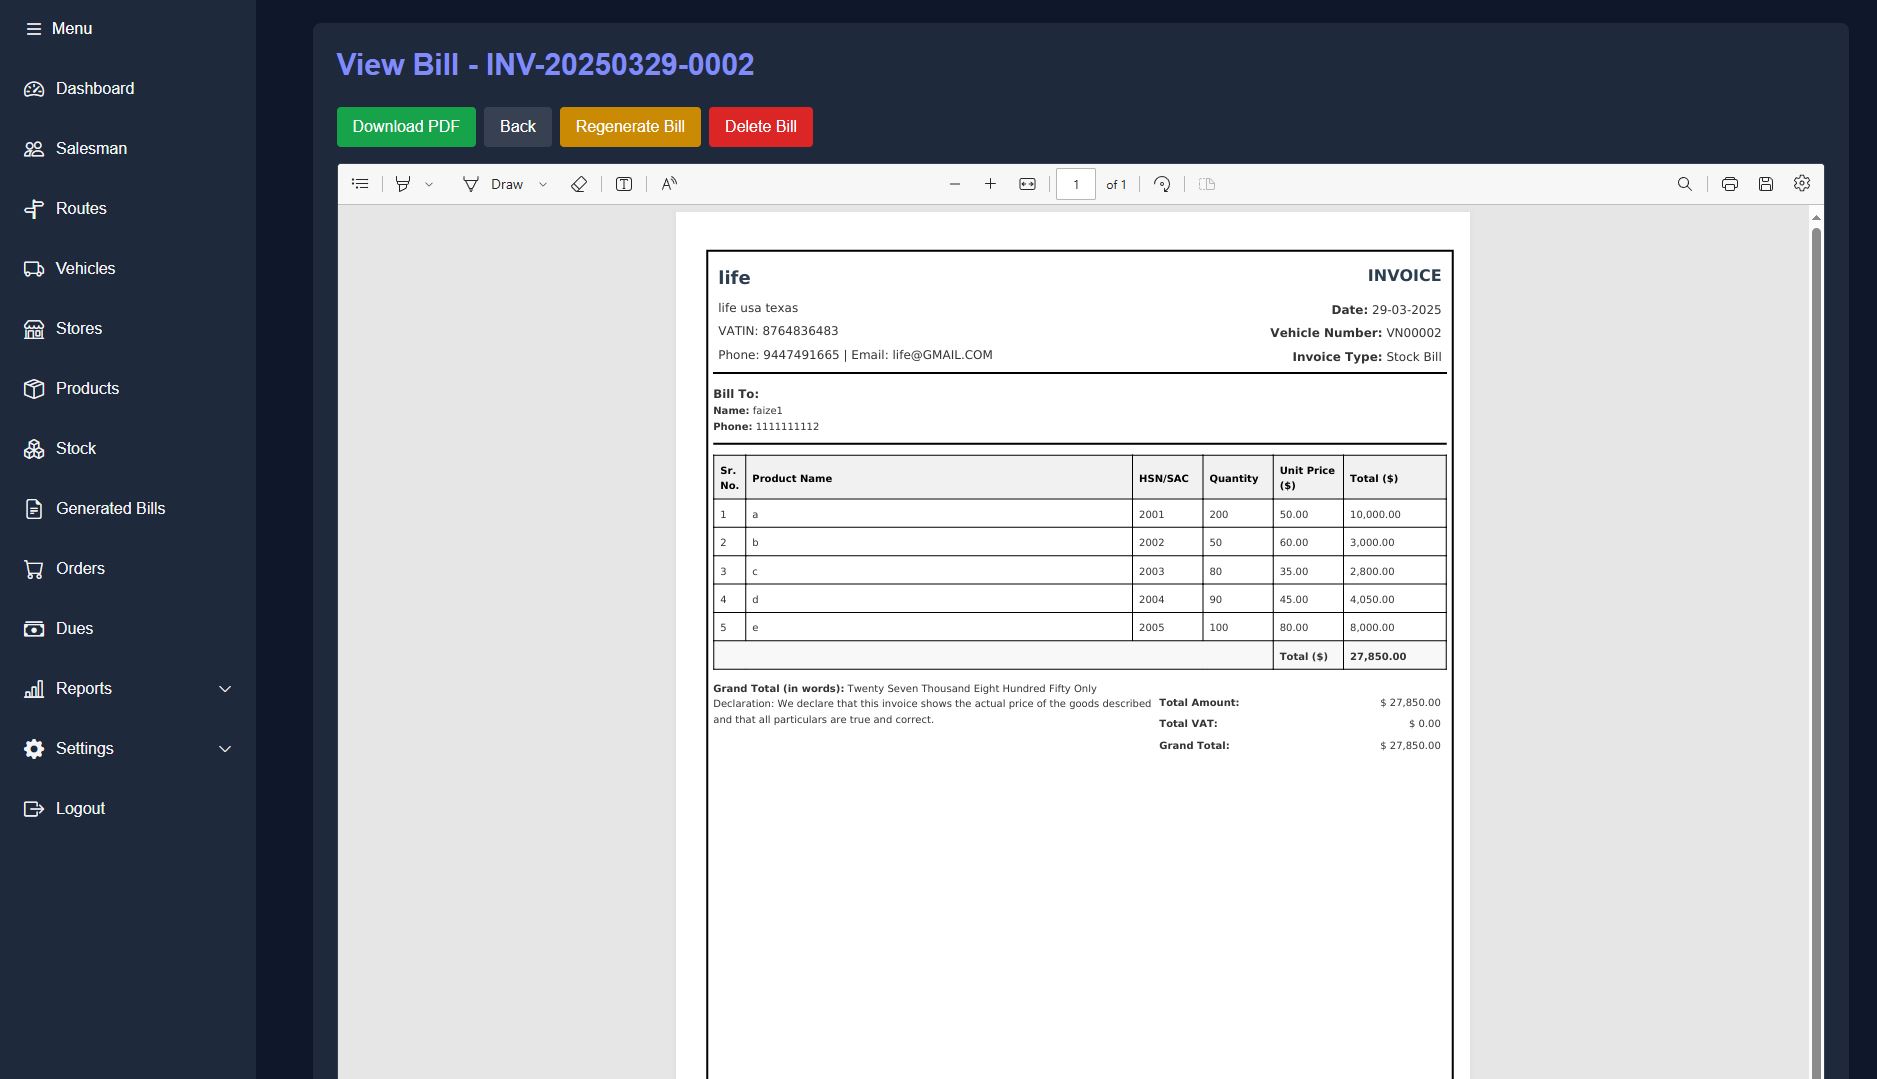
A stock bill lists the products in a vehicle. To generate one:
- After adding stock, click Generate Stock Bill.
- You’ll be taken to a page displaying the generated bills.
- Each bill shows details like Invoice Number, Vehicle Number, and Date Generated.
- Next to each bill, you can view, download, or regenerate it.
13. Checking Orders
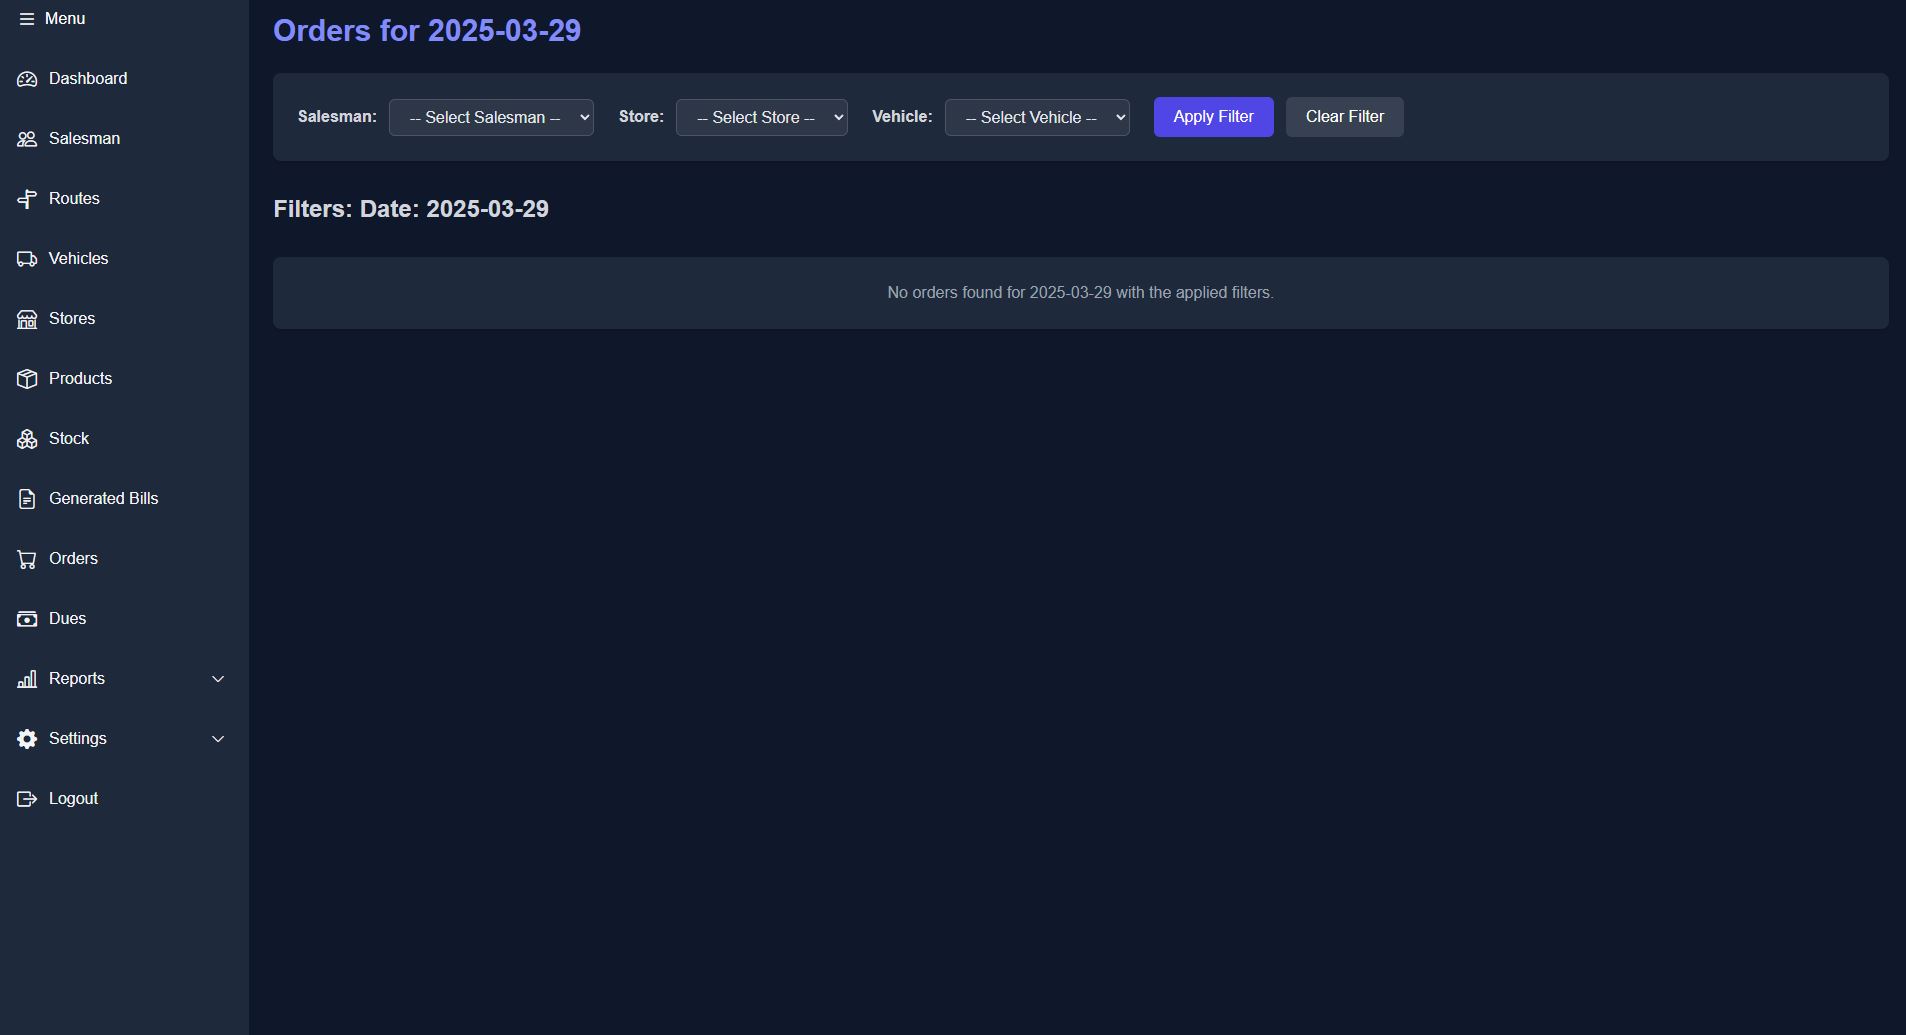
Orders are generated when salesmen sell products. To check orders:
- Click Orders from the sidebar.
- Each order shows details like Store Name, Salesman Name, Vehicle Number, and payment breakdown.
- Use the search boxes to filter orders by salesman, store, or vehicle.
14. Tracking Money Owed (Dues)
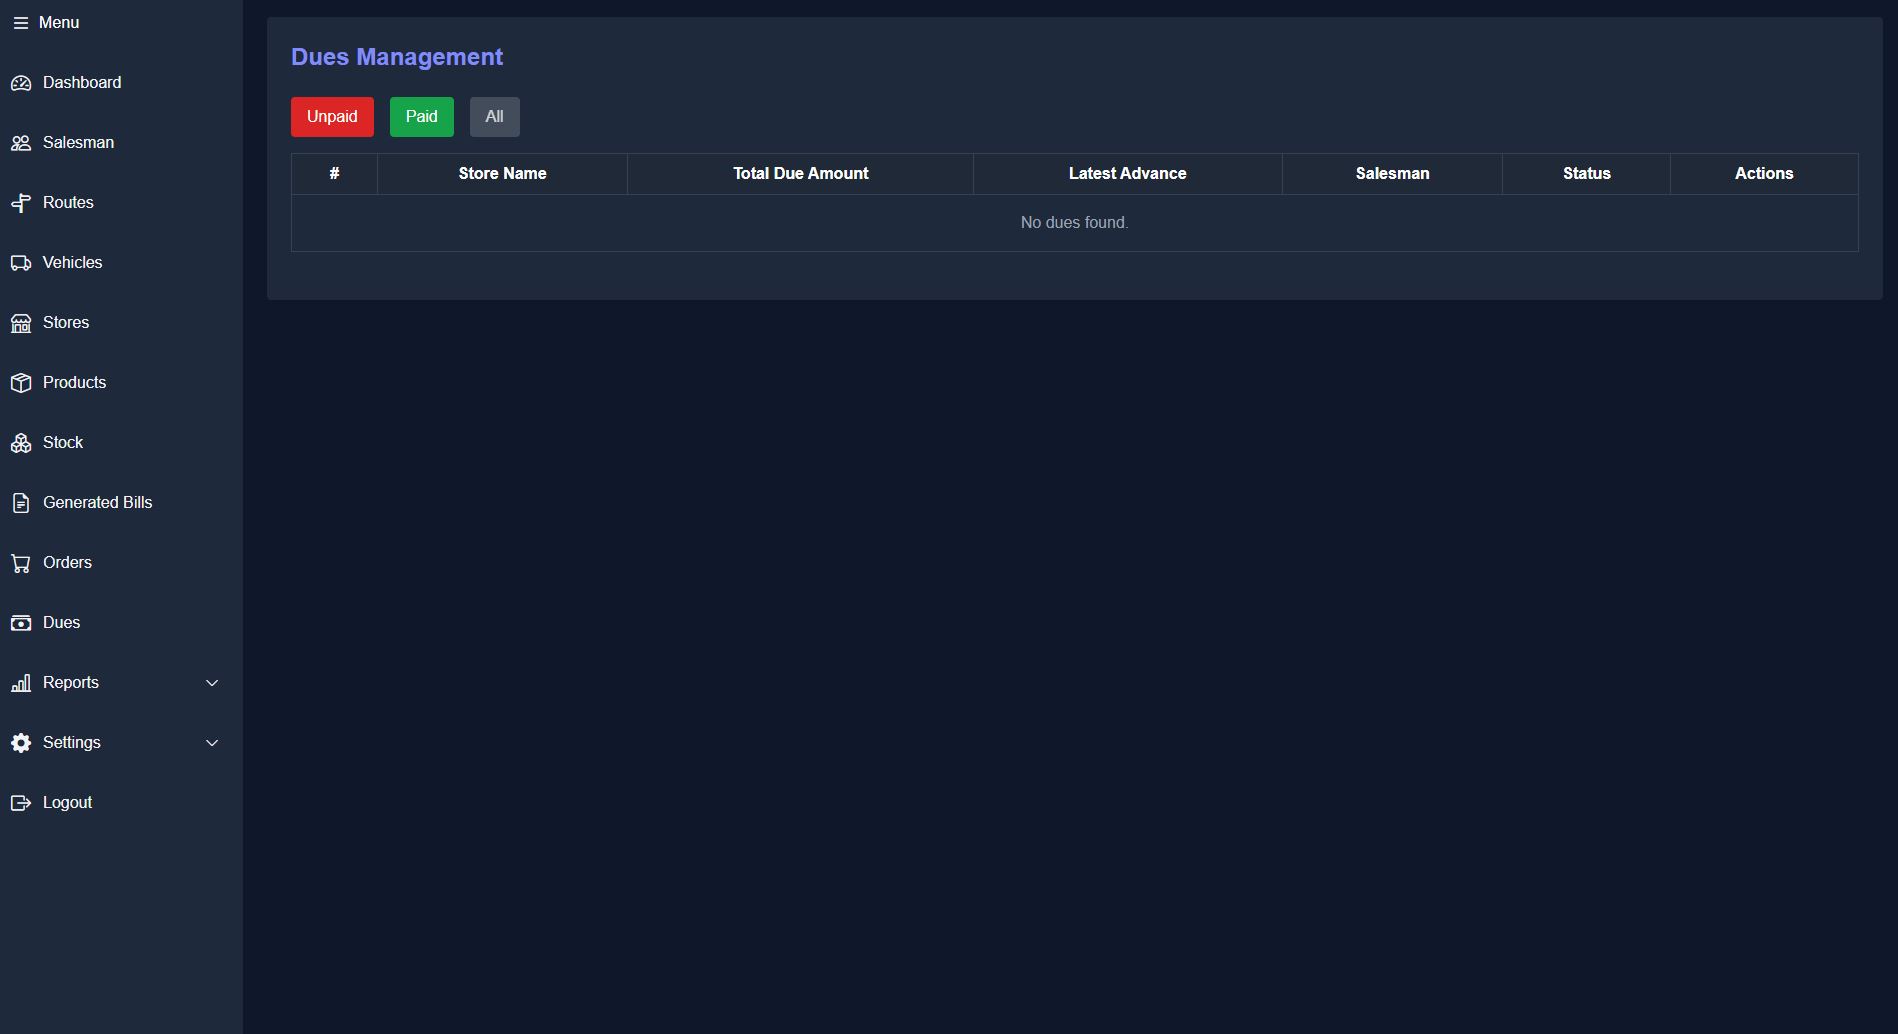
This section shows which stores owe money:
- Click Dues in the sidebar.
- Each entry displays the Store Name, Total Due Amount, Latest Advance, Salesman Name, and Status.
- Click View Details to see full order details for that store.
15. Looking at Reports
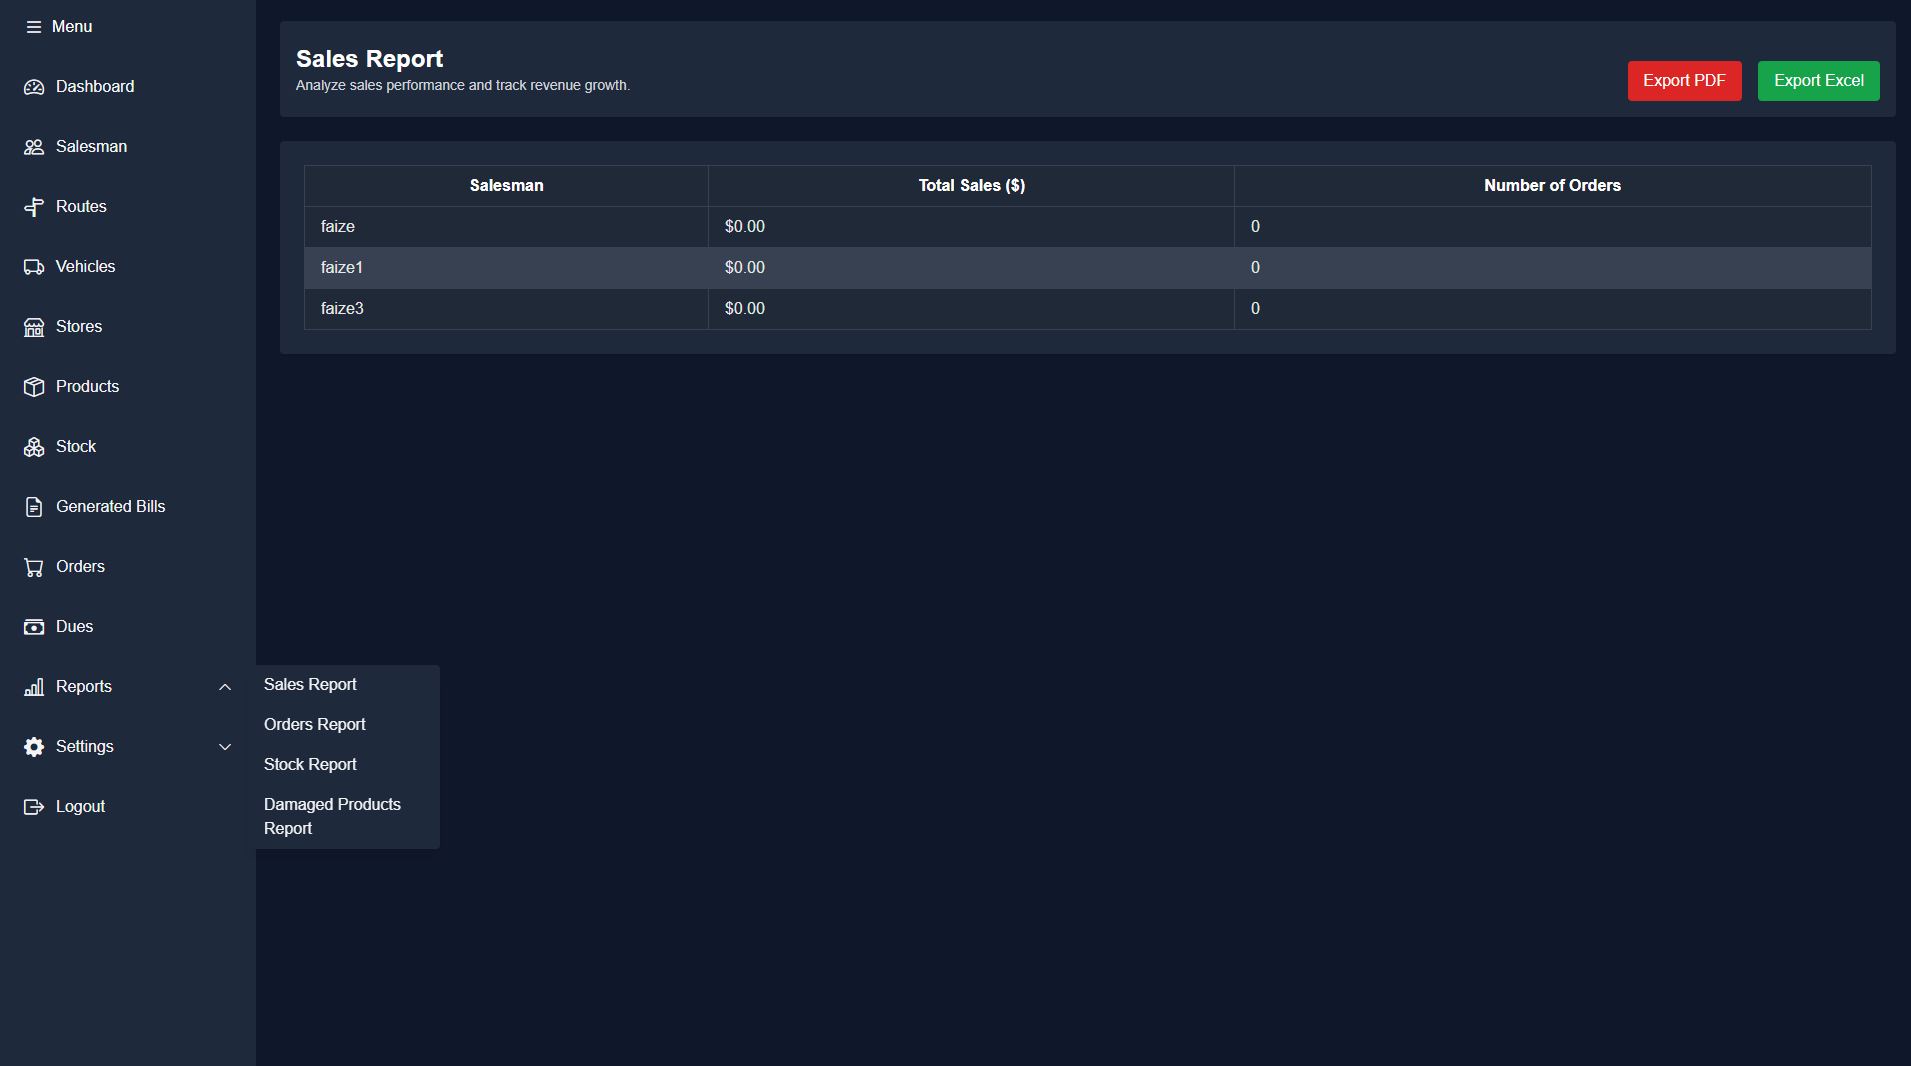
Reports help you monitor business performance. To view reports:
- Click Reports in the sidebar.
- Choose a report type (Sales, Orders, Stock, or Damaged Products Report).
- Use the export buttons to save reports as PDF or Excel files.
16. Setting Up SMTP
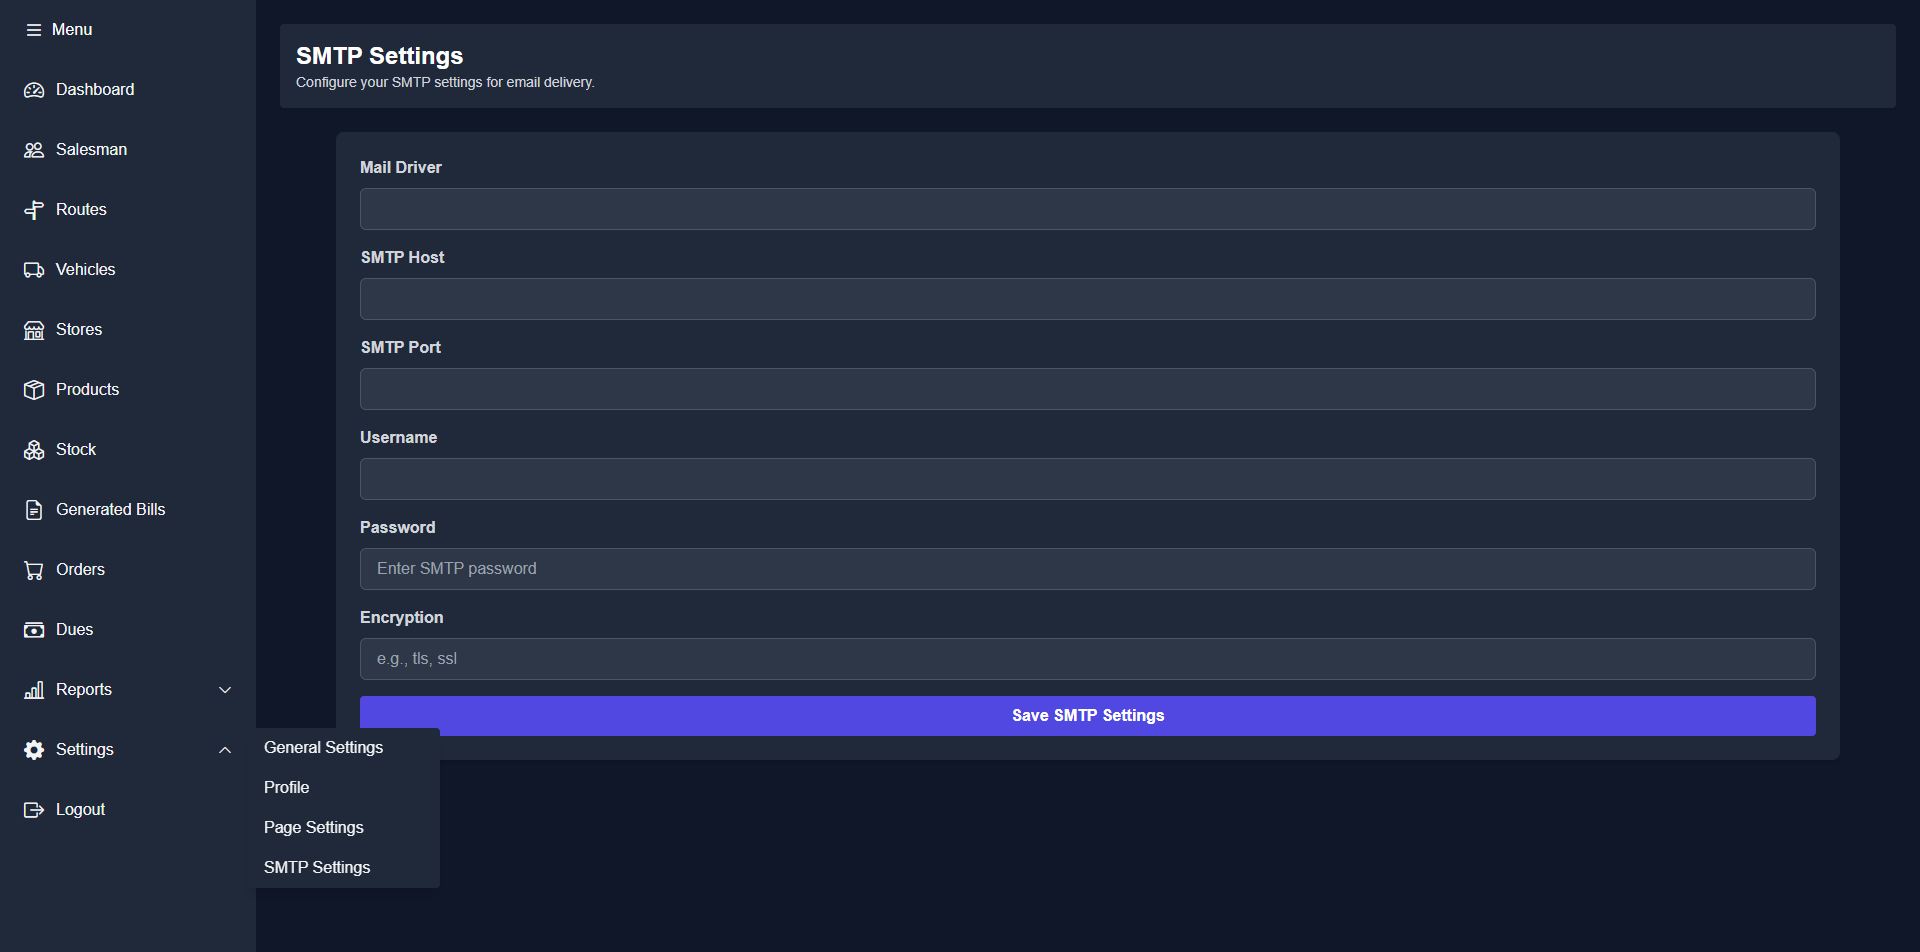
Configure SMTP to enable automated emails such as invoices and notifications:
- Access SMTP Settings:
- Click SMTP Settings in the sidebar (under the Settings menu).
- Enter SMTP Details:
- Mail Driver: smtp
- SMTP Host: e.g., smtp.yourbusiness.com
- SMTP Port: e.g., 587 for TLS or 465 for SSL
- Username and Password: Your email credentials
- Encryption: TLS or SSL
- Save SMTP Settings:
- Click Save Settings and confirm the success message.
17. Setting Up Timezone
After installing your application, go to the public/config/app.php file.
Locate the timezone setting, which by default is set to:
Change it to your local timezone. For example, if you are based in India, update it as follows:
Using the Mobile App (For Salesmen)
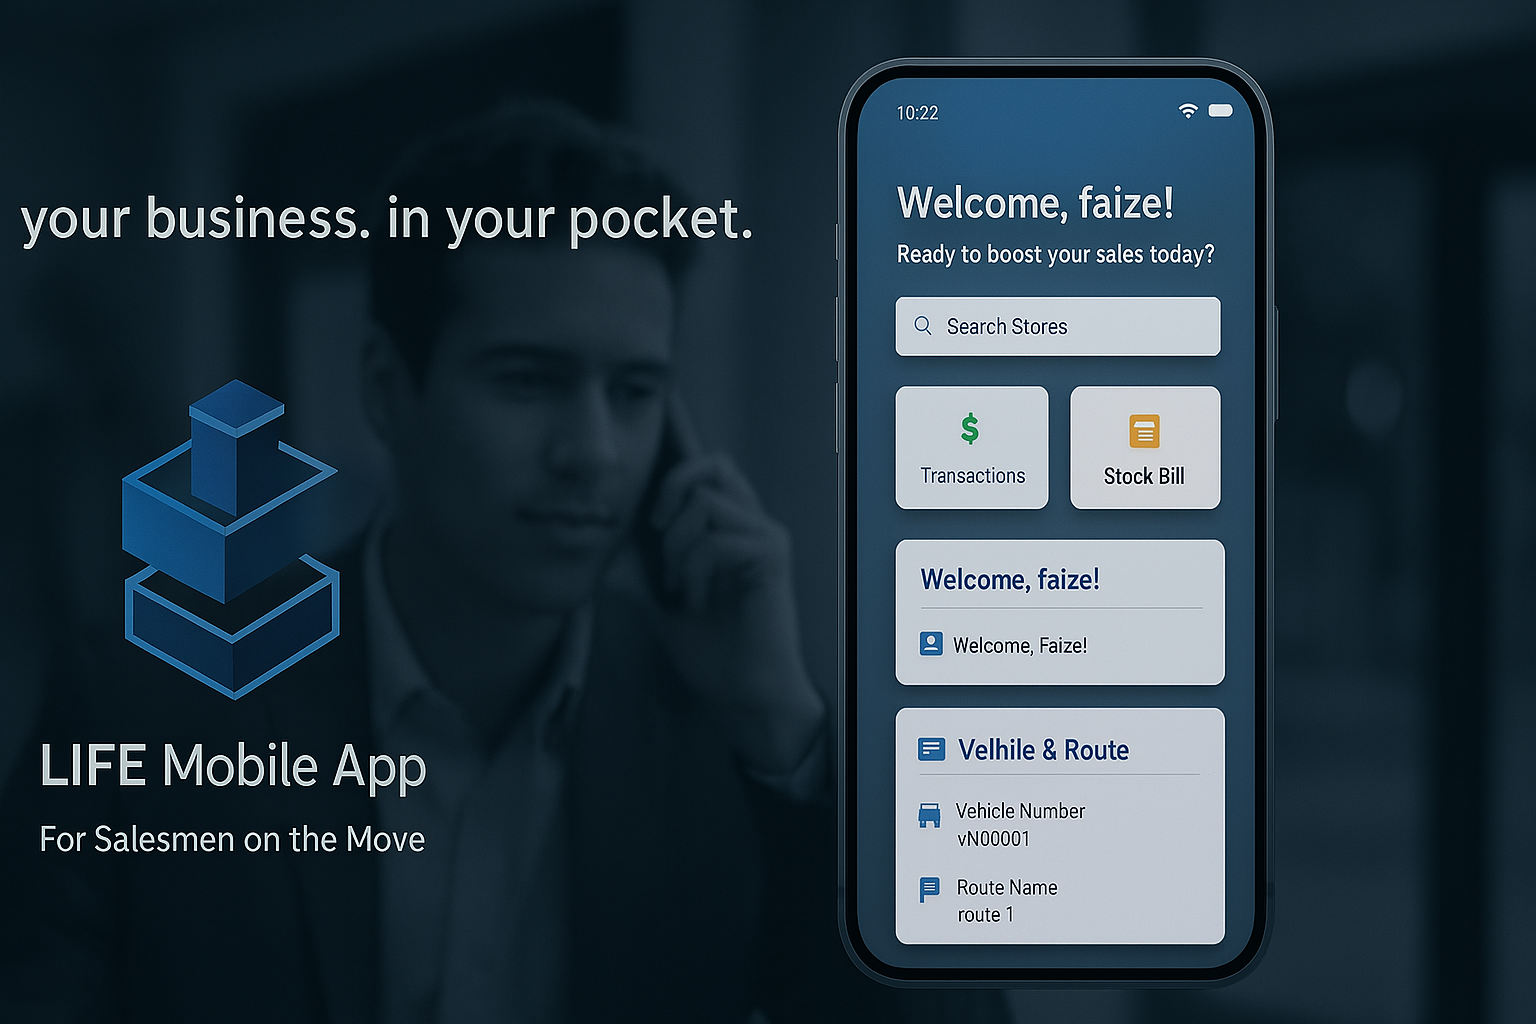
The mobile app is designed for salesmen to use on their Android devices while out selling.
1. Getting the App Ready
Set up the mobile app by following these steps:
- Extract the Downloaded File:
- Download the installable zip file from CodeCanyon and extract it.
- You will see two folders: Web Application (for your admin dashboard) and Flutter App (the mobile app source code).
- Open the Flutter App folder in your IDE (e.g., Visual Studio Code).
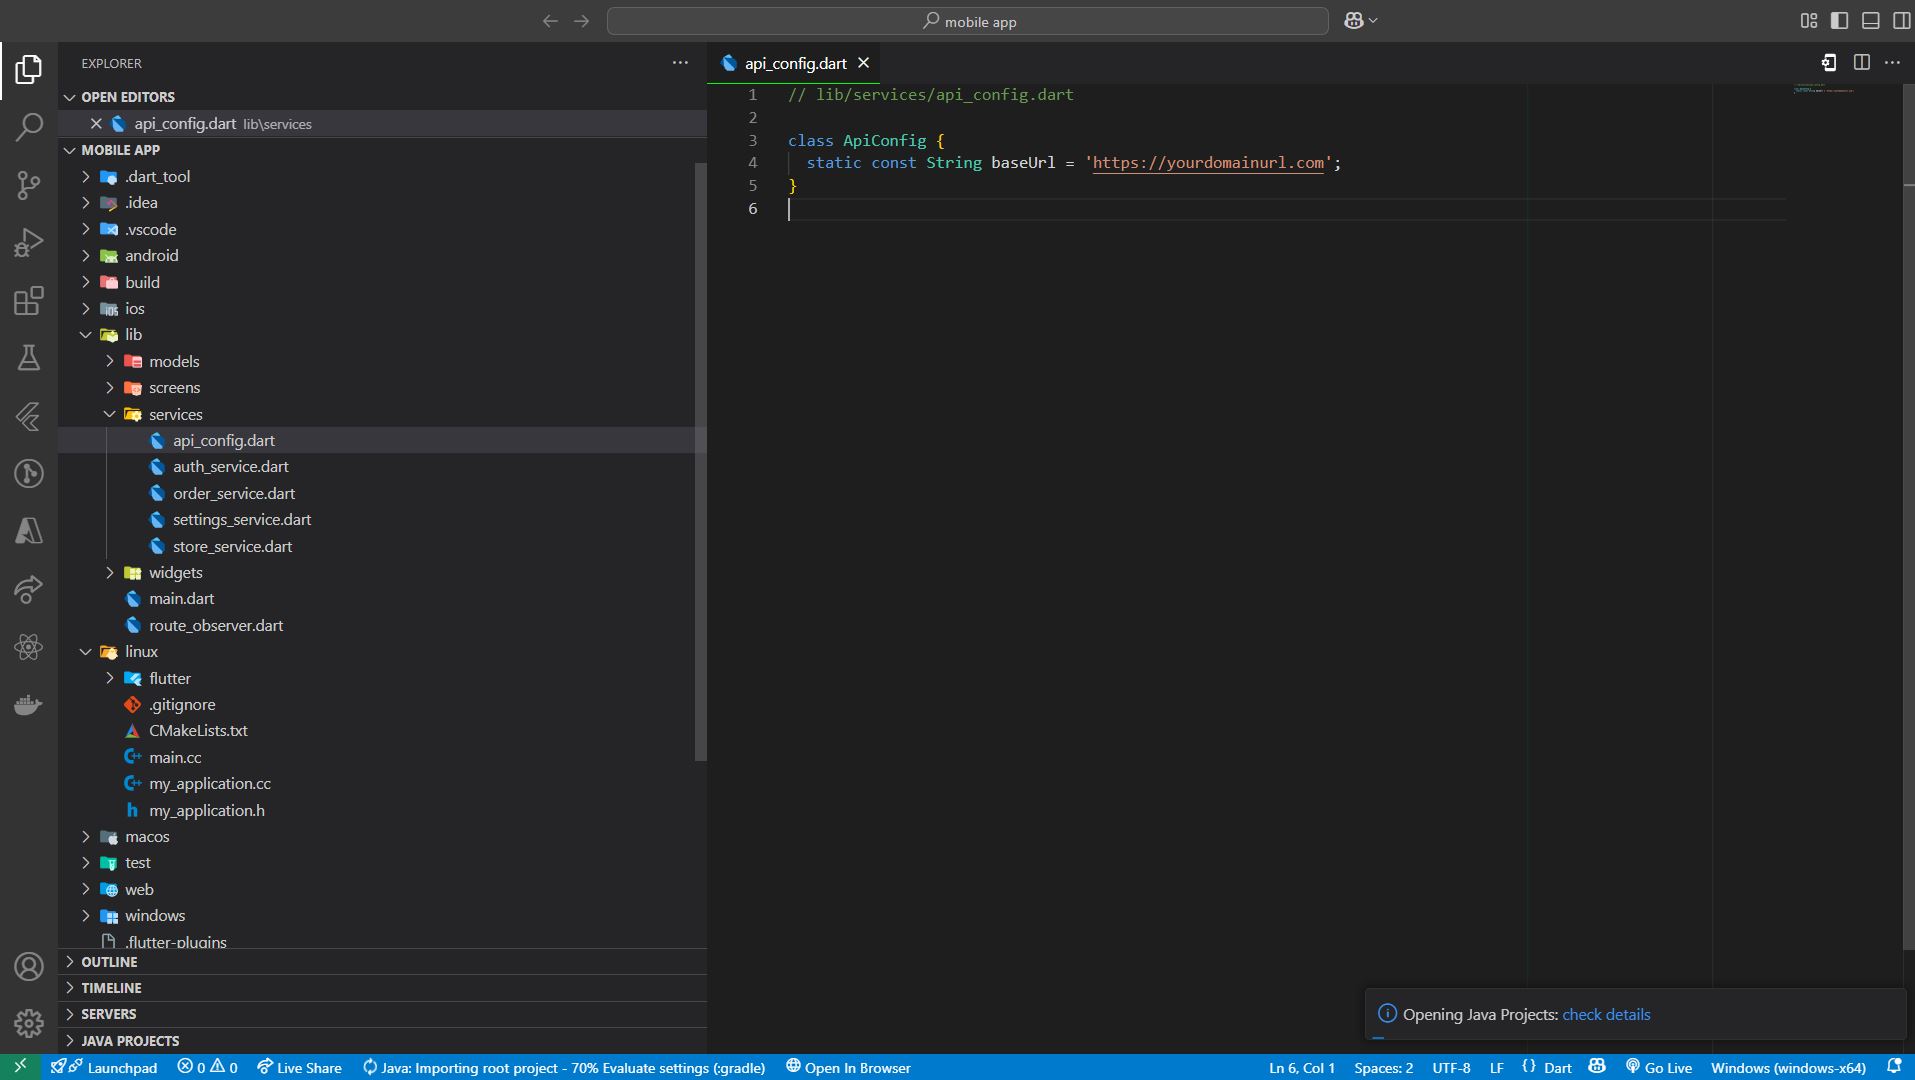
- Update the Website Address:
- Open the file lib/services/app_config.dart.
- Locate the baseUrl variable and change it to your web application’s URL, for example:
class ApiConfig {
static const String baseUrl = 'http://yourbusiness.com';
} - Save the file.
- Make the App File (APK):
- In the terminal, run flutter pub get and then flutter build apk.
- After the build completes, locate the APK file in build/app/outputs/flutter-apk (e.g., app-release.apk).
- Put the App on Phones:
- Transfer the APK file to the salesman’s Android device via USB or email.
- On the phone, open the file and follow the prompts to install the app.
2. Setting Up App Icon and App Name
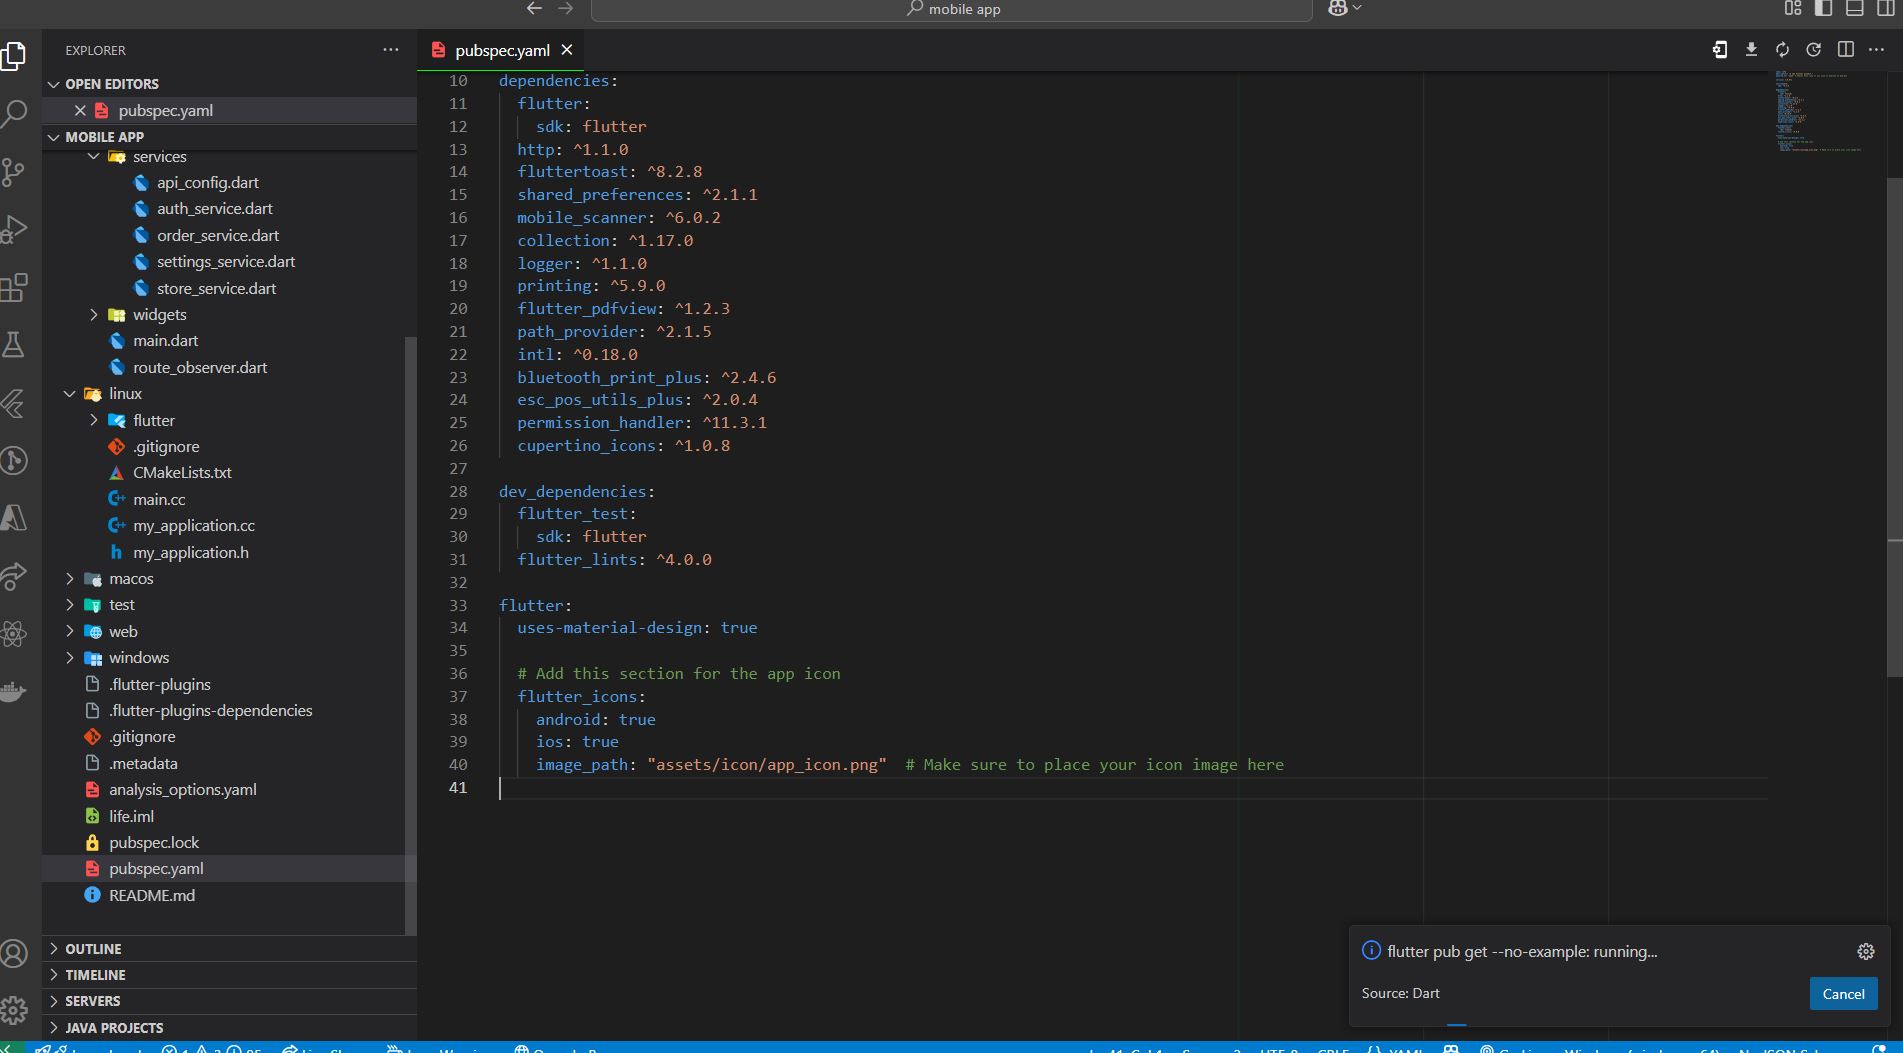
Customize your mobile app’s appearance:
- Update App Icon:
- Open pubspec.yaml and add the
flutter_launcher_iconspackage as a dev dependency. - Add the configuration for your icon image. For example:
dev_dependencies:
flutter_launcher_icons: ^0.9.2
flutter_icons:
android: true
iOS: false
image_path: "assets/icon/app_icon.png"
- Open pubspec.yaml and add the
- Run flutter pub get and then flutter pub run flutter_launcher_icons:main to generate new icons.
- Update App Name:
- Edit android/app/src/main/AndroidManifest.xml and modify the android:label attribute in the
<application>tag to your desired name (e.g., "My Business App").
- Edit android/app/src/main/AndroidManifest.xml and modify the android:label attribute in the
3. How Salesmen Use the App
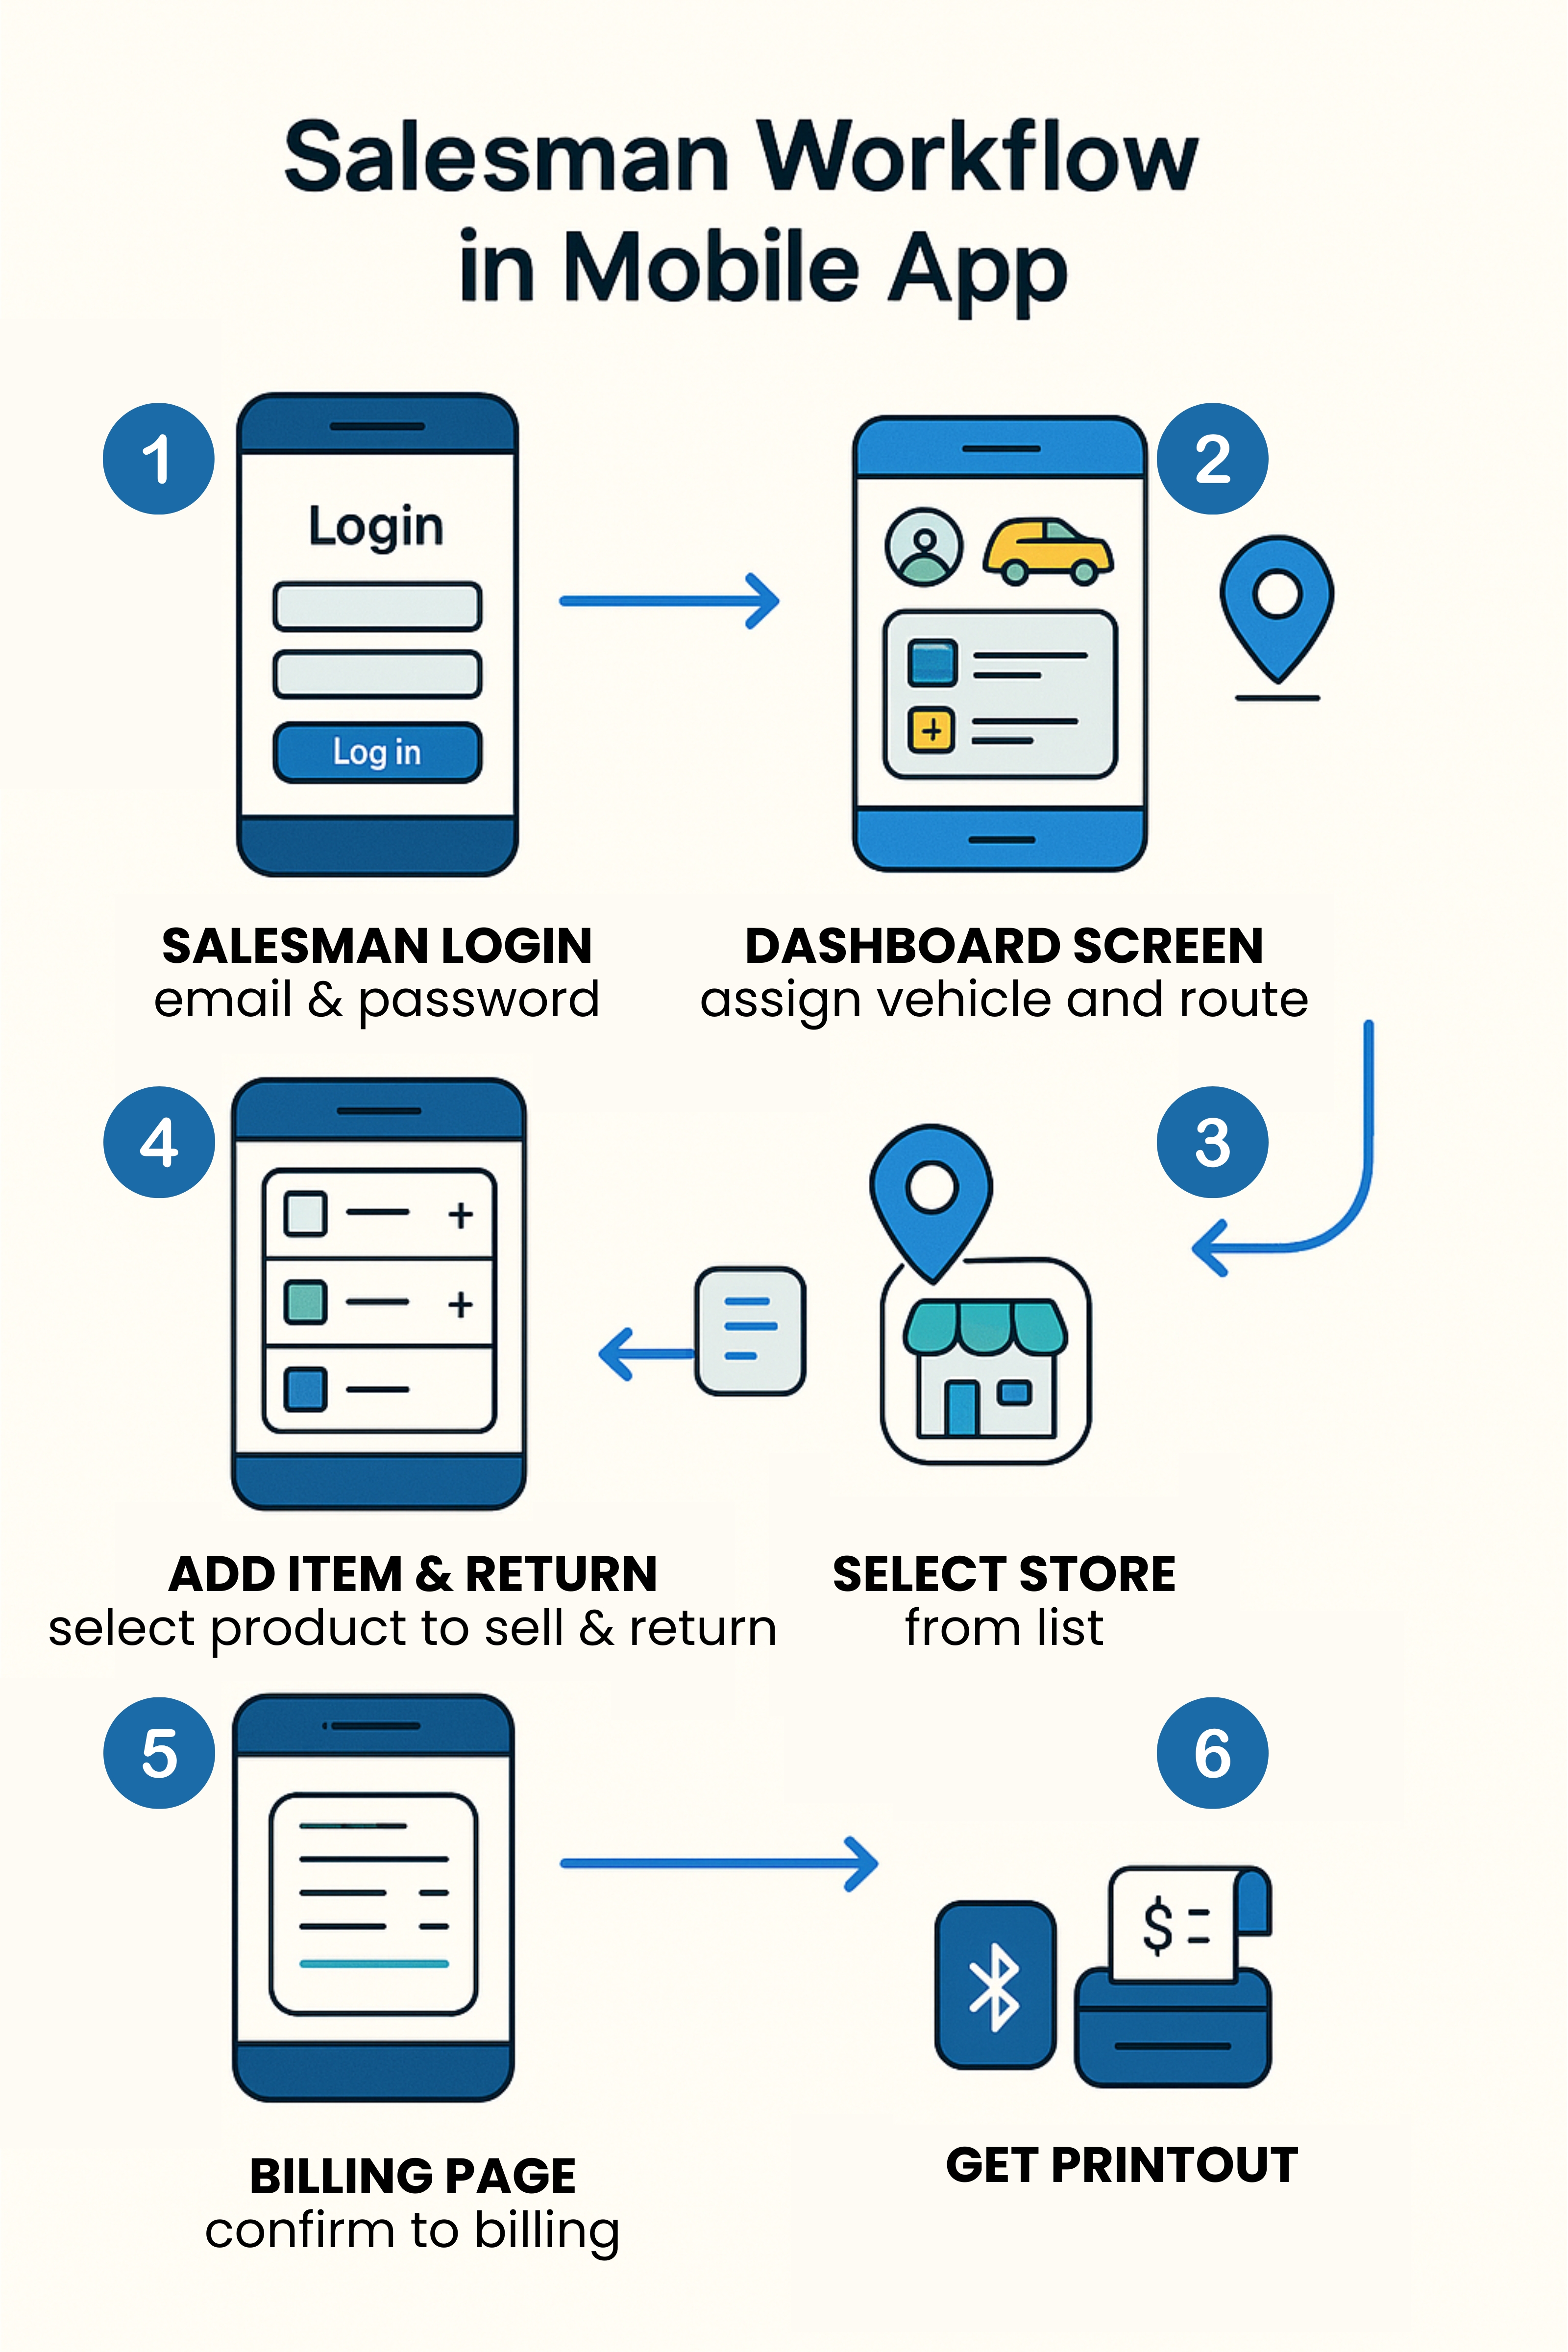
Once installed, the app is used by salesmen as follows:
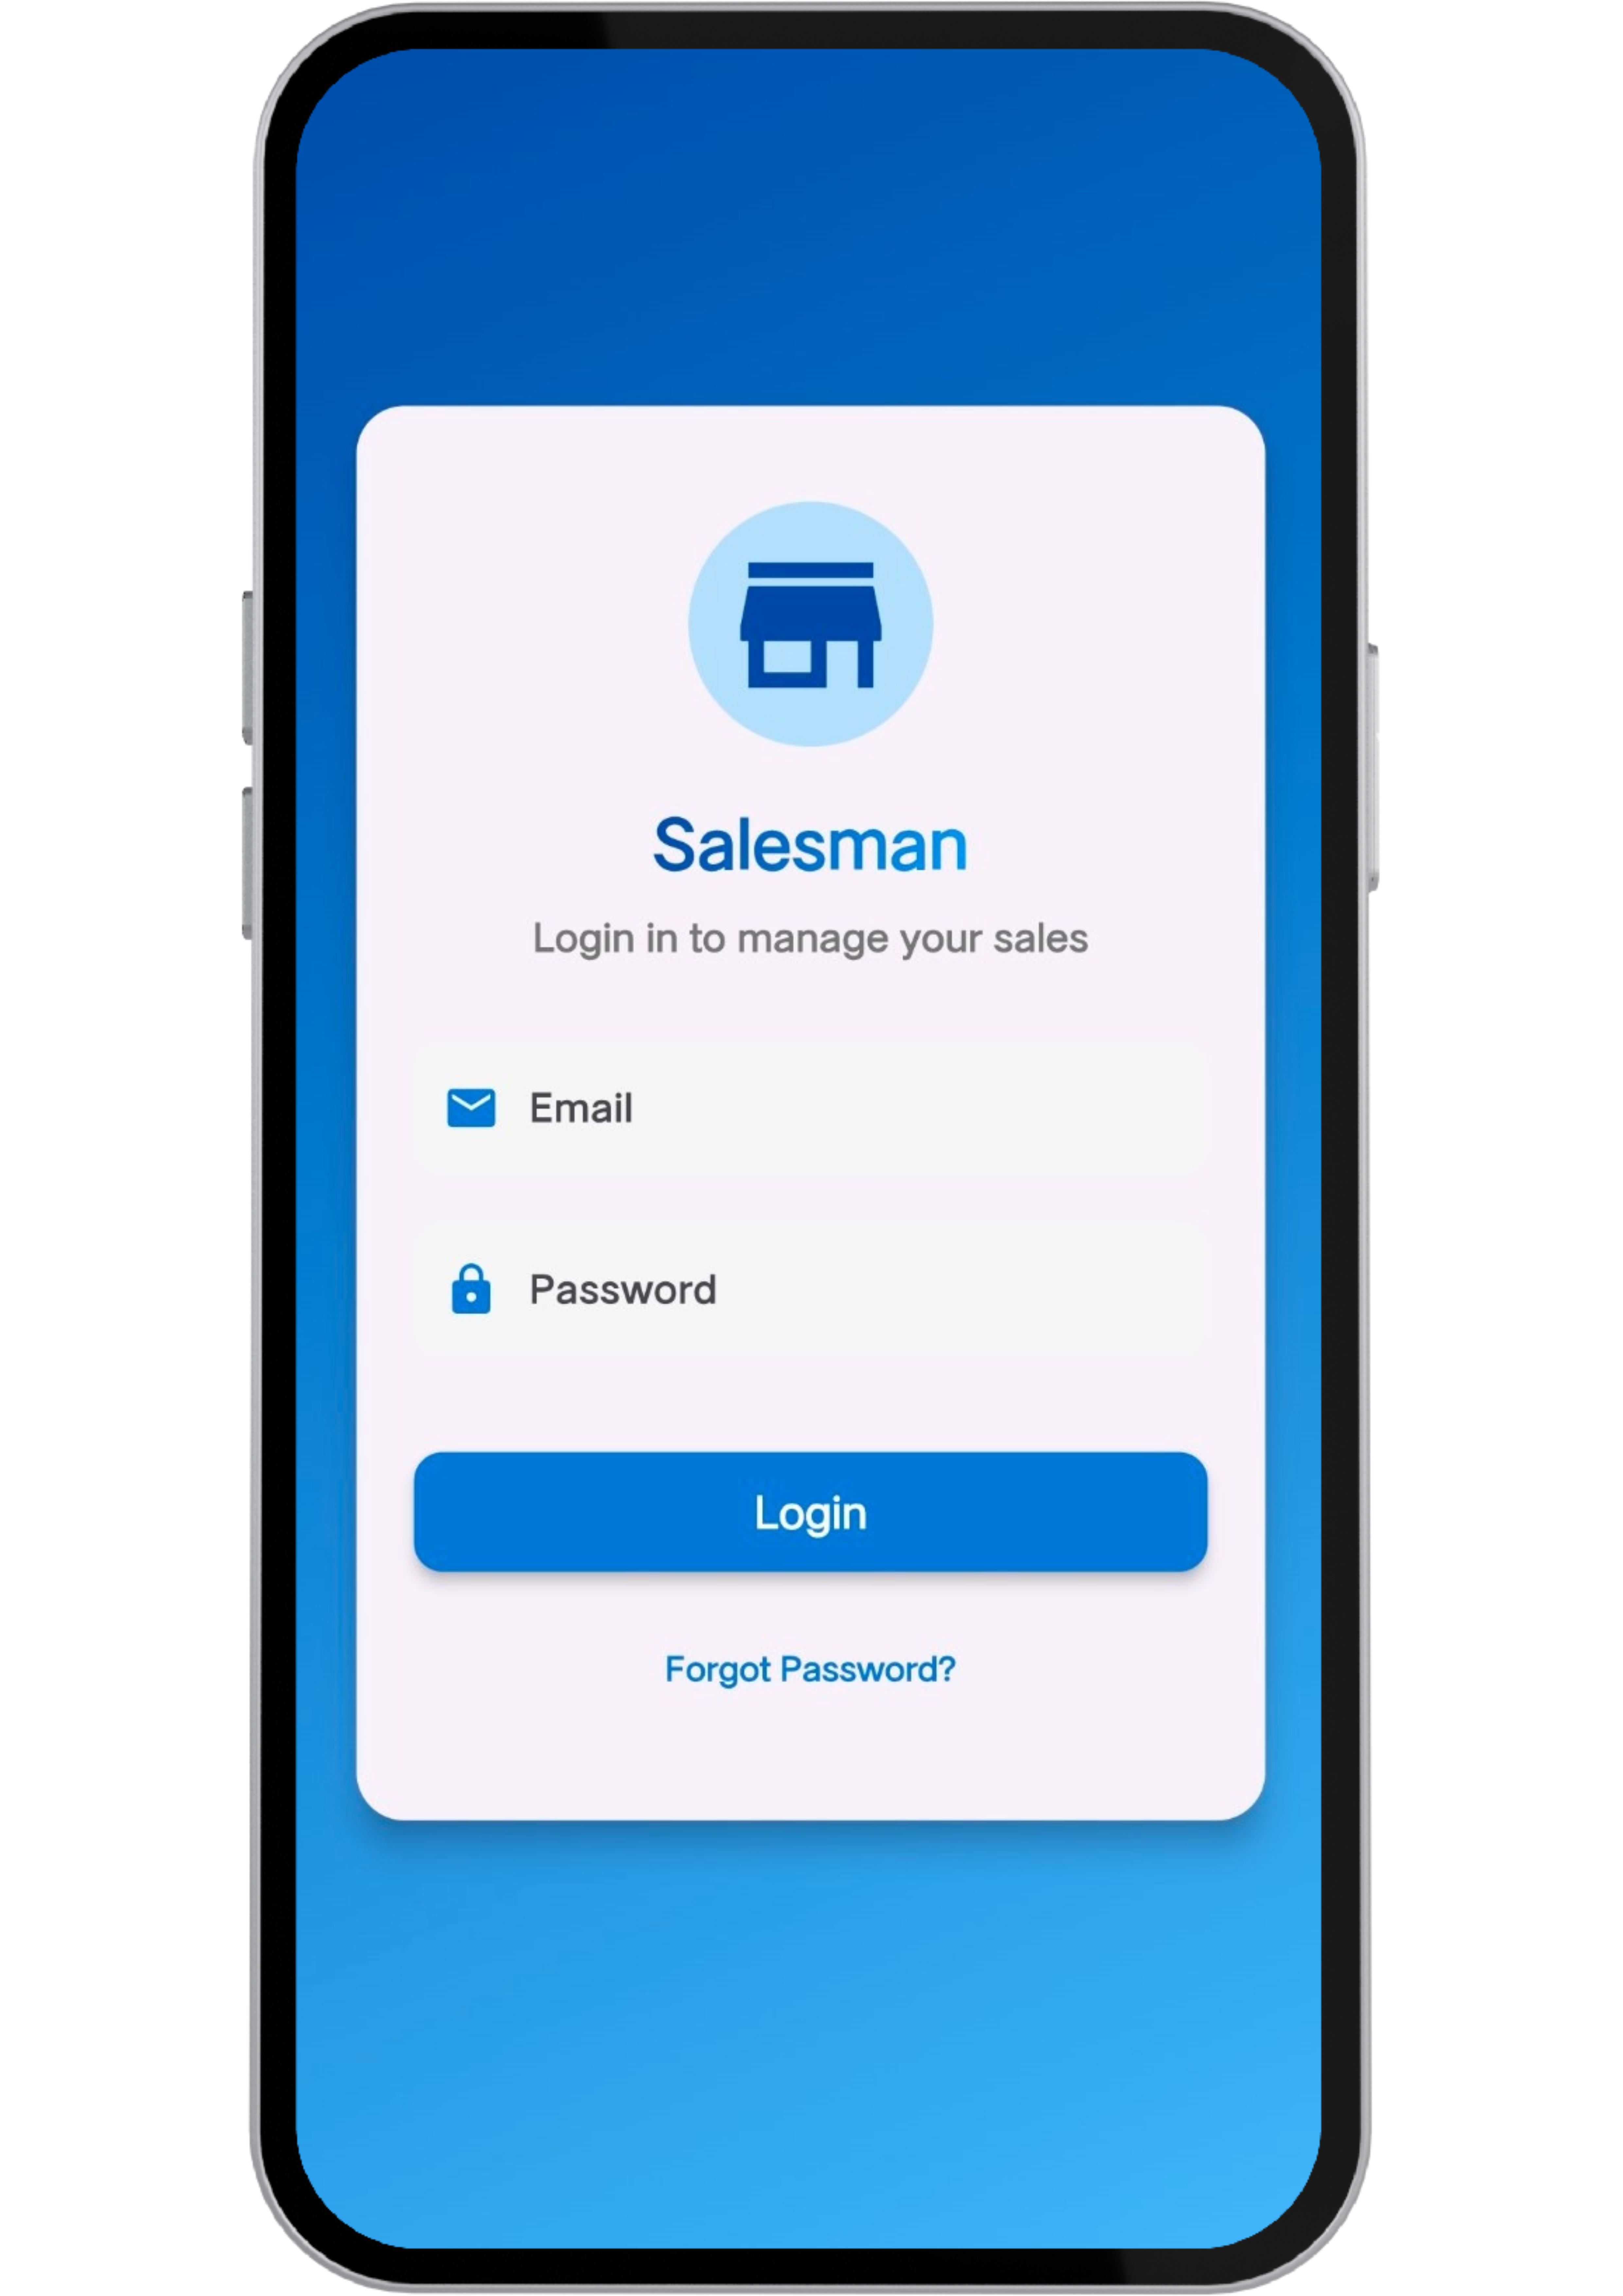
- Logging In:
- Open the “Life” app on your phone.
- Enter your assigned email and password.
- Tap Login to access your dashboard.
- Main Screen (Dashboard):
- View your name, phone number, assigned vehicle, and current stock.
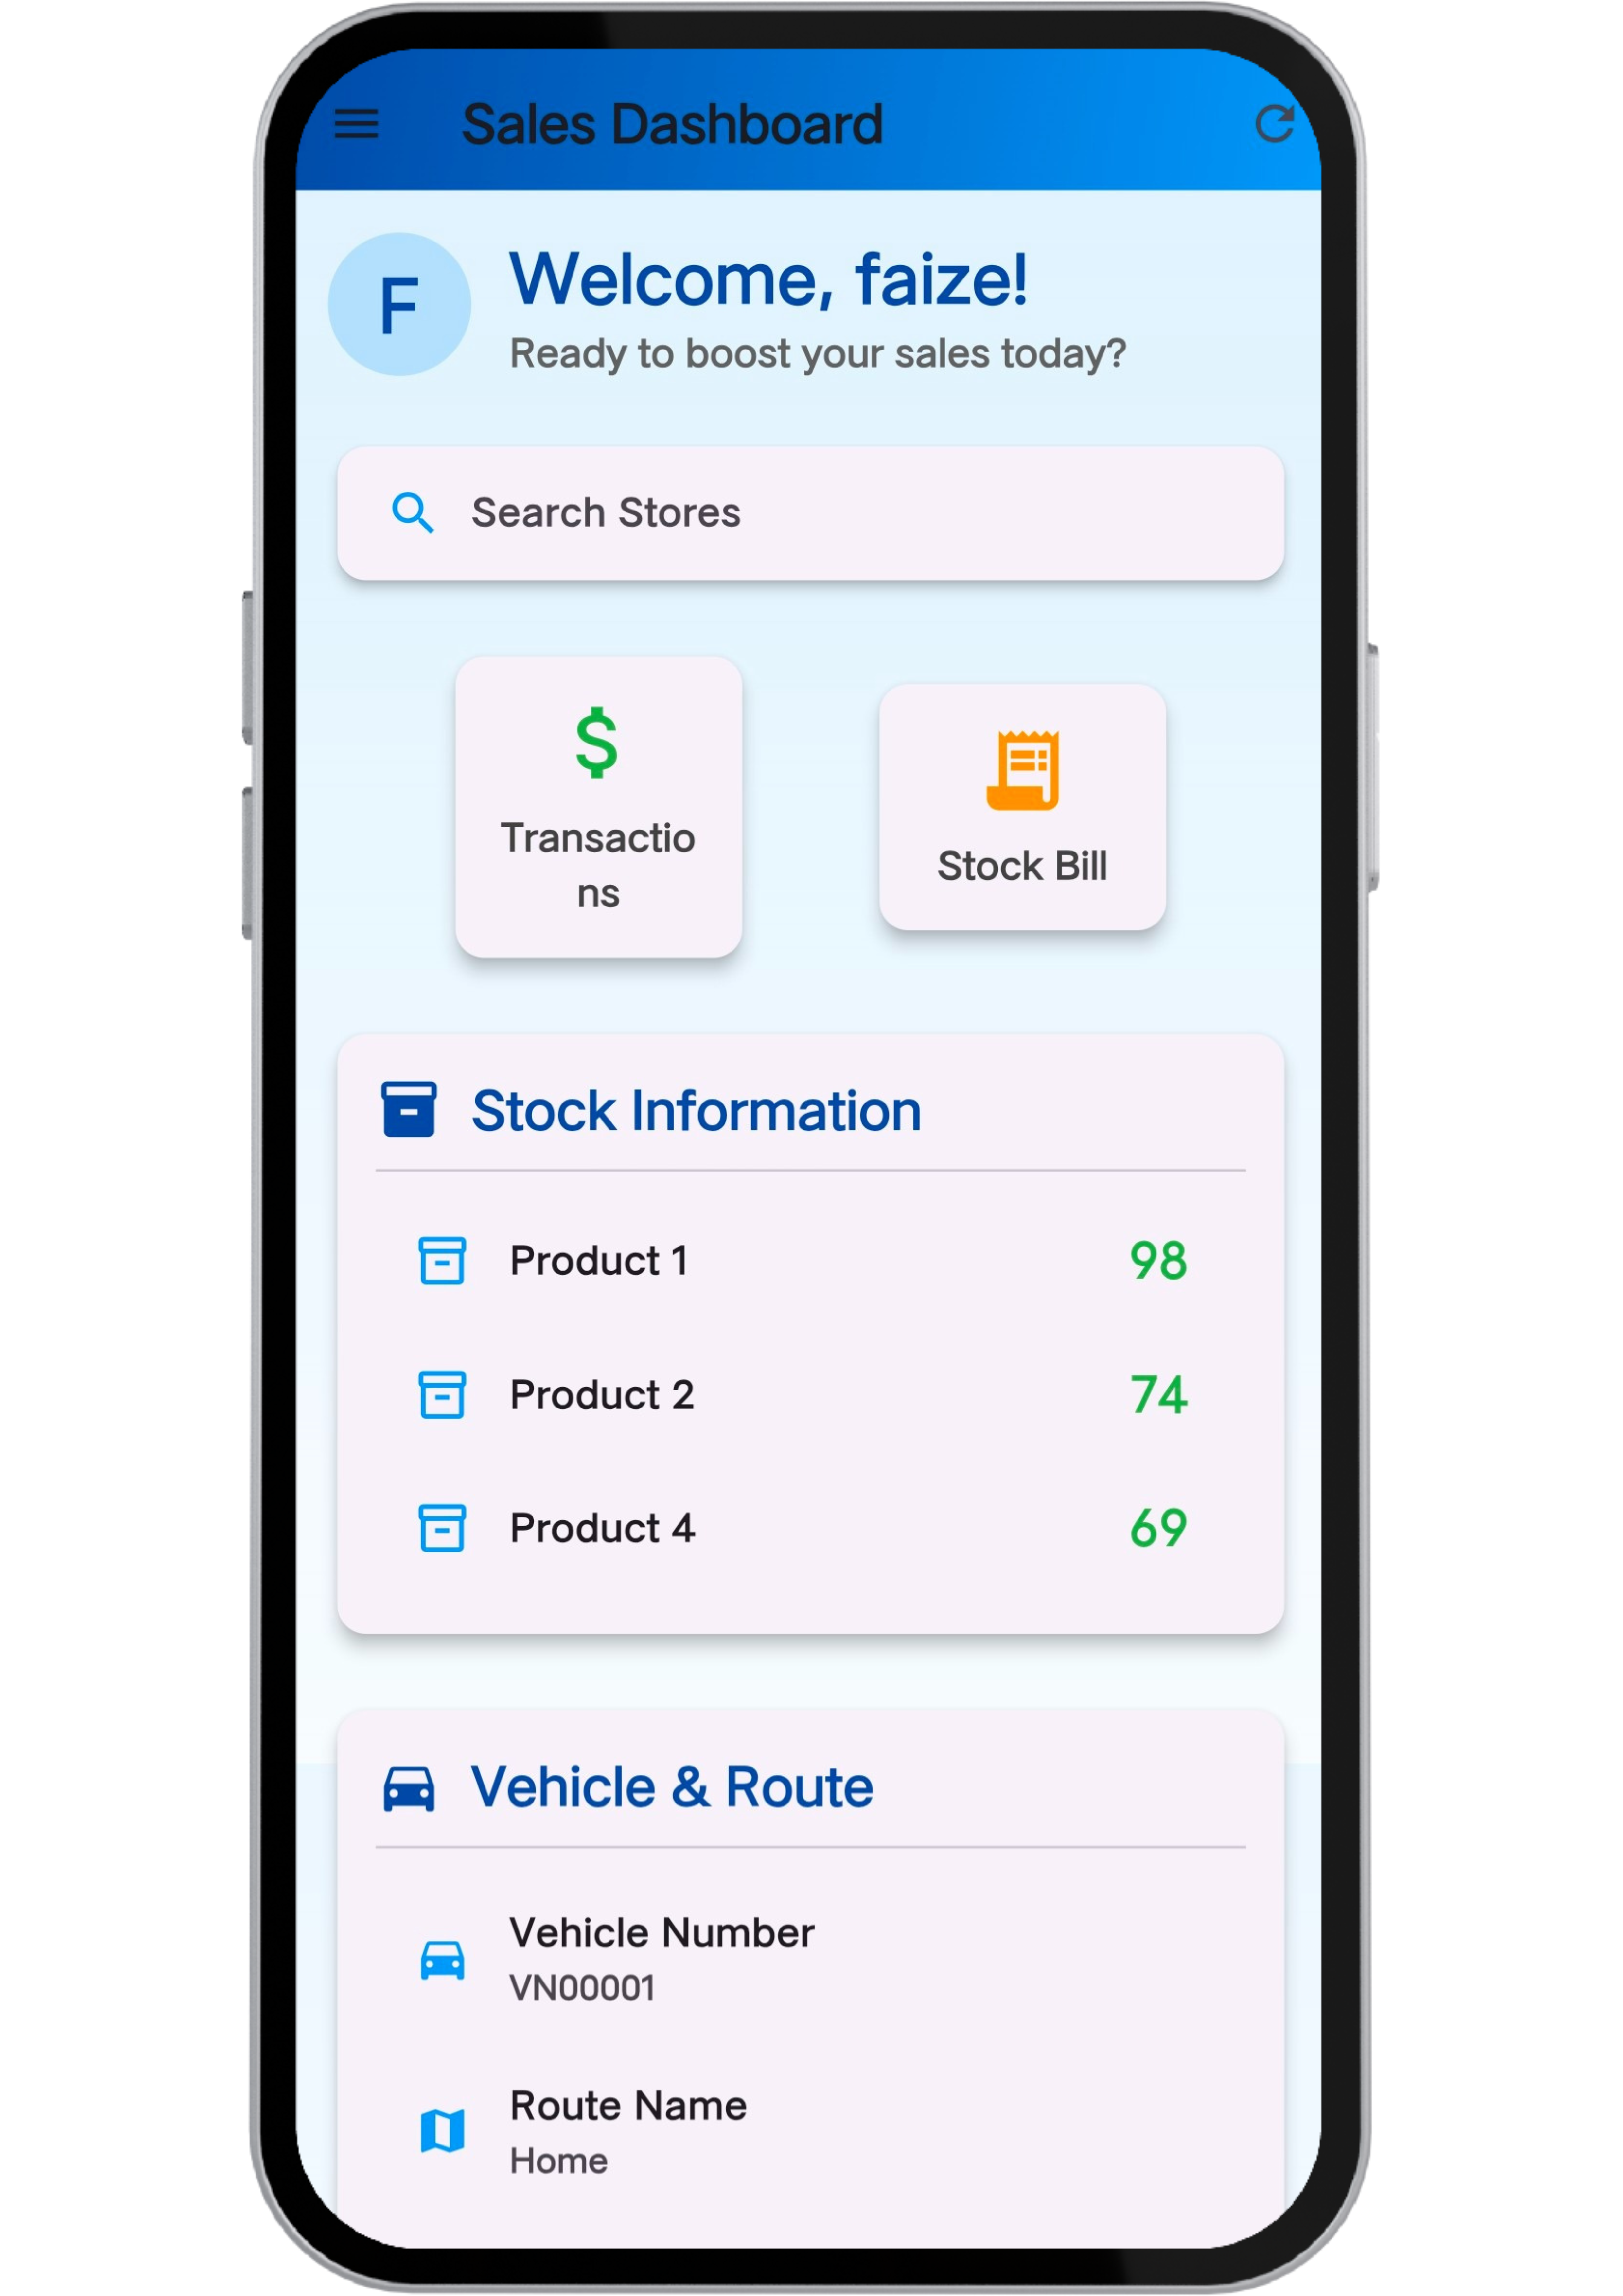
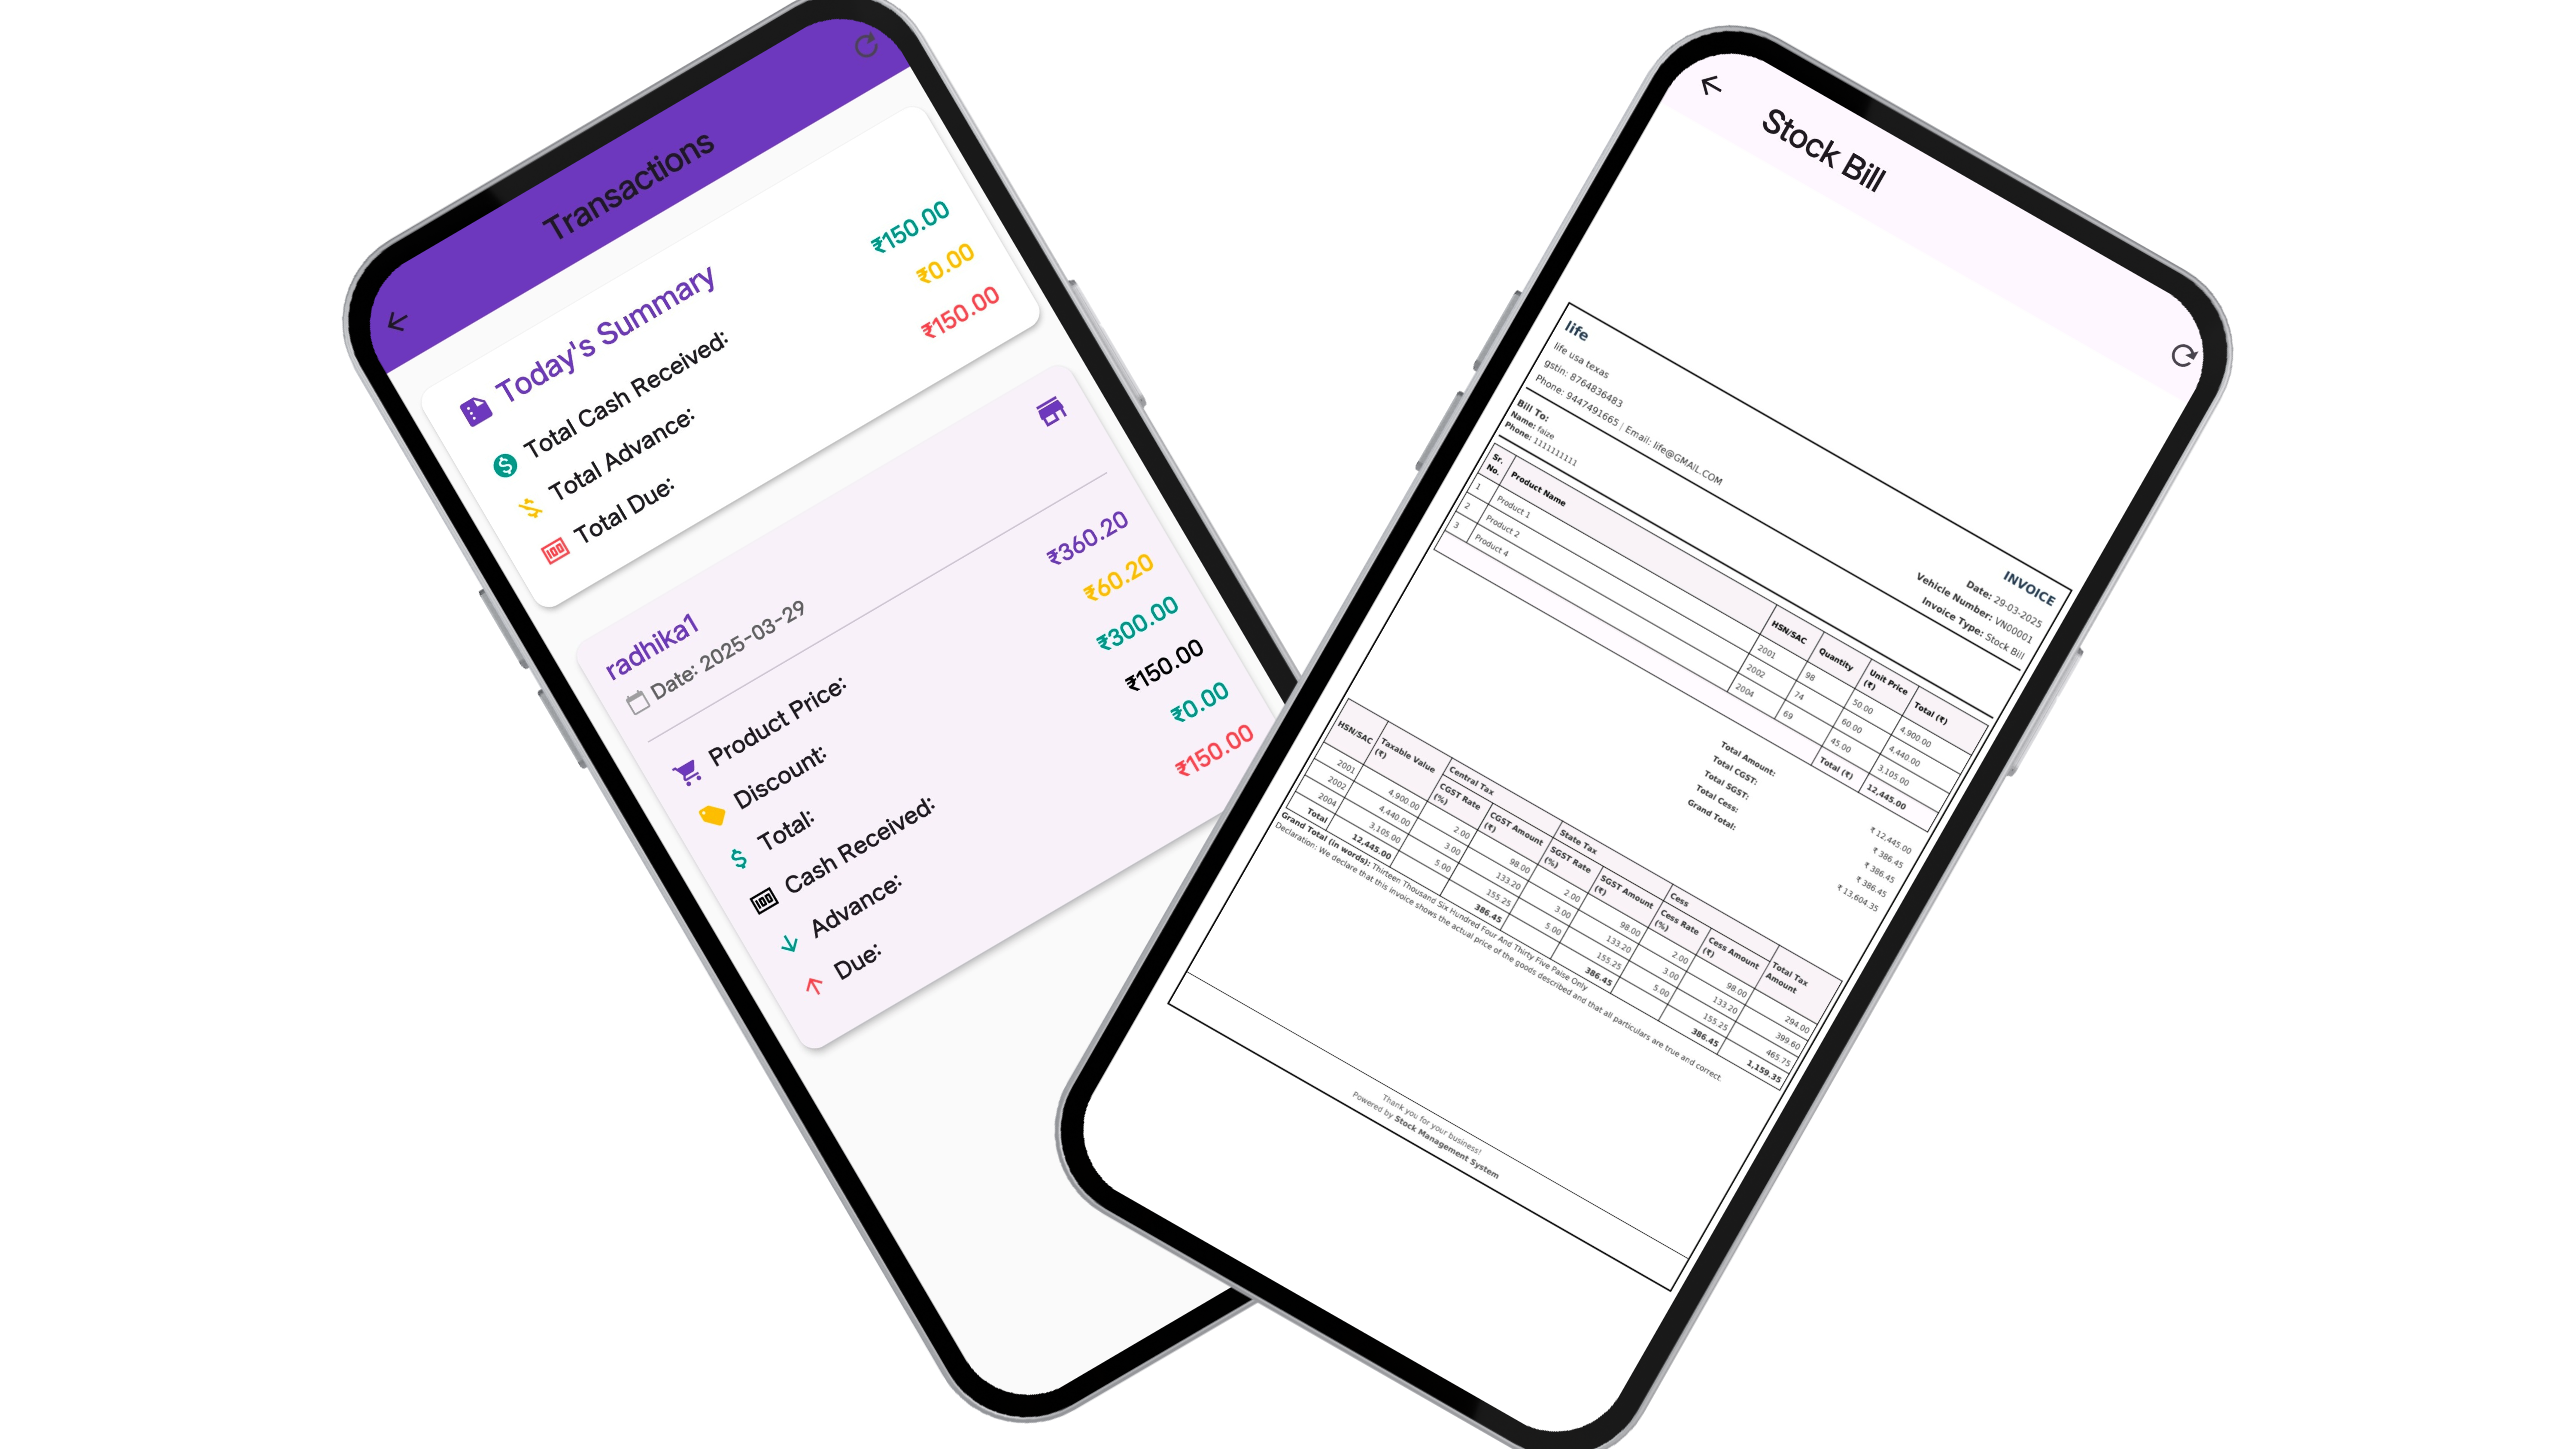
- Transactions & Stock Bill:
- Tap the hamburger menu (three lines in the top-left corner) to open the menu.
- Access Transactions (today’s sales) and Stock Bill (products in your vehicle).
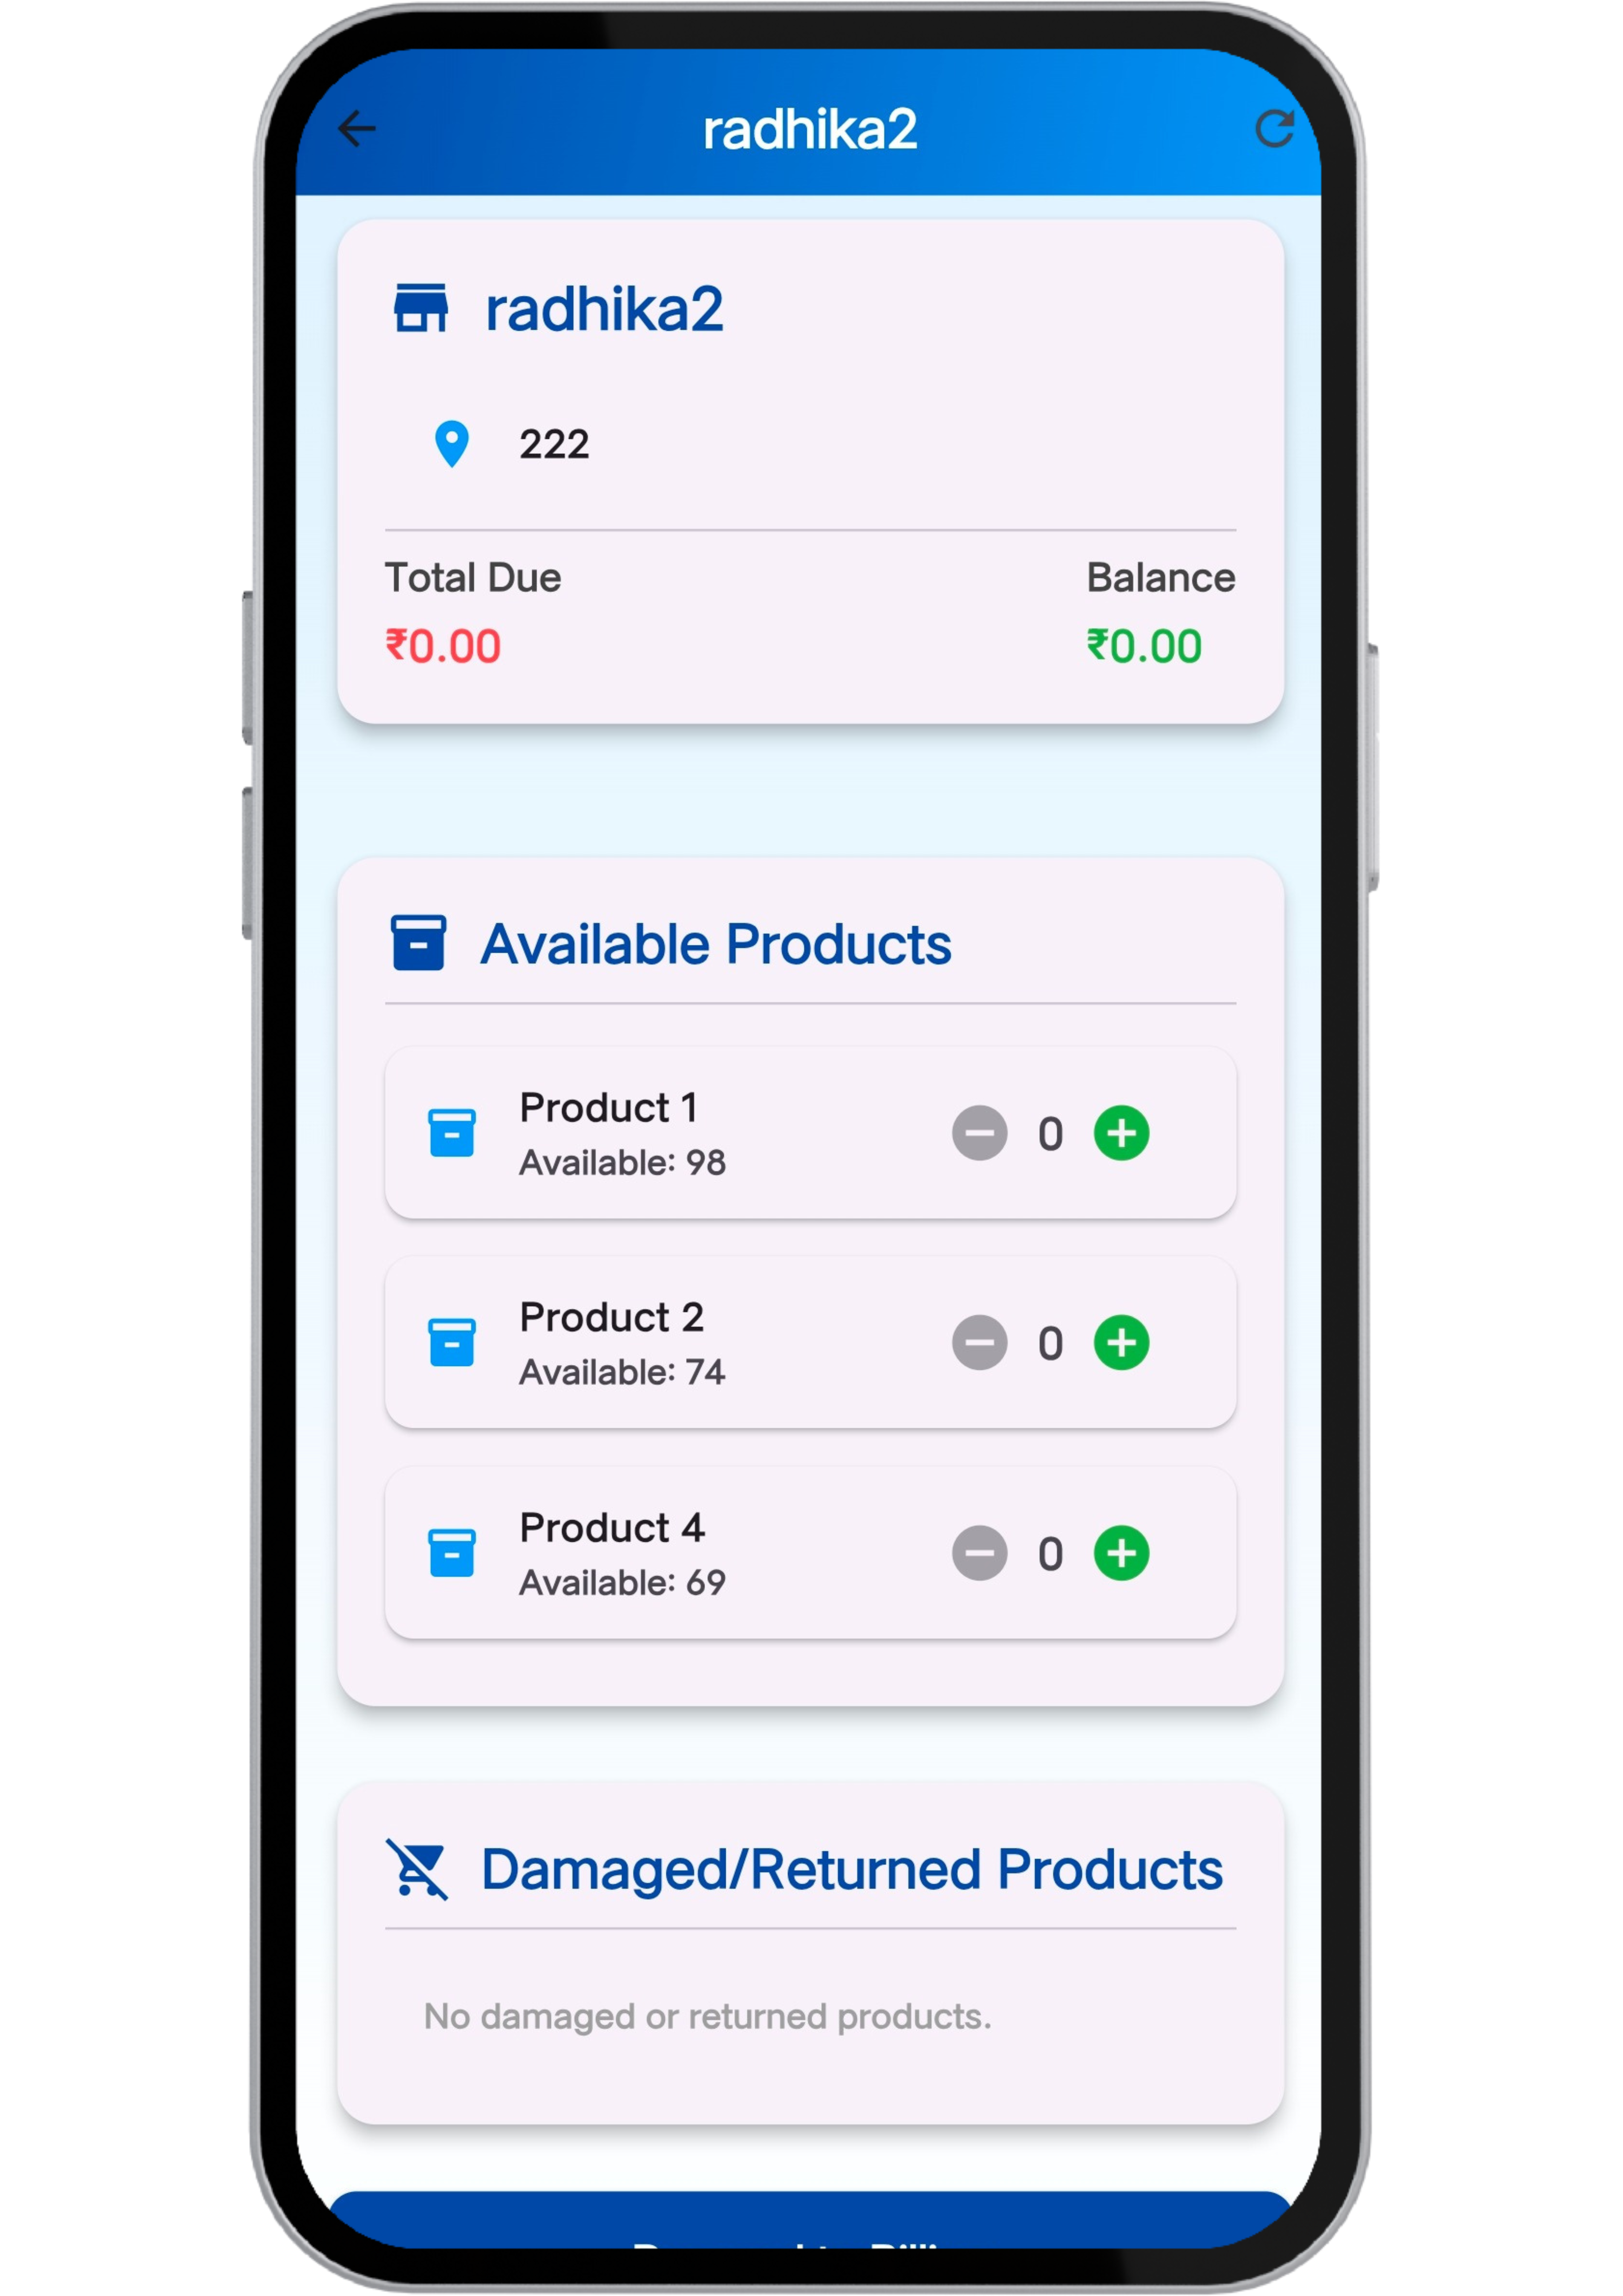
- Picking a Store:
- Use the search bar on the main screen to find the store and select it.
- View store details such as address and outstanding balance.
- Enter sold product quantities and any returned (damaged) items.
- Tap Proceed to Billing to generate the bill.
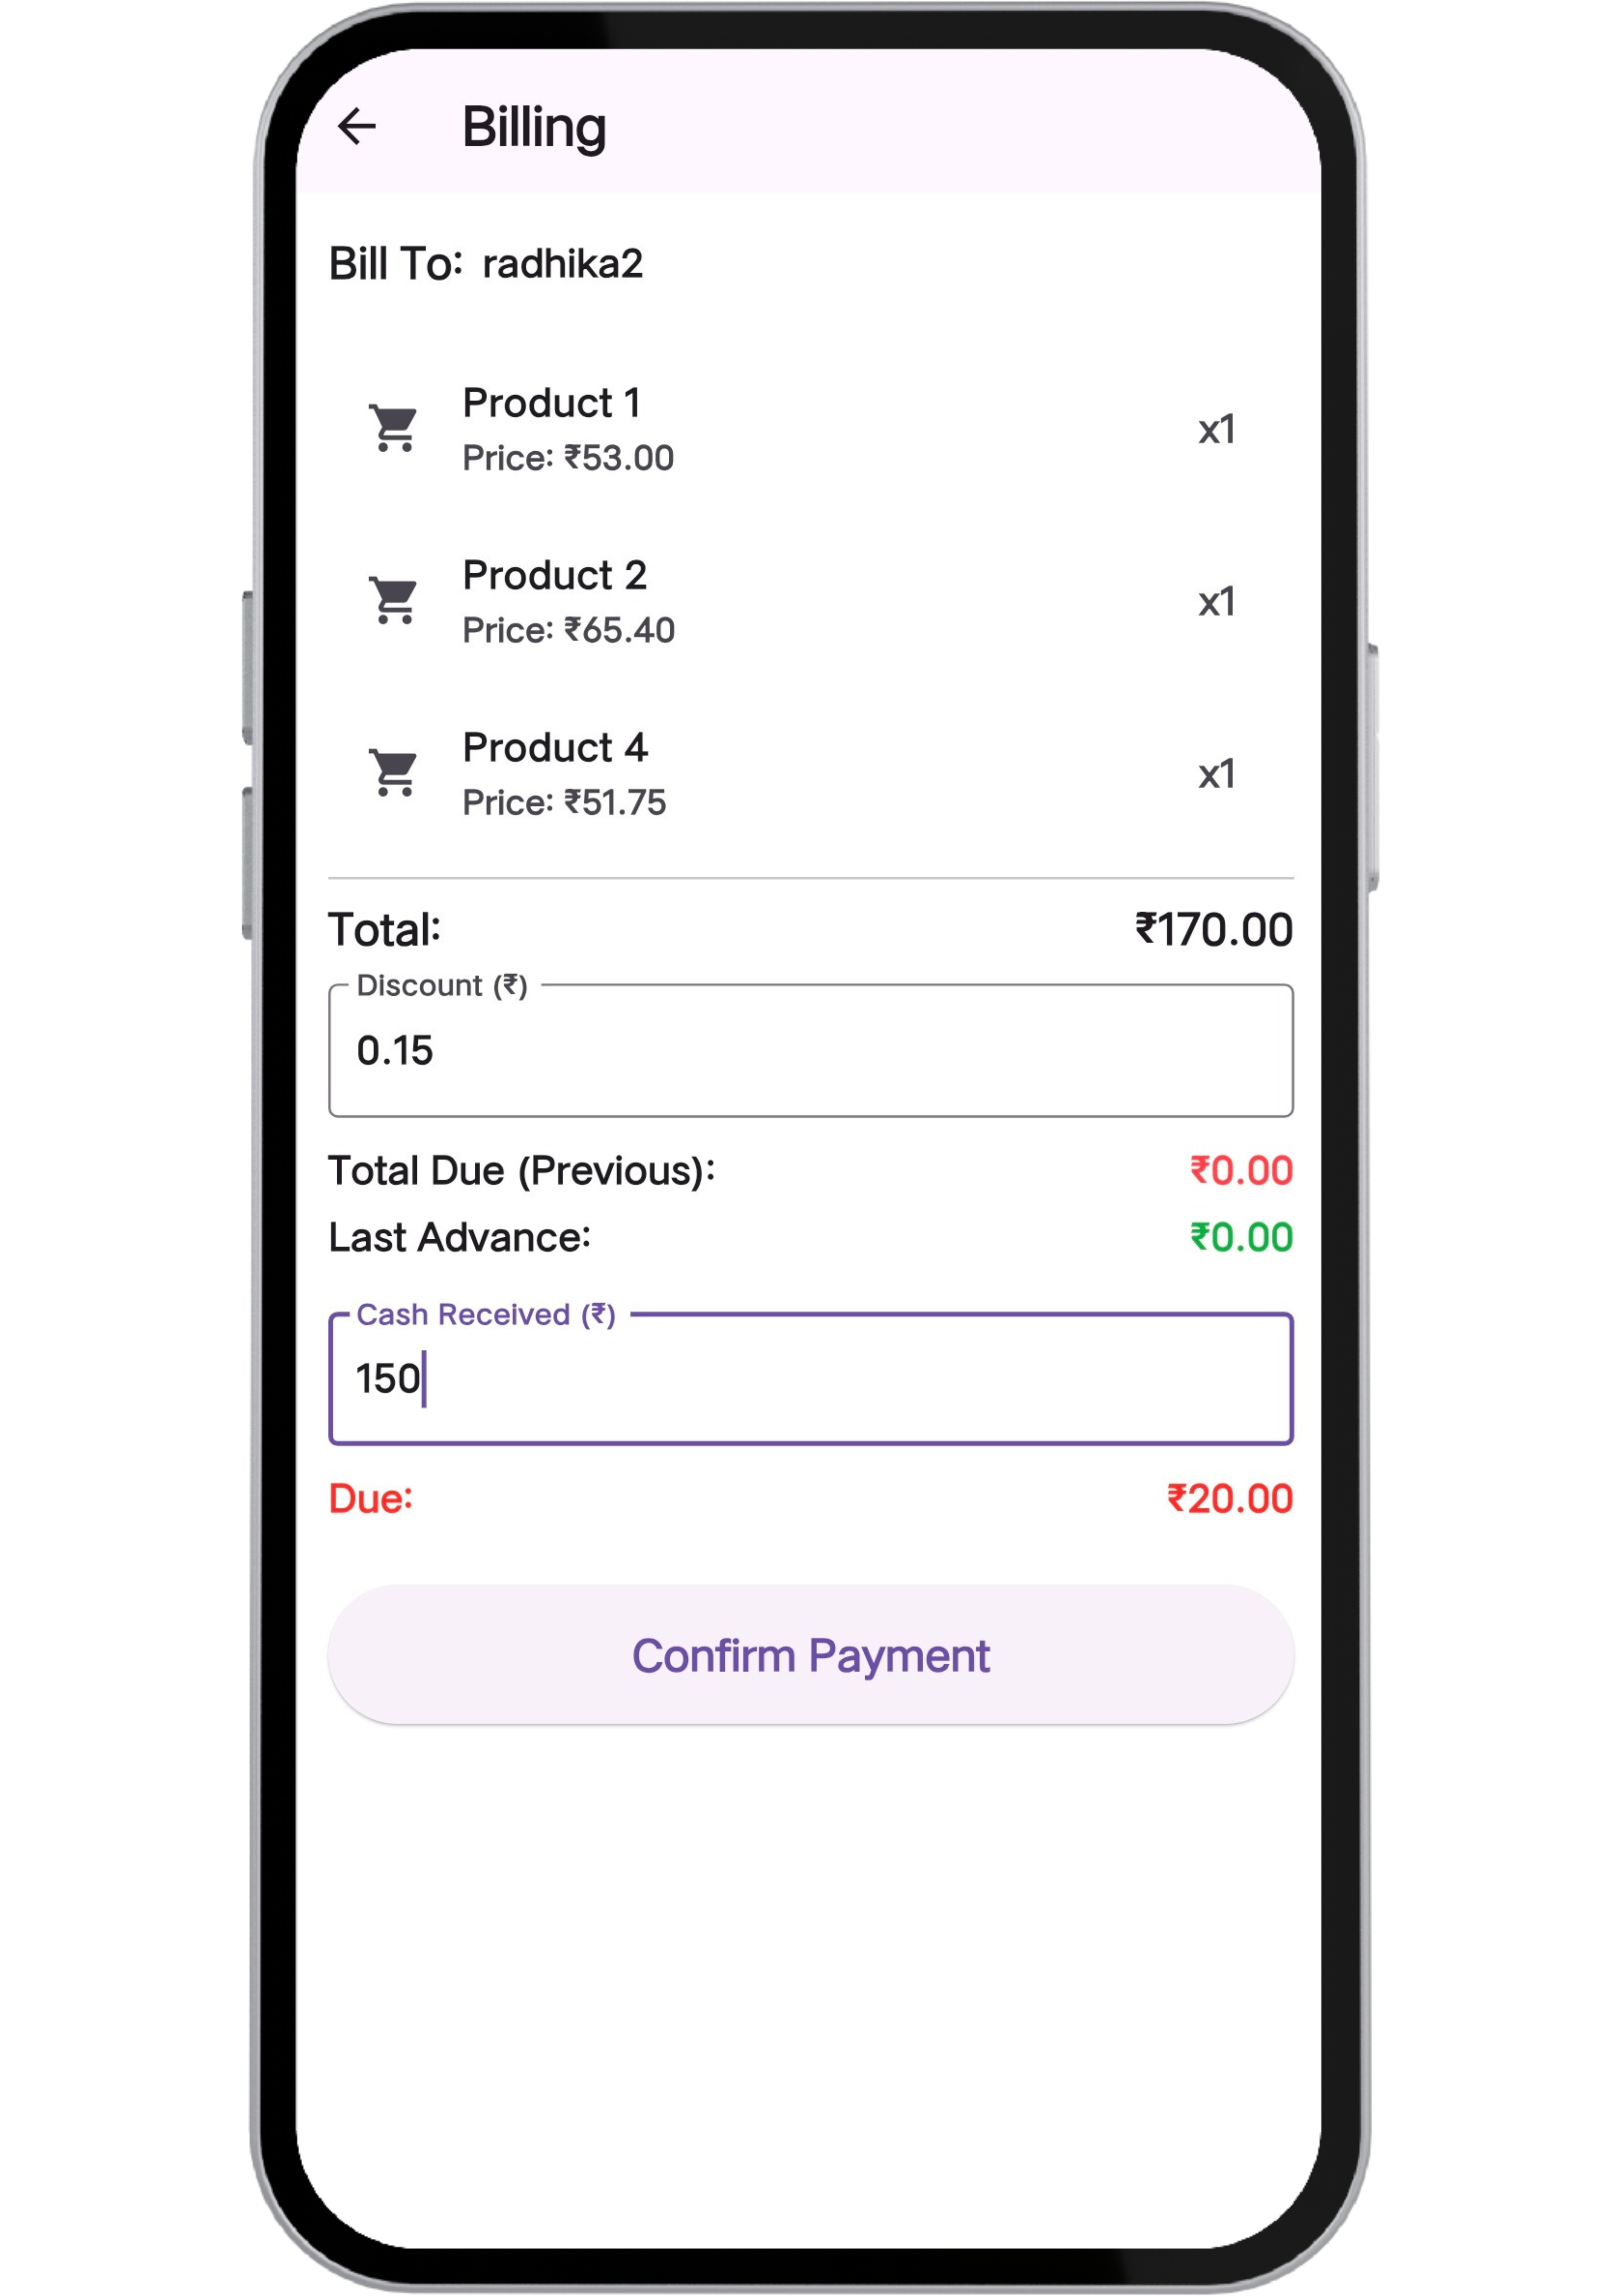
- Making the Bill:
- Review the bill details including products, total amount (with taxes), discounts, previous due, and cash received.
- Tap Confirm Payment and confirm the prompt.
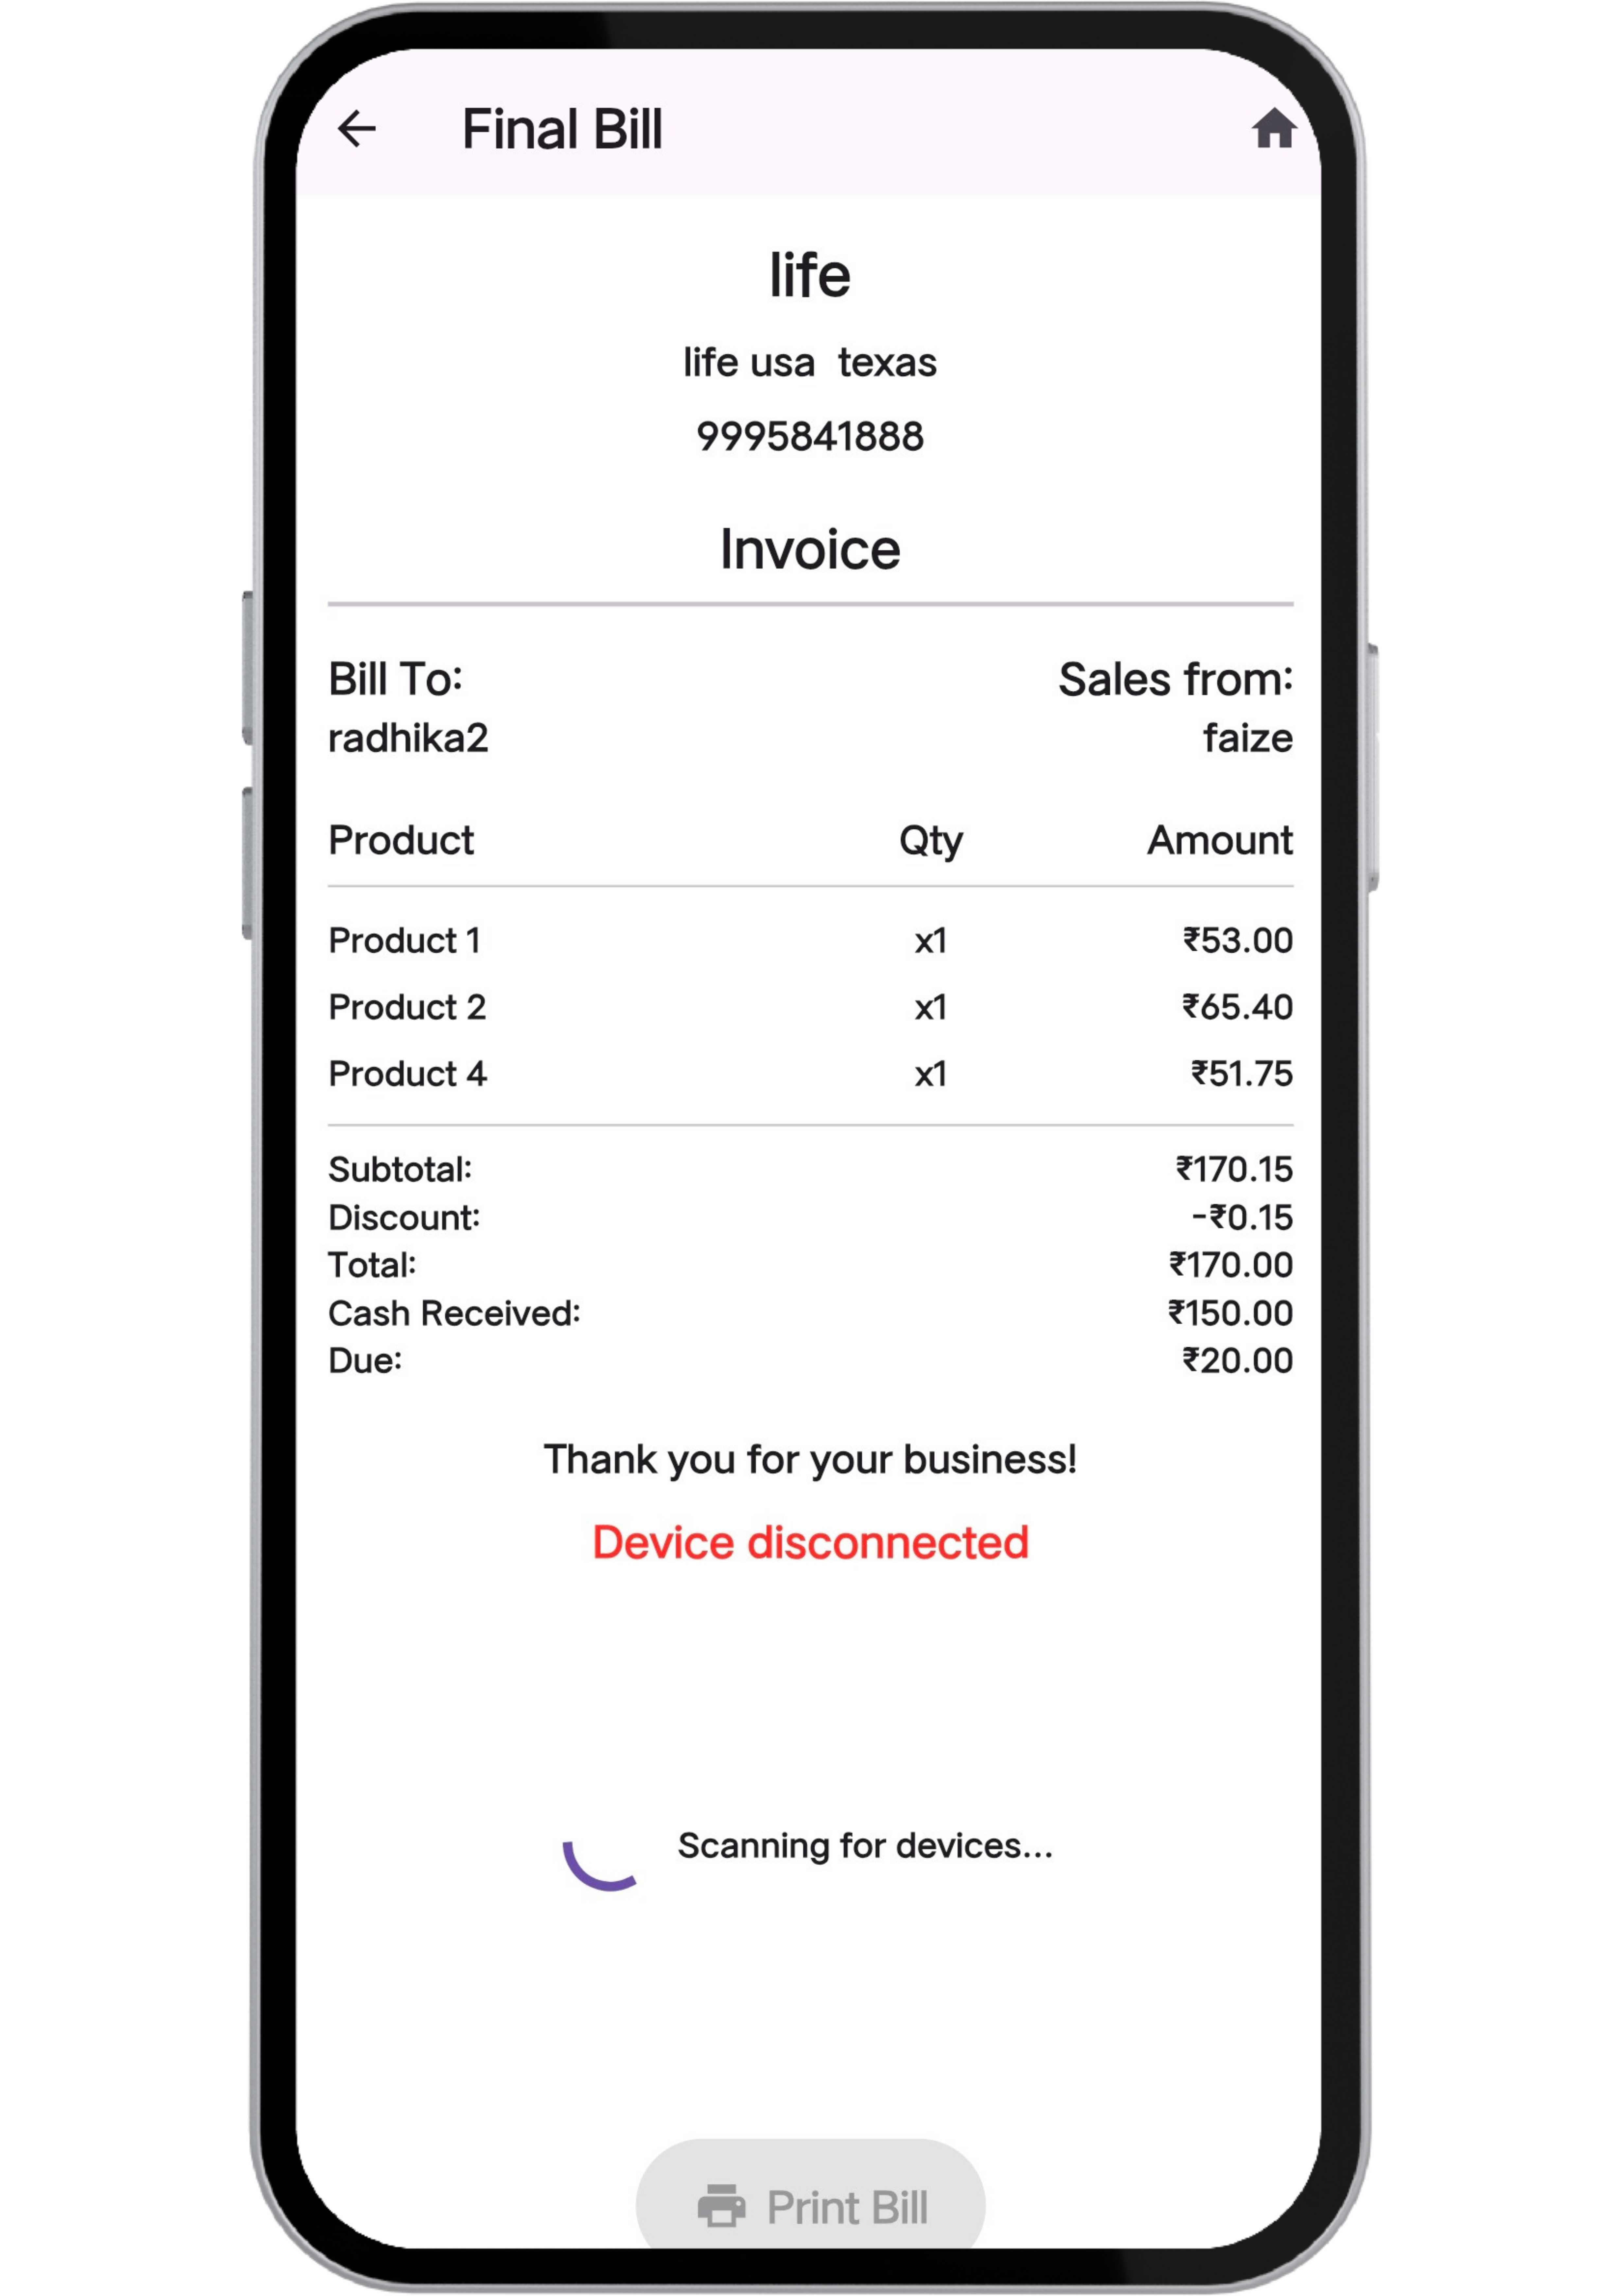
- Printing the Bill:
- Ensure your Bluetooth printer is turned on, connected, and loaded with paper.
- Tap the printer icon or “Select Printer” and choose your printer.
- Tap Print Bill to print the final bill.
Video Tutorial Section
Watch these video tutorials to see the installation and usage of the system in action:
-
Installation Guide:
-
Mobile App Setup:
-
Using the Dashboard:
Troubleshooting & FAQ
🛠 Installation Issues
-
❌ Problem: I see a 500 Internal Server Error after uploading.
Cause: Incorrect file permissions or missing PHP extensions.
Solution:- Ensure folders are set to
755and files to644. - Enable all required PHP extensions (PDO, mbstring, json, etc.).
- Check your server error log for more details.
- Ensure folders are set to
-
❌ Problem: The installer doesn't show up when I visit
/install.
Cause: Files might not be uploaded to the correct directory.
Solution:- Make sure the contents of the Web Application folder are uploaded directly into
public_html.
- Make sure the contents of the Web Application folder are uploaded directly into
📧 SMTP & Email Issues
-
❌ Problem: Test email not sending from SMTP settings.
Cause: Incorrect port, credentials, or SMTP host.
Solution:- Use port
587for TLS or465for SSL. - Double-check SMTP username, password, and encryption type.
- Ensure your hosting provider allows outbound SMTP.
- Use port
📱 Mobile App Issues
-
❌ Problem: The mobile app can't connect to the server.
Cause: WrongbaseUrlor server blocking access.
Solution:- Open
lib/services/app_config.dartand confirm thebaseUrlis correct (e.g.https://yourdomain.com). - Make sure your domain has SSL and no redirects are breaking the request.
- Test the API URL in a mobile browser to confirm it loads.
- Open
-
❌ Problem: Flutter app won't build or shows plugin errors.
Cause: Missing dependencies or outdated Flutter version.
Solution:- Run
flutter pub getandflutter clean. - Make sure you're using Flutter 3.x or the version specified in the documentation.
- Run
🖨️ Printing Issues
-
❌ Problem: Bluetooth printer not connecting from the app.
Cause: Printer isn't paired or permissions not granted.
Solution:- Go to phone settings and pair the printer via Bluetooth.
- Ensure the app has Bluetooth and Location permissions.
- Restart both phone and printer, then try again.
-
❌ Problem: Bill prints but format looks broken.
Cause: Incompatible printer width or encoding.
Solution:- Use 58mm or 80mm Bluetooth thermal printers (recommended).
- Check printer settings for character encoding (UTF-8 preferred).
🤔 General Questions
-
Q: Can I use this on localhost?
A: Yes, but you need to make a few important changes:
- Move the index.php file and the entire build folder into the
/publicdirectory of your Laravel project. - Update any asset or API paths in
index.phpif needed, to reflect the correct relative URLs. - Ensure your local server (e.g., XAMPP, Laravel Valet) is pointing to the
publicfolder as the document root.
- Move the index.php file and the entire build folder into the
-
Q: Can I change the admin URL from
/admin/login?
A: Yes, but you need to modify route definitions in Laravel. -
Q: Do I need a Flutter license to build the app?
A: No. Flutter is open-source. You only need to install Flutter SDK and Android Studio or VS Code.
📞 Need More Help?
If you're facing issues that are not covered in this documentation, feel free to reach out to us for direct support.
- Email: betteronicsalphaprivateltd@gmail.com
- WhatsApp: +91 89433 40464
Please include a screenshot or video of the issue, along with a brief description.